First here is a picture of the finished quilt:
I drew out the center part on paper at actual size so I could get a feel for the layout (this was a good idea), and then debated how I was going to put my partner's name on the quilt. Since I had, at the time, just recently finished Carol Doak's paper piecing class and I had her book "300 Paper Pieced Blocks" that included the alphabet, it seemed natural to shrink the letters down to size and add them to the border (this was a good idea too). At this point, I thought the border would need to be all mini blocks otherwise the weight and drape of it would be off (another good idea) - better to have the whole border be bulky heavy mini's right? So I chose some other blocks from Carol's book, shrunk them, made a few of my own designs (the sewing machine, spool, and crown), and set to work making them. Enter lessons learned....
Lesson 1: Not all blocks should be mini's.
If when you print out the pattern, any part of it "disappears" or looks awkward, maybe this isn't the block to miniaturize!
 |
| the sky around the lighthouse was really difficult to fit in |
Also, if your block has to be broken down into multiple pieces first, then pieced together, maybe this isn't the block to miniaturize.
 |
| My self-designed crown has 4 separate pieces that are sewn together just to make the blue part of the block |
My Union Jack is not meant to look like it is "waving". This block had 9 pieces just for the flag. I figured out a few short-cuts to making the stripes, BUT it was still impossible to get them to line up in a 2 inch block. I even had to add a piece of fabric to the back of the flag to stabilize it to the rest of the block! The flag deserves more respect. I thought about throwing the block out completely, but I felt that my quilt really needed to have the British flag on it. I have since thought of a few alternative ways to try to make this block, but they all still involve multiple pieces - thus, I won't be miniaturizing it in the future!
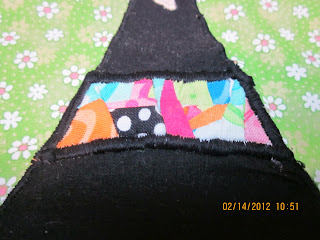
Lesson 2: Crazy quilting should not be miniaturized either. I wanted to add some kind of patchwork to the Queen's dress, and as I was going along, I had all these extra little bits that I started sewing together. I thought it looked cool, BUT when it came to adding it to the dress, it was so much more bulk than there should have been. I had to double satin stitch it and at a wider width to make sure it was secure and it really stood out from the flat fabric of the rest of the dress. If I had more time, I would have ripped it out and done something completely different.
Lesson 3: There are things too small for a novice quilter to machine applique perfectly:
Pivoting around all the little spaces in the fingers was hard. Yes, from a distance you can't really see the extra threads, but up close it is really noticeable.
Lesson 4: When using steam-a-seam or other bonding products with your applique, your needle is going to leave some serious holes which tend not to close up, even with steam, and might allow the batting to show through in some areas:
Again, perhaps not that noticeable from a distance. But, there was one area, the castle, that I was going to quilt little vines climbing up it. I got started, and didn't like the look so I ripped it all out. Because of the steam-a-seam, you could see some of the holes from where the stitching was, even after washing. Again, from a distance, it looked fine; but close up.... Hopefully, my partner wasn't the type to get out a magnifying glass and scrutinize every little thing!
Lesson 5: Test your marking tools before putting them on your quilt. I used a black Sewline pencil to outline my cloud shapes so I wouldn't quilt over them. I have used the white Sewline pencils in the past, and have really liked the way they glide on and wash off. I assumed the black would be the same. Application was just as easy, but even after washing, I could still see some of the black lines from the pencil around the clouds.
Perhaps if I had marked my sew lines with the pencil and actually sewn over them, I would see them and wouldn't care. But because I had marked the areas I didn't want to sew over, I was a bit disappointed that the lines were still showing.
Until next time...


No comments:
Post a Comment
I had to shut off comments for a long time because I was just getting spammed. I'm going to try moderation for a while and see if that helps. Please leave me a comment.