Thursday, April 30, 2015

Pasta Sauce - a totally Random Thing Thursday

I am on the brink of losing my mind making minis and swap items this week.  To make a long story short, I am in the middle of making my 3rd mini for the Spring Fling Swap and my giveaway minis, and I just finished up my craft item for the Outlander swap (sharing tomorrow!!).  I am nearly completely burnt out.

So today, I have stepped away from my sewing machine, and I'm making roasted vegetable pasta sauce.

Pasta Sauce in progress

This isn't a food blog, which makes this a totally random post, but I thought I would share while my sauce is simmering away.

This recipe isn't even a recipe.  It is more like a process, and it is extremely flexible!  Time is the main ingredient.  I usually make this on a Sunday, or any day I have to wait around for 6 hours for the cable guy to show up.  Here's how I do it.

Ingredients:

  • Assorted vegetables for roasting - have at least 50% be "red"
  • Olive oil
  • Salt & Pepper
  • Minced garlic - 2 TBSP up to 1/4 cup based on taste
  • 2 or 3 cans of Organic diced tomatoes
  • Assorted dried herbs - oregano, parsley, chopped rosemary, basil....
  • can of chopped beets (optional)


Roasting vegetables:

I go to the store and pick out whatever vegetables look good, and especially the ones my kids won't eat in normal form: eggplant, zucchini, yellow squash, celery, carrots, broccoli, and cauliflower are all good choices.  Then into my basket go a few pounds of roma tomatoes, red peppers (sometimes yellow and orange ones too), and at least 2 pints of those tiny grape tomatoes or cherry tomatoes (these are key as they really pack a lot of tomato flavor in a small package) add more if you really like tomato flavor.  You want your mix of veggies to be about half "red". Absolutely hate eggplant?  Leave it out.  This recipe is flexible!  Put whatever you want into it.  Add jalapenos, leave out the broccoli.  Any veggie that you have heard of roasting is fine.  Lettuce and cabbage, not so much, but hey, give it a try if you want.  It's your sauce!  When I get home, I add in whatever veggies are in the crisper drawer that I know I will likely get to use before they go bad (this is usually a jumbo sized bag of baby carrots and some more broccoli).

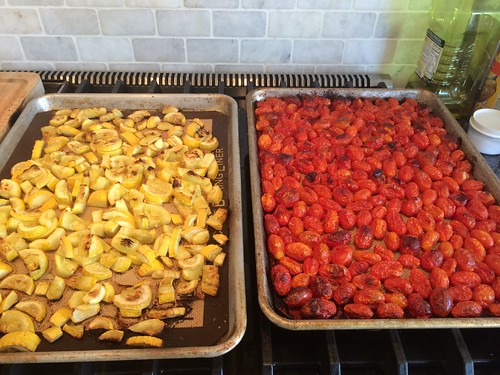
When I get home, I start chopping the veggies up into about 1 inch pieces, batching them according to kind (this just helps things stay approximately the same size), then I spread the chopped veggies on a sheet pan lined with aluminum foil and coated with cooking spray, I drizzle some olive oil on them and sprinkle them with a good amount of kosher salt and some pepper.  I roast them in a 350 degree oven for about 50 minutes, give or take, until the edges of the veggies are brown, but not completely burnt.  The time varies for each type of vegetable. I find the roma tomatoes actually take a little longer because they have so much water in them.  The red peppers take less time.  As they come out of the oven, I put them in a bowl to cool, then I load up the sheet pan with a different type of veggie and start roasting them.  I usually have 2 sheet pans in the oven at the same time, each with its own one type of veggie.

Untitled


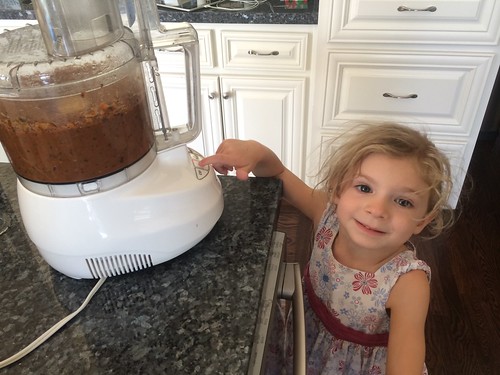
When the veggies are cool, I put them in the food processor and puree them (depending on the veggie, you might need to add a little water), then I stick them in a stock pot on the stove.  This frees up the bowl for the next set of veggies coming out of the oven.  I continue the process of putting more veggies in the oven, pureeing the ones that came out, and adding to the stock pot.   I don't wash my sheet pan, my bowl, or my processor until the very end.

It helps to have a friend "push the button" for you.

Untitled


The Sauce:

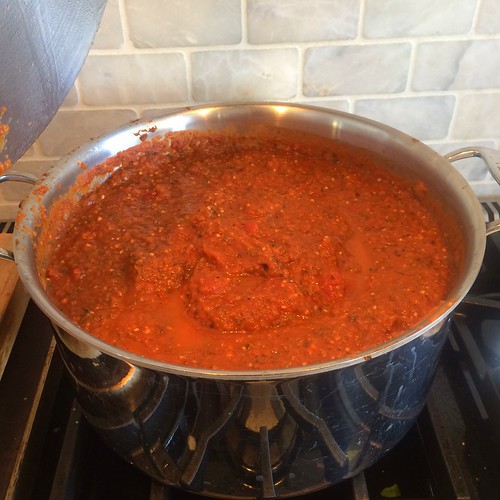
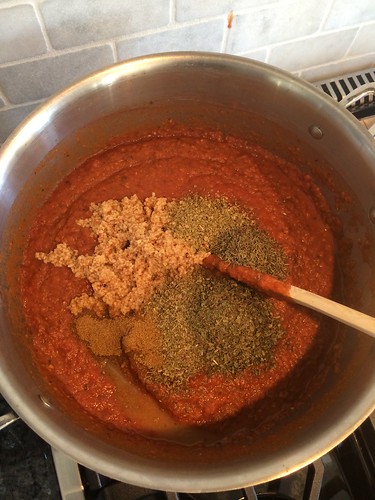
Once I have a batch or two of pureed veggies, I set the heat on the stock pot on low.  I add a lot of minced garlic.  My family likes garlic and we buy it already minced, so I am not joking when I say I add about 1/4 cup.  Mind you, this is also a really big pot of sauce.  I also add the canned organic diced tomatoes with the juice.  With all that pureed texture in there, it is nice to have a few bits of tomato in your sauce.  Here is where I also go through my spice cabinet and pick out any herbs that sound/smell Italian.  Dried oregano is a must, but I will also add any dried parsley, chopped rosemary, basil, marjoram, etc.  As you know, spices and herbs loose their potency the longer they are in your cabinet, so don't be shy about throwing them into the sauce.  I add as much as 4 tbsp of oregano, and about 2 tbsp of the others.  Stir it in!  I also add in about 2 tbsp more kosher salt and another tsp of pepper.  If you are on a low salt diet, you can skip this extra salting, after all we did salt our veggies when we roasted them, but if my sauce is tasting a little bland at this point, salt will help.

Untitled

**see note about water below

Take a look at your sauce, does it look a little brown?  I don't know about you, but I don't really enjoy eating a lot of brown food no matter how good it tastes.  In art class we learn that when we mix paints from the warm color family with paints from the cool color family, we essentially make "mud".  This is true with veggies too.  Your eggplant, zucchini and broccoli are probably to blame, but I am too lazy to peel my veggies and the skin has a bunch of nutrients that I want my kids and husband to eat.  So I found that adding a pureed can of beets with the juice from the can, into the sauce perks that color right up to a nice reddish orange. Totally edible.  When I have time, I even roast my own beets for this process, but I don't always find quality beets at the market, and the canned ones have a bunch of extra juice that is a lovely red.  Don't worry, the beets don't add too much sweetness.

Put the lid on!  This sauce bubbles, ask me how I know.

I let the sauce simmer on the stove on the low heat setting, anywhere from 30 minutes to 2 hours, with occasional stirring.  Everything is essentially cooked, so if you are running short on time at this point, 30 minutes is plenty of time for the flavors to get to know each other.  If you have more time, let it keep simmering.  It is only going to get better.

Now what?:

I usually reserve enough for tonight's meal and freeze the rest in quart sized freezer bags that I lay flat in the freezer (makes for easier defrosting if they are flattened and they take up less space in the freezer this way).   Let your sauce cool a bit on the stove before putting into the freezer bags. When I need some healthy sauce, I just take out a bag and let it defrost in a sink of water for a bit.

While I call this "pasta sauce" because that is what we primarily use it for, it can go into other recipes.  I often sneak it into our taco meat.  That way my kids and husband are getting a little bit of veggies when they only put meat and cheese into their tortillas.  It is also great to add to soups or chilis for a bit of a flavor boost.  It can be used in really any recipe that calls for some kind of tomato sauce - chicken parmesan, great in lasagna, pizza, etc.  I also add it to my pot roasts.  I'm sure you will find a hundred places to put it.


**A note about water.  This sauce comes out pretty thick because of all those pureed veggies.  Because I freeze most of it when I make it, I don't add too much water to the stock pot.  Instead, I add water when I am using the sauce in a recipe.  That way I can get it to the consistency I want for the recipe I am making.  For example, we like our spaghetti sauce to be pretty wet, but in lasagna, I want it more thick so the layers hold together better.


Well, it is about time for me to start bagging up my sauce.  I hope you enjoyed this totally random thing this Thursday.

Thanks for reading,

Jen


Tuesday, April 28, 2015

Autumn Chain - Building Blocks Tuesday

Autumn Chain block for Jennifer in Bee Hive Joy


I've been feverishly trying to finish up mini's for swaps this week.  Somehow, I have managed to make 3 quilts for the Spring Fling Mini Swap, and I hate to admit that I will be happy when that swap is over.  My group has been wonderful, but I'm ready to move on to something else.  So.... I haven't really completed many blocks; however, I did make this one for Jennifer in the Bee Hive Bee.  The pattern is called Autumn Chain, and you can find the free instructions HERE at Sew Mama Sew.

What blocks have you working on this week?  I would love to see.  Link up your fabulous blocks.  You put a lot of hard work into them - show them off!  This free linky will stay open until the first Monday of next month, but I will repost it every Tuesday until a new month starts.


Quilter in the Closet

Rules:

1) Please link up only to the page in your blog showing your wonderful blocks, not just the blog homepage.  Flickr and Instagram pictures are also OK.
2) Make sure to put your blog name as the description so people know where they are going or the name of your block!
3) Please grab my button and post it in your blog post or sidebar.
4) Visit other linky participants!


Thanks for reading,

Jen


Sunday, April 26, 2015

Inspirational Sunday (7) - via Road to California 2015

Welcome back to Inspirational Sunday.  Today's quilts will have you doing a double-take.  I was so struck by how much these looked exactly like a high resolution photograph (no doubt one was used to assist the making of these quilts).

First up is, "Dazzling Dahlia" by Andrea Brokenshire of Round Rock, TX.


"Dazzling Dahlia" by Andrea Brokenshire of Round Rock, TX


Andrea says, "I am constantly taking photographs of the beautiful flora I encounter on my travels.  On a trip to Oregon, I took a number of photographs of the many beautiful Dahlias that grown in the Willamette Valley.  I was amazed at the variety of shape and size of these magnificent flowers.  This is one of them."

Here is another lovely quilt.  This one is called, "Larger Than Life" by Carol A Kolf of Sheridan, WY

"Larger Than Life" by Carol A Kolf of Sheridan, WY

Carol states, "A class with Jennifer Day inspired the technique I used for this moth.  I had taken the photo several years ago and always thought it would be a great design for a quilt.  More than 80 different thread colors were used to create "Larger Than Life".  I used the grain in my sewing room floor as a model for the grain design in the frame."


Here is another.  This one is called, "Aggregating Anemones" by Carla Stehr of Normandy Park, WA.

"Aggregating Anemones" by Carla Stehr of Normandy Park, WA


Carla says, "This piece was inspired by a photograph I took of Aggegating Anemones in a tide pool near Port Angeles, Washington.  I used painted silk organza to represent the green and pink transparent tentacles."

I wish I knew how she used that organza, the effect is amazing!

I have a few more remarkably realistic quilts to share next week, but then we will move on to another genre.


Thanks for reading today,


Jen

Saturday, April 25, 2015

QuiltCon recap

It's been a couple of months since I returned from Austin, and I am glad that I took a little time to decompress before telling you all about my trip.  My brain definitely needed a little time to get back to its normal rate of speed.  I also wanted to wait until I got my quilt back so I could factor that into the experience.


Sunset Boulevard at QuiltCon 2015

Firstly, QuiltCon was AWESOME!  The people were great, the classes were good, and the show was lovely.  But I'm sure you already guessed that.  Here's what I really got out of the experience.

Camaraderie:

This one may be obvious.  I mean we were all there for the same reason, but it was delightful to feel like one of a group.  I kept hearing, "these are my people", and "these people get me", and I was feeling the same way.  Whether it was the stranger you sat down next to in a class, or someone you swapped a pin with in the hallway, or the roommate you stayed up with until 1 am every night talking about quilting; everyone was there because they love to quilt and they were just as excited as I was to be there.

I generally sew alone.  On occasion, my daughters join me, or I stay late at a guild meeting to sew, but most of the time I am down in my dungeon studio with the cat, working on my projects.  So, to be immersed into a large group where anywhere you went you would run into someone willing to talk quilting, was bliss.

Inspiration:

QuiltCon is kind of like inspiration overload.  Everywhere you turn you are met with something or someone that gets you really thinking.

Unlike some other shows, when I walked around QuiltCon, there were more moments of "I could do something like that".  Perhaps it is because simple shapes and patterns are part of the modern quilting movement, or maybe it is because making quilts for USE is also a big part of modern quilting.  Either way, as I walked around and viewed the quilts hanging in the show, there was at least one feature in each of them that I was inspired to try.

My classes challenged me to try something new or to do a skill better than I've been doing.  That process is always inspirational, even when the new skill isn't going so well.

Perhaps the most inspirational thing was getting the comments back on my quilt, and the fact that they weren't negative!  I was pretty much expecting a bunch of negative comments, especially hearing about some from the previous QuiltCon.  Plus, I know that my quilt had issues, I can point them all out to whoever wants to know.  Now I don't know if the QuiltCon judges were making an effort this year to be more positive or what, but I was inspired by the comments I received: "Great pixelation of background", "Quilting is technically good", "Piecing is precise and even".  This was just the encouragement I needed to keep trying.

I know many of us put down our own work.  We know where all the flaws and mistakes are, and we can't help but compare ourselves to others.  I have tried really hard to just get over it.  Yes, my work is flawed, but I am on a journey here.  Perfection is not my goal.  My goal is to improve with each quilt I make, but I know I rush sometimes and so of course, mistakes are inevitable.  That is part of the journey as much as anything else, learning from errors.

Getting feedback from someone looking at my quilt in person instead of through a computer screen was extremely helpful.  I hope to enter a quilt in next year's show.  I hope you will consider it too!

Next year's QuiltCon is practically in my backyard, Pasadena!  OK, so in LA traffic that is really an hour away (only 25 miles, mind you).  If you are planning on attending, I hope you drop me a line so we can meet up for coffee or something.


Thanks for reading today,


Jen


Friday, April 24, 2015

Aprons on the line - a finish Friday

It's a finish Friday!

As promised, here is the mini I made for my new partner in the Spring Fling Mini Swap on Instagram.

Spring Fling Mini Swap item

My partner was a big fan of Lori Holt at Bee in my Bonnet, and I happened to have some of her fabric on hand.  Finding a pattern that would go with the vintage feel wasn't too hard either.  I had one of Eleanor Burns' books, Quilts from El's Kitchen (Quilt in a Day) (affiliate link).  It has some really cute blocks and projects in it.


teeny tiny hexy flowers

In case you are wondering, YES, those are tiny hexies!

Untitled


My partner received her quilt yesterday and really seems to like it.  That makes me happy!


Thanks for reading today,


Jen


Linking up with:


**This post contains affiliate links.  If you purchase something after clicking on one of my links, I may be compensated.

Tuesday, April 21, 2015

Star totes - Building Blocks Tuesday

I finally settled on 2 blocks options for my upcoming paper piecing class next month.

The first I am calling the 8 Carat Star.

8 Carat Star block

I love the way that Alison Glass purple looks with the other prints.  I may have to order more of it.

I am sure this block is very similar to many PP stars out there.  Frankly, I think it would be impossible to not come up with this design if you are starting from a basic four patch in EQ7 and trying to create radiating triangles without needing more than 8 templates.

The second, I am calling the Velvet Star.

Velvet Star Block

This one looks really great in a quilt layout too.  I may put that one together for a pattern over the summer (IF I can figure out how to make EQ's templates play more nicely with the printer; I've been having a lot of trouble with this).

For my class, I am having participants choose one block or the other, and we will be making this cute little tote with a couple of adjustments.

8 Carat Star block

I made this tote strictly as a prototype, but then it started looking really nice.  So, my 2nd daughter claimed it as "hers".  Those handles are just the right size for her, but not so much for a grown woman.  They need to be longer and that is definitely one of the adjustments for the final pattern for the class.

I will be making another sample for the class soon, but I need to finish up a few minis for swaps, etc. first.

What blocks have you working on this week?  I would love to see.  Link up your fabulous blocks.  You put a lot of hard work into them - show them off!  This free linky will stay open until the first Monday of next month, but I will repost it every Tuesday until a new month starts.


Quilter in the Closet

Rules:

1) Please link up only to the page in your blog showing your wonderful blocks, not just the blog homepage.  Flickr pictures are also OK.
2) Make sure to put your blog name as the description so people know where they are going or the name of your block!
3) Please grab my button and post it in your blog post or sidebar.
4) Visit other linky participants!


Thanks for reading,

Jen


Sunday, April 19, 2015

Inspirational Sunday (6) - via Road to California 2015

Today, and probably next Sunday, I thought I would share a few of the quilts from the Art Pictoral category at Road to California.  I think you will agree they are stunning.

First up is the winner of the category, a quilt called "Beneath My Wing" by David M. Taylor of Steamboat Springs, CO.

"Beneath My Wing" by David M. Taylor of Steamboat Springs, CO

David says, "From the moment I saw Inge's stark, dramatic photo of a mother swan protecting her cygnet beneath her wing, I knew I had to recreate the moment with Applique and quilting, and lots of "white" fabrics."

The details on the feathers are just amazing!


Second place went to this lovely quilt, called "The Landing" by Joanne Baeth of Bonanza, OR.


"The Landing" by Joanne Baeth of Bonanza, OR


She says, "The challenge was to create Canadian geese in different positions of flight as they came in for a landing.  Over 1500 pieces were cut out, shaded, fused, and stitched-one feather at a time."

I think she did a marvelous job of capturing the geese in flight, even down to the awkward way they stick out their feet to slow themselves down.


Third place went to this stunning quilt, called "Fancy Shawl Dancer" by Linda C. Anderson of La Mesa, CA

"Fancy Shawl Dancer" by Linda C. Anderson of La Mesa, CA

She says, "Having seen local Indians dance with this eye-stopping dress and mesmerizing movement reflecting a butterfly, I knew I had to capture that feeling and motion.  The dark sky makes me think of dream catchers in the southwest, as well as starry, starry night by Van Gogh.  I used 100% cotton and hand painted all the fabric used.  I machine stitched the raw edged applique."

Here is a close up.


close up of "Fancy Shawl Dancer" by Linda C. Anderson of La Mesa, CA

I do like those circular motifs in the background, and I think she did an excellent job on the shadow (silly, I know).

Next week, I will share a few quilts that will make you do a double-take wondering if they are actually photographs!


Thanks for reading today,


Jen

Friday, April 17, 2015

Saved from the Mini Quilt Black Market - a finish Friday

Is there a Mini Quilt Black Market?  I've come to the conclusion that there MUST be.

When I first started doing swaps through the interwebs, I heard about people who flaked and disappointed partners who didn't receive anything in exchange for the hard work they put into their item.  Now, I must tell you that I am not normally even close to an optomist, but I truly felt that these indiscretions where the result of something tragic happening in life of the offender.  I certainly think occasionally that is the case, but sadly, and more frequently, it is the result of people who just don't care.

I've read enough post by people who really rant about this subject, but I don't want to go there today.  I just want to report that is mini.........


Butterfly Mini Quilt
Spring Fling mini using Butterfly paper piecing pattern by Tartan Kiwi

the one I made for my partner in the Spring Fling swap has been

SAVED!!!! 
FROM THE MINI QUILT BLACK MARKET

My partner didn't even bother keeping her Instagram account open long enough to make it to the first check in, and our swap leader stepped up!  After several attempts to contact the offender, I've been reassigned a new partner.

This isn't the first time that this type of intervention has happened.  Swap leaders are more aware of offenders than ever before.  Not that long ago, the only recourse was to have an angel step in and make a quilt for those who didn't receive a swap item.  Now there is a network of swap leaders that communicate with each other, and even a BLACKLIST!  Plus, with more requirements for mid-swap check-ins, and mandatory progress pictures, it is harder to be an offender and get away with it.  During the Rainbow Mini Swap that just finished, several participants were told to hold onto their minis until their partners showed some kind of proof that they made something.  I really appreciate these new safeguards.  It is not that the loss of a mini that I pour my heart and soul into, is that big of a deal.  It is more that I know that the loss will be felt more by whoever the offender's partner is, and that makes me sad.

If you have never participated in a swap online and are now swearing it off, please don't!  That "optimist" in me truly believes that things are going in the right direction.  All the check-ins and progress pics are not tedious, they are fun.  And while being told to hold onto my mini did remind me of the potential for things to go wrong, of the hundreds of people who participated in this swap, only a handful have been questioned as "offenders".

I am happy to be working on a new mini for my new partner.  She deserves something made especially for her.  I can't wait to share it.  It is definitely a little different from things I've made in the past!

Thanks for reading today,


Jen


Linking up with:


Tuesday, April 14, 2015

Huts on the Beach - Building Blocks Tuesday


Itty Bitty Houses

Last week, I made these tiny 4 inch houses for the Teeny Tiny Block Swap.  They kind of remind me of huts on the beach.

Please make sure you stop back on Friday.  I have a pretty mini to share with you, and a bit of useful information too!


What blocks have you working on this week?  I would love to see.  Link up your fabulous blocks.  You put a lot of hard work into them - show them off!  This free linky will stay open until the first Monday of next month, but I will repost it every Tuesday until a new month starts.


Quilter in the Closet

Rules:

1) Please link up only to the page in your blog showing your wonderful blocks, not just the blog homepage.  Flickr pictures are also OK.
2) Make sure to put your blog name as the description so people know where they are going or the name of your block!
3) Please grab my button and post it in your blog post or sidebar.
4) Visit other linky participants!


Thanks for reading,

Jen


Sunday, April 12, 2015

Inspirational Sunday (5) - via Road to California 2015

Hi everyone!  I've been busy designing and testing paper pieced block patterns for an upcoming class I am teaching to my guild, and I guess it has me in a bit of a paper piecing appreciation mood.  So...here are some lovely paper pieced wonders from the 2015 Road to California show.

This first one is just amazing!  It is called "Outta the Loop" by Karen Machetti and Eyvonne Smith of Port St. Lucie, FL.

"Outta the Loop" by Karen Machetti and Eyvonne Smith of Port St. Lucie, FL

It's a shame that the table was in the way!  The bottom of the quilt is equally amazing.

Here's a closer look.

close up of "Outta the Loop" by Karen Machetti and Eyvonne Smith of Port St. Lucie, FL


Check out that wonderful quilting too.

Here is gorgeous star quilt called "Going Green" by Patricia C. Robertson of Reedley, CA.  I love the addition of the appliqued leaves.

Going Green by Patricia C. Robertson of Reedley, CA

The stars themselves are Carol Doak's patterns, but Patricia designed the rest.  So lovely.

And then there is this tiny wonder!  Sea Breeze by Pat Kuhns of Lincoln, NE.

Sea Breeze by Pat Kuhns of Lincoln, NE

Yep! That is some tiny piecing, and as you can see it won 1st place in the miniature category.  The Mariner's Stars and the sashings are both foundation pieced, and then the Mariner's Stars are appliqued onto the background.  I like tiny, but this is really tiny!

And now for something a little less intricate, but equally as lovely.  Floating Jewels by Tanya Heldman of Los Angeles, CA.

Floating Jewels by Tanya Heldman of Los Angeles, CA

I just love the quilting and modern look of this quilt.

What about you?  What kind of paper piecing do you like best?


Thanks for reading today,


Jen

Tuesday, April 7, 2015

Arrowhead Star - Building Blocks Tuesday

I was playing around in EQ7 last week and came up with this paper piecing block.  I figured it needed a test drive, and so...

Arrowhead Star
Arrowhead Star pattern by Quilter In The Closet

I'm not at all sure what I am going to do with this one.  Perhaps I need a very patriotic pillow??  If anyone wants to give it a go, just let me know.

What blocks have you working on this week?  I would love to see.  Link up your fabulous blocks.  You put a lot of hard work into them - show them off!  This free linky will stay open until the first Monday of next month, but I will repost it every Tuesday until a new month starts.


Quilter in the Closet

Rules:

1) Please link up only to the page in your blog showing your wonderful blocks, not just the blog homepage.  Flickr pictures are also OK.
2) Make sure to put your blog name as the description so people know where they are going or the name of your block!
3) Please grab my button and post it in your blog post or sidebar.
4) Visit other linky participants!


Thanks for reading,

Jen


Sunday, April 5, 2015

Inspirational Sunday (4) - via Road to California 2015

Another special exhibit that is usually seen at Road to California is the Hoffman Challenge.

Hoffman Fabrics is located here in Southern California and they have some lovely fabrics.  Each year, they choose one fabric and challenge the community to create with it.  There are several categories for quilts of various construction methods, but there is also a "doll" category and clothing and accessories categories - just in case quilts aren't your thing.  If chosen as part of the travelling exhibit, your item will see the halls of many a quilt show during the year!

What I like about this challenge is that while you have to use a recognizable portion of the fabric, you can mix in other fabrics from other manufacturers.  This really allows you to create what the fabric inspires as your masterpiece as you envision it.  Several of the challenges I've been a participant of in the past have limited which coordinating fabrics you are allowed to use.  This does make it challenging, but sometimes you just have an idea that needs to be realized and requires another fabric.

This is the fabric for the 2014 Hoffman challenge.

2014 Hoffman California Fabric Challenge

Here are some of the quilts from the 2014 challenge.

This one is called" Circles in the Mist" by Sonia Reed, and is of her own design.

"Circles in the Mist" by Sonia Reed


And for those of you that still haven't finished your One Block Wonder quilt from the Quilt Along a couple of years ago, perhaps this will inspire you to get it out again and finish it up!

It is called "Here Come the Blooms" by Penelope Harris.


"Here Come the Blooms" by Penelope Harris


Perhaps one of my favorites of the challenge is this one called "Segovia" by Deana Steel.  She let her love for Spanish guitar music to inspire this lovely quilt.


"Segovia" by Deana Steel


In case you are interested in trying your hand at the 2015 Challenge, the challenge fabric is:

2015 Hoffman California Challenge Fabric
I'm not sure why, but this one reminds me of flying carpets and the movie, Aladdin.

All the details of the challenge are listed here at the Hoffman Challenge website.  Entries are due in July!

I've heard it said several times that the Hoffman Challenge is a great place to get your feet wet in the quilt show circuit.  I was considering entering last year and planned on making a coral reef scene, but alas, that summer deadline is a tough one for me.  By the time I found the fabric, I just didn't have time to make the actual quilt.  Perhaps one day....If you are worried about sourcing the fabric, Equilter.com seems to usually carry the challenge fabric.  I have ordered from them in the past with good results and they have the 2015 challenge fabric.  So go for it!

Who is going to enter?


Thanks for reading today and Happy Easter if you celebrate!


Jen