I was at the shop this morning 15 minutes before it opened, glaring at the salesperson. At opening, she noticed me and told me the machines were not in yet. "They are usually delivered sometime between now and one o'clock." I thought to myself, do I need to spell out D-E-S-P-E-R-A-T-E? So I called at 1:20. "No, they haven't come in yet. They are a little behind today. We will call you!" At three o'clock, they called to tell me Ms. Kitty did not come in. Evidently, there was a part that was ordered and didn't come in on time. "Perhaps next week". Are you kidding me?
Remember that post where I explained that I opted for the shop closer to me rather than driving an hour each way to the place it was serviced originally. Well, I am definitely re-thinking that now!
I guess I will buy some more fabric to ease my pain.
Jen

Quilter in the Closet: My artistic journey as I learn, try, and am inspired by multiple techniques, including quilting, painting, drawing, and who knows what else!
This blog may contain affiliate links to products. As an affiliate, I earn a small amount from qualifying purchases; however, it does not affect the cost of the item to you, nor am I compensated if you do not purchase.
Thursday, May 31, 2012
Wednesday, May 30, 2012
Making lemons from lemonade - WIP Wednesday
Today was my first opportunity to sew since last week. I figured it was high time I did something about my Bee Happy quilt, especially since it was supposed to be completed last Sunday. Ironically, this was the only project this year that I started early, with the intention of being the first in the group to complete! That obviously did not happen! With deadlines, whooshing past me, I decided I better put my frustration aside and get it quilted with Big Brother. Unfortunately, he had other plans.....
 |
| "P" is for Pissed Off! |
 |
| Yes, I had to take a picture of this. It is actually about half the thread that I had in the trash. |
 |
| Add caption |
To add to the frustration, I KNOW I am not doing my best work. My stitch sizes are very inconsistent (versus my usual average amount), in part because I feel like I have to hurry over the appliques to get back to the background, and in part because of all the stops and starts I have to do every time he protests. Let's not even discuss all the ripping out of stitches and the small holes it leaves in the appliques.
I feel very badly because sick people deserve nice quilts too. I know they don't expect perfection, but this quilt is so far from that, I'm sure it will end up in the trash instead of a hospital. I hate giving up, but I think if I had an extra week, I would be tempted to start all over again with another design. I have until Saturday to get it done and in the mail. Ms. Kitty is supposed to be ready Thursday afternoon. Doesn't give me a whole lot of time!
Back to trying to make lemons from lemonade.....
Completed Projects:
- Are you kidding me?
- Hands2Help Bee Happy Quilt - quilting in progress
- Red, White, Blue New York Beauty - piecing in progress
- Urban Nine Patch - just blocks for my 3 x 6 Bee, they are cut and ready to be put together
- Urban Nine Patch Tablerunner
- New York Beauty Quilt A Long - actually different from the one above.
- Batik Stripe Quilt - still sandwiched and ready to be quilted!
- Thank you quilt for Ashley's teacher - due second week of June! Plenty of time, right?
- Lincoln quilt - need to put the borders on this baby and finish it up.
- Blue & White Stack-n-Whack for May UFO challenge
This week's stats:
Completed projects - 0
New projects - 0
Currently in Progress - 4
Linking up with Freshly Pieced WIP Wednesday's

Memorial Day Weekend

Hope you all had a great Memorial Day weekend! I know I did!
I celebrated a special someone's 4th Birthday.

Second daughter, Lizzy, enjoyed the day by the pool, eating lots of cake! Ah, to be that young again!
How did you celebrate?
Jen
Friday, May 25, 2012
Free Motion Finish Friday
Finally a finish! Here is my piece for May's Free Motion Challenge at Sew Cal Gal's blog.
I dare say my practice pieces turned out a little better, but I am still happy with how this one turned out. I actually had, not one but two, sneezes sneak up on me while quilting this. Brother Bear doesn't have the same speed control as Ms. Kitty, so on the first sneeze, I actually pushed the pedal faster. The second I managed not to push my foot, but my hands wiggled a bit. I tried to travel stitch back to cover the two enormous stitches that resulted, but I'm not that great at traveling yet. Oh well, I'll just cover those parts with a plate, or a fork.
One of the things I really appreciated about these "foundational" designs, as Leah puts it, is that you get a chance to stitch down a meandering line first. That line was nice, because I knew my quilt was secure before I went in and did some of the detail work. On this small piece it probably didn't matter much (especially since I spray basted it), BUT on a bigger quilt I could really see how that might be nice, particularly if you pin.
Are you participating in the Free Motion Challenge? How is it going? I would love to hear!
Well, I am off to try to quilt up my Bee Happy quilt with Big Brother again. Ms. Kitty hasn't returned from the spa, and the deadline is Sunday! That completely sneaked up on me! Reminds me that earlier this week I had a conversation with one of Ashley's teachers about how she doesn't like to do her homework. I was tired of the arguing and temper tantrums so when the day came that she was supposed to turn it in, I sent her to school with it not completed. I was hoping a disappointed look from the teacher would solve this problem. But somehow, she got it done in the hour she has at the afterschool program, which on this day was actually before school. Her teacher, ever positive, said that perhaps she will be a successful procrastinator. Hmmm, I wonder who she gets it from?
Jen
 |
| front |
I dare say my practice pieces turned out a little better, but I am still happy with how this one turned out. I actually had, not one but two, sneezes sneak up on me while quilting this. Brother Bear doesn't have the same speed control as Ms. Kitty, so on the first sneeze, I actually pushed the pedal faster. The second I managed not to push my foot, but my hands wiggled a bit. I tried to travel stitch back to cover the two enormous stitches that resulted, but I'm not that great at traveling yet. Oh well, I'll just cover those parts with a plate, or a fork.
 |
| back |
One of the things I really appreciated about these "foundational" designs, as Leah puts it, is that you get a chance to stitch down a meandering line first. That line was nice, because I knew my quilt was secure before I went in and did some of the detail work. On this small piece it probably didn't matter much (especially since I spray basted it), BUT on a bigger quilt I could really see how that might be nice, particularly if you pin.
Are you participating in the Free Motion Challenge? How is it going? I would love to hear!
Well, I am off to try to quilt up my Bee Happy quilt with Big Brother again. Ms. Kitty hasn't returned from the spa, and the deadline is Sunday! That completely sneaked up on me! Reminds me that earlier this week I had a conversation with one of Ashley's teachers about how she doesn't like to do her homework. I was tired of the arguing and temper tantrums so when the day came that she was supposed to turn it in, I sent her to school with it not completed. I was hoping a disappointed look from the teacher would solve this problem. But somehow, she got it done in the hour she has at the afterschool program, which on this day was actually before school. Her teacher, ever positive, said that perhaps she will be a successful procrastinator. Hmmm, I wonder who she gets it from?
Jen
Wednesday, May 23, 2012
Welcome to crazy - WIP Wednesday

Man-oh-man, this week has been one of the craziest! Not only did I manage to schedule myself to teach both the 3rd graders and the kindergartners art this week, but it is also Open House tomorrow night and there are additional duties for that. I have projects that I have saved for each student and I have to figure out a fun and creative way to display them in the cafeteria for the parents to see. Procrastination being a forte of mine, I only came up with my ideas last night! Now I have to figure out a way to get them put together. The matting of all the artwork seems to be the biggest piece of the puzzle. I may be up all night doing that.
Completed Projects:
- Free-Motion Challenge Placemat for May (Yes, you will here more about it on Friday)
- Hands2Help Bee Happy Quilt - quilting in progress
- Red, White, Blue New York Beauty - piecing in progress
- Urban Nine Patch - just blocks for my 3 x 6 Bee, they are cut and ready to be put together
- Urban Nine Patch Tablerunner
- New York Beauty Quilt A Long - actually different from the one above.
- Batik Stripe Quilt - still sandwiched and ready to be quilted!
- Thank you quilt for Ashley's teacher - due second week of June! Plenty of time, right?
- Lincoln quilt - need to put the borders on this baby and finish it up.
- Blue & White Stack-n-Whack for May UFO challenge - I have no desire. If I don't take it out by next Wednesday, I'm putting in the "Back Burner" category
This week's stats:
Completed projects - 1
New projects - 1
Currently in Progress - 5
Linking up with Freshly Pieced WIP Wednesday's
Tuesday, May 22, 2012
A learning curve - Trial and Error Tuesday

I finally got a chance to try out the Urban Nine Patch block from Jenny at Sew Kind of Wonderful. I plan to make these blocks for the 3 x 6 Bee that I joined, and I figured I better try out the pattern before I set to making these for OTHER people.
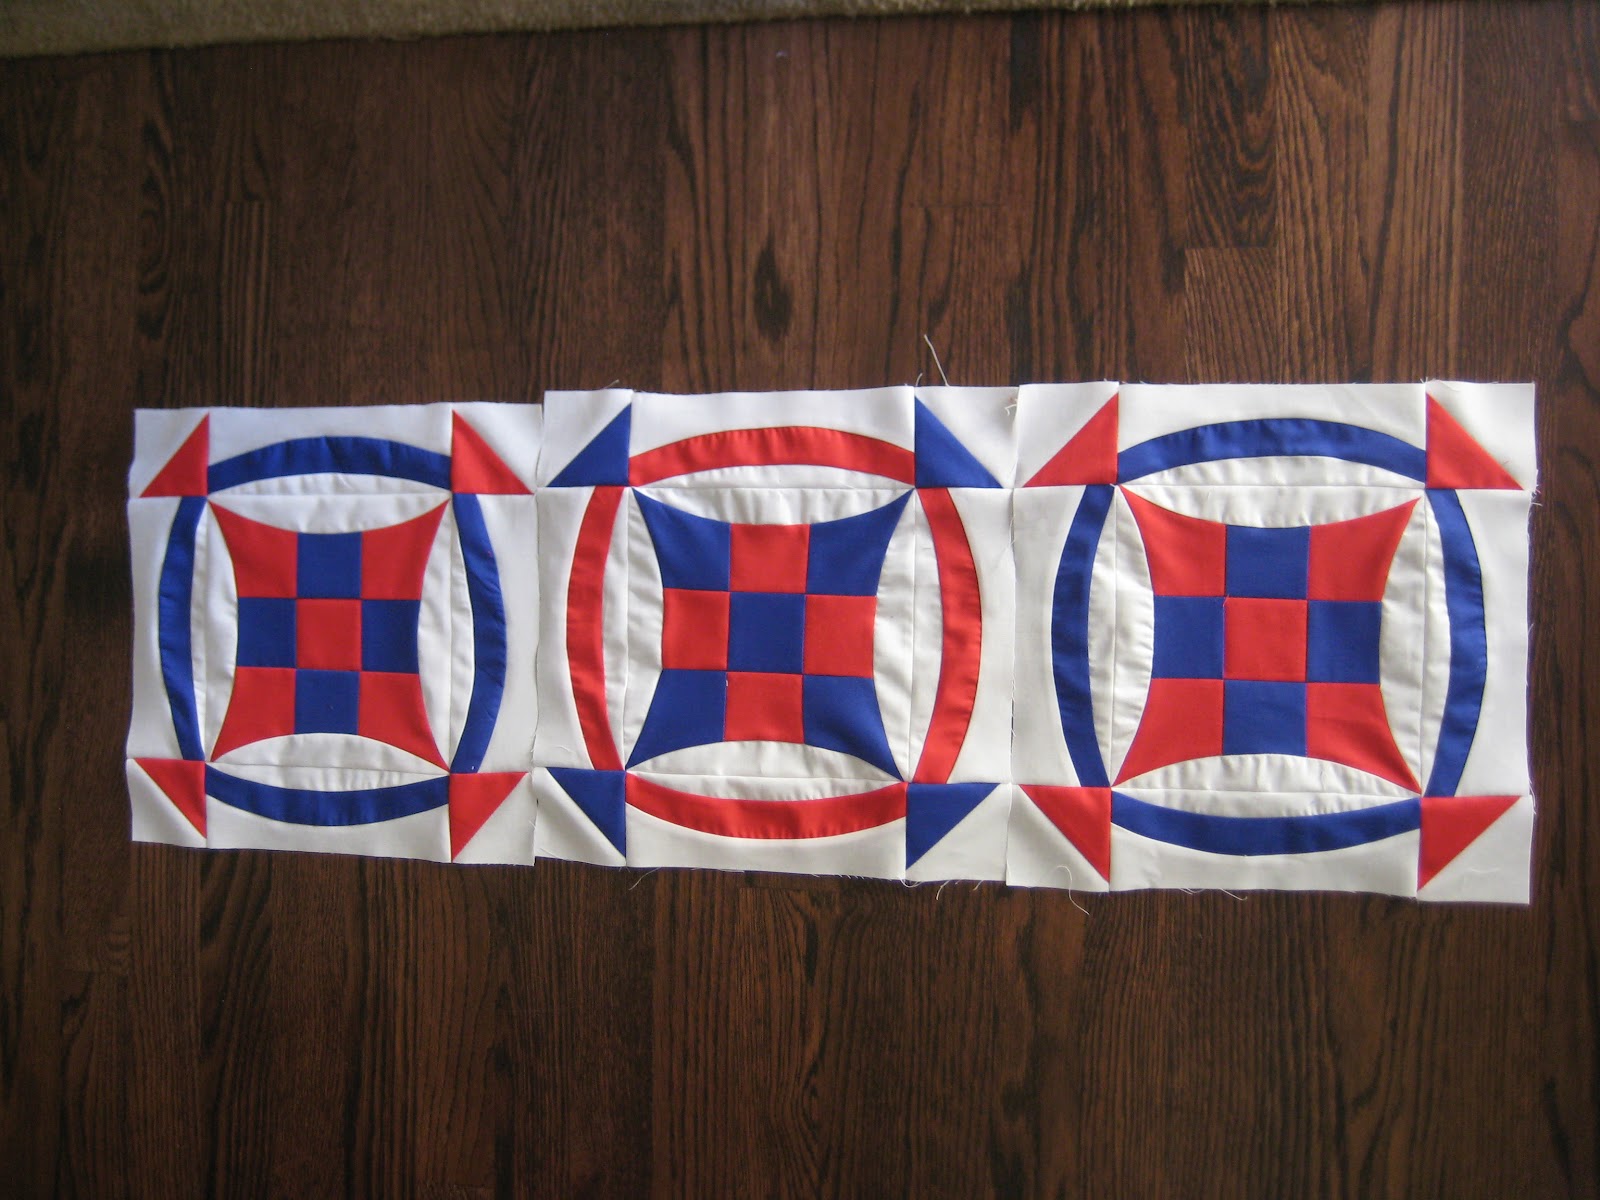
Of course, after I made these three blocks, took pictures of them, and started to write this post, I realized that I had actually sewn the edges of the blocks on BACKWARDS, DOH! The curves are supposed to bend outward, like the one on the right below!

I'm not sure if I am going to go through the process of picking all three of my blocks apart yet. I was going to make a little Memorial Day table runner out of them. Do I really need them to be right?? Yes, I AM THAT LAZY! I'll make sure the ones for my hive-mates are the right way.
OK, Jenny's curved ruler is cool. I was a little worried throughout the process because my components weren't beautiful, flat curves. Luckily, Jenny's method leaves some room for error and you square up several times during the making of the block. Still, I thought they should be more flat, so I emailed Esther over at Threads on the Floor. Her Urban Nine Patch is stunning! Sure enough, she gave me some great tips. For instance, I was trying so hard not to stretch my top piece of fabric, that I didn't even realize that I was holding onto the bottom fabric with all my might! Also, piecing them the wrong way made a bias edge join with another bias edge, leaving way to many stretchy parts together. Thus, some of my curves were a little wavy. In the pics above you can see it around the nine patch especially. These aren't really puckers, and they will likely quilt right out of the block, but only time will tell. Plus, I use a cotton blend batting, so once washed, it will look a little wrinkly anyway. I am not that much of a perfectionist for the stuff that will be living in my house, but I would prefer the stuff I give away look, well, perfect.
 |
| I tried to take pics outside, but the wind kept blowing my blocks away! |
Would I recommend this pattern to another beginner? That's a tough one. The ruler does help you cut the curves easily, but putting them together on the sewing machine requires a bit of coordination. Jenny's suggested method has you crossing your hands, putting them together as you sew, and you have to watch the top and bottom fabric while keeping an eye on your 1/4 inch seam, while trying not to pull, etc., etc. I'm not sure I would have been able to do all that a couple of years ago. As you can see, I still didn't pull it off perfectly. However, Jenny's pattern does leave some room for error because you square up the pieces as you go along. Even my first block came out the right size. All that said, if you are accepting of a little waviness here and there like I am, you should give the pattern a try!
What are you quilting this week?
Jen
Monday, May 21, 2012
Blogger's Quilt Festival - Spring 2012

Here is my entry for the Blogger's Quilt Festival over at Amy's Creative Side. Yes, I am totally jumping on the bandwagon here, but why not? I am a blogger, and I did complete a couple quilts so far this year.

I choose the mini-quilt that I made for the Name Game Swap (see that post here). Why? Because, so far this year, it was the most fun to make. I loved making all those 2 inch blocks around the side. I loved incorporating her daughter's nickname, "The Cupcake Princess" into the quilt too. All I can say is, fun, fun, fun! In fact, I am a little surprised that I haven't converted to an all mini, all the time, type of quilter. That's how much fun it was. And, of course, I learned a few things along the way, especially about mini's. You can see that on my "Lessons Learned" page at the top.
Now about the festival. All I can say is WOW! If you are a beginner, please check out the link above. At the bottom of the page, you can view small icons of all the quilts entered in this festival. The images are so diverse, and so beautiful! You really get a sense of all the different types of quilts and quilters out there, even if you don't click on over to their individual pages. I also liked going to the previous festival's posts. There are even more pictures there, and it was really neat to see what was popular and hip and when. Really, go check it out.
One last plug, when the voting opens, please vote for someone! My particular favorite is Esther over at Threads on the Floor. I am in love with her Urban Nine Patch quilt. The quilting on it is absolutely spectacular and very deserving of a festival ribbon!!!
What are your favorites??
Jen
Sunday, May 20, 2012
Ms. Kitty back to the spa
I picked up Ms. Kitty from the spa Friday night, eager to get quilting. She, however, was not ready.
First I tried piecing. I set her up in my usual settings. I thought it was a little weird that she didn't want to have the needle in a position slightly to the right. I do this to make that scant 1/4 inch seam even easier to accomplish. OK, Ms. Kitty, fine. I'll put on a different foot and let you have the needle in the 0 position. All is well. After I completed piecing a block, I thought I would see how the free motion quilting would go, and all H-E-double hockey sticks broke loose. It was the same group of problems as before. Enormous looping of the top thread on the bottom side of the fabric. I tried everything - feed dogs up, feed dogs down, darning foot, free motion foot, NO FOOT, needle to the left, needle to the right, needle in the middle, tension low, tension high, new needle, old needle, top thread in upright feeder, top thread in sideways feeder, low speed, medium speed, high speed. Nothing worked. Even at her best (needle to the left, tension at 5, darning foot, and high speed), she still had little loops on the underside every 30 stitches or so and even some loose stitches on top. And I was just doing straight lines in the same direction as the fabric normally feeds - this should be her best direction. Anything resembling stippling, resulting in even greater problems.
I tried again last night, just to see if a rest would magically fix things. It didn't. My trash can is full of samples and A LOT of thread!
This morning, I made a practice sandwich and set about documenting the settings so that I could take it back to the shop. I did about 20 lines or so at all different settings. Of COURSE, nothing was as extreme as the results I had the last two nights, but there was still looping here and there. I even brought samples of my previous free motion quilting so they didn't think I was just trying it out for the first time and getting these results. As luck would have it, it was a completely new lady at the shop that I haven't met before. She looked at me like I was nuts, took my samples and Ms. Kitty, and quietly filled out the paperwork to send my machine back to the mechanic.
Pray that he figures it out. I have got to get that Hands2Help quilt done by June 2nd!! Brother Bear has decided he doesn't like to quilt through the adhesive in the appliques and my tension goes all haywire whenever I do. I know they don't expect these quilts to be perfect, but I simply can't give a quilt away with THAT going on.
So Ms. Kitty went right back to the spa. Although maybe I should start calling it "rehab" considering, and change her name to Lohan??
Frustrated,
Jen
Friday, May 18, 2012
Get your improv on! - Finish Friday
 |
| placemat top |
Yes, you are right, the placemat above isn't actually "finished" yet. I decided today to piece together another placemat for this month's Free Motion Challenge piece. I just felt that Leah Day's design was more modern and I couldn't figure out how to incorporate it into the placemat I made originally. So, I will save that other one for another month.
For this one, I just used a bunch of scraps from the solids I cut on Wednesday for my solid bee group. The one's from the front tended to be of similar sizes, thus the strips. I even used a bunch of orange - a personal victory considering I really don't like orange that much! On the back, I had even more more fun just piecing together what was left. There were a few other improvisational blocks that didn't fit onto this month's placemat, so who knows, perhaps this one will actually get a matching partner at some point!
 |
| placemat back |
Since it is already time to go get the kids for their afternoon activities, I didn't have a chance to actually QUILT this month's motif. But, at least it is here all ready to go, when I do get a chance!
Hope you are all out there quilting away!
Jen
Wednesday, May 16, 2012
More of the same - WIP Wednesday
Gosh, I'm boring! I've just been working on more of the same.

More red, blue and cream/tan New York Beauties. Although, these don't have the blue yet.
I also pieced a placemat together, potentially to be this month's Free Motion piece. Although, now that I have it all sandwiched together, I don't see how this month's quilting motif really goes with it. I'll have to ponder whether to do it anyway, or put this one aside for next month's motif.
Today, I left the beach and drove up to a place in the mountains. So, no sewing today. But, I took my cutting mat and rotary cutter and managed to cut my solids for the 3 x 6 Bee that I am in. Now they are all ready to go and become Urban Nine Patch Blocks!
Completed Projects:
On-going Projects:
Back Burner:
This week's stats:
Completed projects - 0
New projects - 1
Currently in Progress - 5
Linking up with Freshly Pieced WIP Wednesday's

More red, blue and cream/tan New York Beauties. Although, these don't have the blue yet.
I also pieced a placemat together, potentially to be this month's Free Motion piece. Although, now that I have it all sandwiched together, I don't see how this month's quilting motif really goes with it. I'll have to ponder whether to do it anyway, or put this one aside for next month's motif.
Today, I left the beach and drove up to a place in the mountains. So, no sewing today. But, I took my cutting mat and rotary cutter and managed to cut my solids for the 3 x 6 Bee that I am in. Now they are all ready to go and become Urban Nine Patch Blocks!
Completed Projects:
- Zero - Boy, I'm not really good at this category, am I?
On-going Projects:
- Hands2Help Bee Happy Quilt - quilting in progress
- Red, White, Blue New York Beauty - piecing in progress
- Blue & White Stack-n-Whack for May UFO challenge - I have no desire. If I don't take it out by next Wednesday, I'm putting in the "Back Burner" category
- Free-Motion Challenge Placemat for May
- Urban Nine Patch - Decided to do this block for my solids group in the 3 x 6 Bee
Back Burner:
- New York Beauty Quilt A Long - actually different from the one above.
- Batik Stripe Quilt - still sandwiched and ready to be quilted!
- Thank you quilt for Ashley's teacher - due second week of June! Plenty of time, right?
- Lincoln quilt - need to put the borders on this baby and finish it up.
This week's stats:
Completed projects - 0
New projects - 1
Currently in Progress - 5
Linking up with Freshly Pieced WIP Wednesday's
Tuesday, May 15, 2012
Binding Tool - Trial and Error Tuesday

Product Review time!
Frustrated when trying to finish off attaching your binding? You might like the "Binding Tool" from TQM Products. I got mine at Missouri Quilt Co. As of today, it is under $8 (plus shipping). A deal!
I was constantly frustrated when attaching my binding to my quilts. For some reason, I just couldn't get it through my head how to do it. I had at least 6 different versions of instructions telling me how to, but I kept struggling. I either ended up with my tails too long and an enormous amount of binding for that last 10 inches of quilt or sometimes only 8 inches of binding for the last 10 inches of quilt! The most difficult part for me was figuring out which way to twist the binding open to attach it to the other side. So even when I had the length right, I ended up with multiple twists which were unacceptable. Enter the binding tool.
It was actually featured in one of my magazines over the holidays as an excellent stocking stuffer. And since I am in charge of stuffing stockings around here, I bought myself one!
Now there are several videos out there for how to use this tool. I just felt like doing my own pictures for fun!

First, attach your binding as usual, EXCEPT leave a 12 inch opening. I like to put pins in these places, so I know where I need to start and stop. You will also need to start with approximately 10 inch tails. Go ahead, attach that binding all the way around your quilt.
When you make it all the way around to your 12 inch opening. Nestle the binding tool, letter side up, against that last pin, and mark along the line (I used red pen below).

Now, move your binding over to the cutting mat. Line up that mark under the "Mark here" line.

Then trim with your rotary cutter. You will notice that it makes a little notch mark at the bottom. Those notches save my sanity!

Next, rotate the tool around to your other side of the 12 inch opening and nestle the tool against that pin. Your letters on the tool are still facing up!

Mark a line along the "Mark Here" line.

This is the only tricky part! THIS time line up your line with the end of the tool. (Your line will end up where the notch is going to be).

Then trim with your rotary cutter.

Now align the two pieces of binding. You will have a notch on both sides to help you!

Pin if you need to, and sew the two pieces of binding together.

You will end up with perfectly measured binding to continue to attach to your quilt, AND no twists!!!
As I mentioned above, the instructions have you do a 12 inch opening. That doesn't give you a whole lot of room if you are making something small - like a placemat, or a mug rug. I have gotten by with less, and will tell you how next Tuesday! (Read, I didn't take pictures of this, so now I will have to do make something in order to show you how!)
Am I the only one out there that ended up with those twists in their binding??
Sunday, May 13, 2012
Happy Mother's Day

Happy Mother's Day to all you mothers out there.
I must admit that I'm not feeling "it" all that much today. I had a couple of rough days with the kids of late, and I'm not feeling like the best mom today. It's made me reflect a little about such things.
Whenever I am able to draw better, I plan to draw out two pictures - one entitled "what I thought motherhood would look like", and another "what motherhood turned out to look like" or something similar. Until I can put an image on paper, you will just have to use your imagination...
What I thought motherhood would look like - Picture a woman, dressed nicely in a summer dress, pearls, maybe not high heeled shoes, hair in place, you know, polished looking (a Stepford wife). Husband in his tie, standing next to her, arm around her. Three little girls in the picture, all wearing Sunday dresses with hair neatly arranged. The oldest girl, age 5, has 3 gold medals around her neck, probably from 3 different sports. The Olympic committee obviously made an exception on the age requirement because of her tremendous skills. The middle child at age 3 is reading a book on Advanced Physics and has 3 PH D's already in other fields. The baby is on mom's hip, playing the violin. All is a picture of happiness and perfection. I might also mention, that the house surrounding them has been featured in several magazines because of it's neat, orderly, yet completely beautiful appearance.
This is what my life really looks like - Picture a woman, dressed in cut off shorts, hair in a lopsided ponytail, feet in socks, face twisted somewhat because the baby on her hip is pulling her hair. Husband is in the background, on the computer. Three little girls are in the picture. The oldest, age 5, is doing cartwheels in the kitchen, knocking a dishrag onto the stove and it catches fire. The naked 3 year old has climbed the kitchen cabinets in order to take a flying leap for the lighting fixture, so she can swing from it like a monkey. Baby is simultaneously biting mommy and pulling her ponytail, and SHE is the one crying. House surrounding them is full of miscellaneous clutter.
OK, so maybe no fires have actually been set...yet. But some days being a mom in my house feels like the above. I'm sure in reality it is somewhere between the two pictures. Luckily, I have found quilting. The calm, quiet of it brings balance to my chaotic life. And, of course, there are moments I wouldn't trade for anything.
Happy Mother's Day.
Jen
Friday, May 11, 2012
TGIF, right??
Another Friday with no actual finishes. So, I decided to finally show you my finishes from a couple of weeks ago. I am taking a chance that one of the recipients of this gift isn't reading this, as her gift is not yet delivered.

These are travel sewing kits that I made from Amy's tutorial at Lots of Pink Here. It's a great tutorial, and these things got whipped up pretty quickly. I actually made 3 of these from one charm pack, some leftover white scraps, and 4 pieces from a layer cake (mostly for the binding)! Since I didn't have the yardage in a fabric I liked to make the tie that Amy did, I decided on a ponytail holder/button combo for the closure. Mama likes!
I already sent one off to Elisa of the Postpartum Quilter. Such a sweetheart! I made one for another for a special someone... Here it is, already to be wrapped. up.

And of course, I made one for myself!

As you can see, mine is full to the brim! I've got some hexagon paper pieces, a charm pack that I cut up for such things, and a few already started. I like to keep my travel pack in the car or my purse for when I am between driving the kiddos to activities, or for when I am 20 minutes early to a doctor appointment, or... you get the idea. I love it!
In other news, I also finally took Ms. Kitty to the spa. I agonized over where to take her. When I last got her serviced, I was spending a lot of time down in Orange County visiting my niece in the hospital, so it wasn't a big deal to drop her off while I was down there. But, now I'm not going down there every week or so. In the end, I decided to drop her off at the local Viking dealer inside Joann's. They charge a little more and don't fix her onsite, but in the end the choice came down to an extra $50 and a few extra days or 4 hours of my time (OC is about an hour each way!). Time is just in too short of supply at the moment.
Hopefully, Ms. Kitty will be feeling better by the end of next week. I have started to miss her, especially since Brother Bear is starting to get particular about what he likes to sew. I had no trouble with him when I first pulled him out. He did a marvelous job on my FMC piece for April, and I've been piecing away on my New York Beauties. BUT, I got about 1/3 of the way through the free motion of my Bee Happy quilt, and he started giving me some trouble. As far as I can tell, it has to do with the iron on fusible that was used in the applique pieces. He just doesn't like sewing through it and it throws the tension off whenever I go over an applique piece. The quilt is covered in appliques (front and back), so it has proven challenging. I finally got fed up and put the quilt aside for a while. Brother Bear does an amazing job with the paper piecing though, so I have been able to continue with that. In case you are wondering, I call him Brother "Bear" because he is so much louder than Ms. Kitty. He sounds like a bear chomping on a fat salmon.
Later today I get to go to, not one, but TWO, Mother's Day Teas! Both the elementary school and the preschool are hosting me this afternoon, back to back. It should be fun. I have no idea what I am going to wear. My usual uniform of jeans and a T-shirt may be a little too casual for these occasions but I also know I'll be running around the playground playing games and kneeling in the grass, etc, etc. A dress or skirt just won't do either. The dilemmas I face!
Happy Mother's Day to you mothers!
Wednesday, May 9, 2012
Hole in the Head - WIP Wednesday
What was I thinking? I must have a hole in my head or something, because I managed to start a new project that wasn't on my list from last week.

I started quilting the Bee Happy quilt, got about 1/3 of the way done, and needed a break. What better way to spend my break than to try to figure out how to put together a mosaic with my colors for the 3 x 6 Bee, and I realized that I had absolutely no pictures of anything quilt related in red, white and blue. I did, though, have a project on my UFO list that was supposed to be red, white and blue, and I had all the fabrics needed to start the project. So I started cutting, and I managed to get a few blocks put together.

There is something calming about paper piecing. I think it is the methodical, cut, sew, press, repeat. I needed something calming this week and I feel so much better just spending a few hours with this routine. Refreshed almost!
Completed Projects:
On-going Projects:
Back Burner:
This week's stats:
Completed projects - 0
New projects - 1
Currently in Progress - 5
Linking up with Freshly Pieced WIP Wednesday's

I started quilting the Bee Happy quilt, got about 1/3 of the way done, and needed a break. What better way to spend my break than to try to figure out how to put together a mosaic with my colors for the 3 x 6 Bee, and I realized that I had absolutely no pictures of anything quilt related in red, white and blue. I did, though, have a project on my UFO list that was supposed to be red, white and blue, and I had all the fabrics needed to start the project. So I started cutting, and I managed to get a few blocks put together.

There is something calming about paper piecing. I think it is the methodical, cut, sew, press, repeat. I needed something calming this week and I feel so much better just spending a few hours with this routine. Refreshed almost!
Completed Projects:
- Nada, but I am getting closer on the Bee Happy quilt, maybe next week.
On-going Projects:
- Hands2Help Bee Happy Quilt - quilting in progress
- Red, White, Blue New York Beauty - piecing in progress
- Blue & White Stack-n-Whack for May UFO challenge - I actually glanced at it this week.
- Free-Motion Challenge Placemat for May - I am determined to finish before the last days of the month
- Batik Stripe Quilt - still sandwiched and ready to be quilted!
Back Burner:
- New York Beauty Quilt A Long - actually different from the one above.
- Urban Nine Patch - Decided to do this block for my solids group in the 3 x 6 Bee
- Thank you quilt for Ashley's teacher - due second week of June! Plenty of time, right?
- Lincoln quilt - need to put the borders on this baby and finish it up.
This week's stats:
Completed projects - 0
New projects - 1
Currently in Progress - 5
Linking up with Freshly Pieced WIP Wednesday's
Tuesday, May 8, 2012
Trial and Error Tuesday - storage tip

I apologize, I only have time today for a quick tip.
One of the coolest things about becoming a quilter is all the wonderful fabric you get to work with. Unfortunately, a side effect of this cool thing is a tendency to accumulate said wonderful fabric. And where do you put it all?
I have seen some beautifully organized closets in blogland. Neat, folded bundles of fabric, organized by color and sometimes even theme. I am in awe of these closet owners. I, however, do not have the sensibilities to be able to organize this way, nor do I have the extra closet space. I have mentioned before that my studio space is actually a large portion of the garage. I want my fabric to be close to me, so it is there too. So, I need it to be protected somewhat from mostly dust and any car exhaust that makes it that far into the room. I started by buying large plastic storage bins with lids. When my stash could all fit into one of these bins, it seemed like a marvelous thing. But, then I began to accumulate more fabric and I started doing projects that needed, for example, 20 different fat quarters of a certain color. So, I started to need smaller bins where I could dedicate one bin to a specific color. They do make small, lidded plastic bins, but after I bought a few I realized there was another option = plastic produce containers.
We buy a lot of our produce at Costco, but I have also gotten some with large containers from the regular grocery store. I'm talking about the larger containers that hold 4 pounds of grapes, or 1 pound of baby spinach. I can pack a lot of 1/2 yard and fat quarter pieces in these things. I like to separate my colors, but I can also fill them with fabrics planned for specific projects too. For instance, I have one bin for my blue and white stack-n-whack fabrics, one with all the cut pieces for the Batik tile quilt that I started earlier this year, one with fabrics for a hopscotch game I plan to make (someday), one with all my charm packs, layer cakes, etc. Also handy are the quart size berry containers. I use these smaller containers to hold my scraps, which are somewhat organized into general shapes (but not colors, I don't have that many yet). I also have a small berry container with half square triangles that were leftovers from some flying geese I made at some point. You get the idea. The containers are great. They are see-through, lidded, can be stacked, I was already buying them to get the produce, and best of all I am reusing something which is good for the environment.
So next time you get something in a plastic container, think to yourself "would this be suitable for 2 1/2 inch strip scraps?
How do you like to organize your fabric?
Friday, May 4, 2012
Finish Friday - Flipped Out!

No quilty finishes this week, but I did have a great training class for art with the kids. The project is a Notan. This is the first one I made. I was thinking of stippling when I chose my shapes.
This is the second one that I made trying to simplify the shapes for the kindergartners.

I started by just cutting out triangles, squares, and rectangles. It wasn't until I started flipping the images out that it started to look like a face. Just goes to show you that sometimes with art, you don't know what you are going to get until you approach the finish.
Next week, something quilting will be finished. It might only be a placemat, but it will be quilty.
Quilt on!
Wednesday, May 2, 2012
WIP Wednesday - walking on eggshells
Is it Wednesday already? Sadly, I have spent most of my time recently talking to insurance companies and mechanics thanks to a minor accident over the weekend. Thankfully, no one was hurt and the kids were NOT in the car! But boy, do I miss the sewing time. I found myself overly "snappy" tonight - I need some quiet release!
I spent my only free time today pinning the layers together on my Bee Happy quilt. I couldn't believe it, but I ran out of pins before I finished the borders! I usually only have one quilt pinned at a time and didn't realize that my Batik Stripe quilt was still pinned too.
Tomorrow is volunteer day at the school. Friday I will be there almost all day too since it is training for another art project for the kids. I sure hope I get some sewing done soon, or my head my pop off!
Completed Projects:
On-going Projects:
Back Burner:
This week's stats:
Completed projects - 1
New projects - 0
Currently in Progress - 4
Linking up with Freshly Pieced WIP Wednesday's
 |
| All clipped down and ready to go |
 |
| Got pins? |
I spent my only free time today pinning the layers together on my Bee Happy quilt. I couldn't believe it, but I ran out of pins before I finished the borders! I usually only have one quilt pinned at a time and didn't realize that my Batik Stripe quilt was still pinned too.
Tomorrow is volunteer day at the school. Friday I will be there almost all day too since it is training for another art project for the kids. I sure hope I get some sewing done soon, or my head my pop off!
Completed Projects:
- I did get my April Free Motion Challenge Piece done!
On-going Projects:
- Hands2Help Bee Happy Quilt - It is almost completely sandwiched.
- Blue & White Stack-n-Whack for May UFO challenge, gotta dig this one out of the closet.
- Free-Motion Challenge Placemat for May - I am determined to finish before the last days of the month
- Batik Stripe Quilt - still sandwiched and ready to be quilted!
Back Burner:
- New York Beauty Quilt A Long
- Urban Nine Patch - I am sew excited about starting this new project, but it really should wait until Bee Happy is done, and I will likely make the Urban Table Runner pattern first, just to figure out how the ruler works, but what colors should I choose -- too many choices.
- Thank you quilt for Ashley's teacher - due second week of June!
- Lincoln quilt - need to put the borders on this baby and finish it up.
This week's stats:
Completed projects - 1
New projects - 0
Currently in Progress - 4
Linking up with Freshly Pieced WIP Wednesday's
Tuesday, May 1, 2012
Trial and Error Tuesday - Oh, Brother!

Despite taking her apart, cleaning, oiling, adjusting, etc., I haven't been able to fix Ms. Kitty's issues. She will need to be taken in to the doctor. I fear that it may be the tension disks, because every time I adjusted them, she would be better for a line or two, but then the problem would return. On to Plan B....

This was the sewing machine that I actually learned to quilt on. Ever so practical, I didn't want to buy a machine until I knew I liked it, so I borrowed this machine from my neighbor. As you can see, it is very basic. I think she told me she paid $50 for it brand new! I managed to piece 3 baby quilts together with this machine with no difficulty. I mean, I shouldn't have had any problems, right? I just needed a straight stitch! It is when I took my first machine quilting class that I began to have doubts about it.
You cannot drop the feed dogs on this machine, and to a beginner that seemed like a huge deal. It also didn't have a speed regulator for the pedal and I really had difficulty controlling my sewing speed on it (which is important with machine quilting). You also can't adjust the pressure of the presser foot, so with the darning foot, I felt like I was really having to pull and push the fabric around. I definitely got a workout!
This is my Plan B machine. Luckily, my bobbins fit it, my feet fit it, I can even figure out a configuration for my quilting table (not a perfect fit, but it will do), and I have learned a few tricks and have a few more tools since then.
The SewSlip manages to eliminate the arm and hand workout. These things really are worth the money! Now that I've been sewing a while, I am better at regulating my speed too. But, if I wasn't, I learned that you can actually put a few pieces of tape along the sides of the pedal in the "too fast" spot. Of course, you will still be able to push past that if needed, but just a little resistance helps your brain realize that you are at that point.
I know, you are thinking to yourself, "Whatever, a $50 machine can't do what you need it to in order to finish a quilt". Wanna bet? Remember how my Free Motion Challenge piece wasn't quite finished? Well......

I did all the filler quilting on the Brother. I used a walking foot to put the binding on. And, because Ms. Kitty won't be back from the doctor/spa for a while. I plan on piecing my next project on it too! I WILL show YOU! Granted, I am not sure how large that project will be at the moment, but I am determined!
Now, of course, because it doesn't have any fancy stitches, I would be rather limited if I wanted to do a quilt with blanket stitched machine applique, or if I wanted to get fancy with my machine binding. I can still do machine applique with a zigzag stitch though! And, I used a straight stitch to machine bind this placemat.
Yes, yes, Jen, but why is this on Trial and Error Tuesday? I just want you beginners out there to realize that you don't NEED a $10,000 sewing machine in order to quilt. I think it is very easy to be intimidated by opinionated quilters that you run into that claim you need this machine or that machine (those opinionated types seem to be everywhere, oh wait, I am giving my opinion here). Yes, there are some features of Ms. Kitty that I miss a little, but do I NEED them? No. With a little more practice, I could have continued with this machine and probably would have created the same things.
I picked up an American Quilters magazine today which had an article "Great Finds: Home Sewing Machines". All the machines featured were about $2,000 or more. I was a little disappointed in the article, to say the least. They might be the newest on the market, but do you need to spend that much to get what you need? No. You need a machine that can stitch a straight stitch nicely and either a walking foot or darning foot. You could finish an entire quilt with just a straight stitch, including the quilting. If you want to do machine applique, you need at least a zigzag stitch. Those are the bare minimums.
Just like fabric, you want to buy the best machine you can afford, but you don't necessarily have to spend ALL your money. A $50 machine, a Sewslip, a darning foot, and a walking foot = still cheaper than a even a $1000 machine - what some dealers will call a basic set up. Think of it this way, you can spend that extra money on fabric!
Subscribe to:
Posts (Atom)