
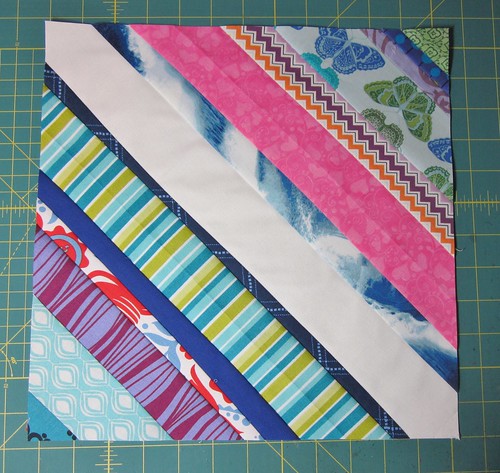
For my regular readers, I am participating in the We Bee Learning Bee, organized by Mrs. Pickles Garden. February is my month and I need to do a tutorial for my fellow bee-mates to follow. So, today for Building Blocks Tuesday, I am going to show you all (or y'all) how I built this string block.
This block is not original. There are plenty of other tutorials out there like mine, including this one from Film in the Fridge, and this one at PS I Quilt, and another from the Sometimes Crafter. There are probably dozens of tutorials out there for this block, but I had never tried a string block until this morning (the reason Building Blocks Tuesday is a little late today).
OK, here we go....
You will need:

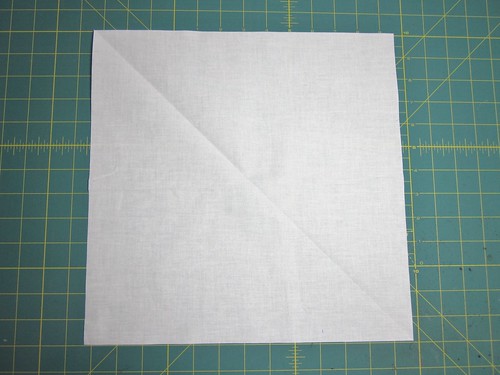
- a 13 inch square of muslin**
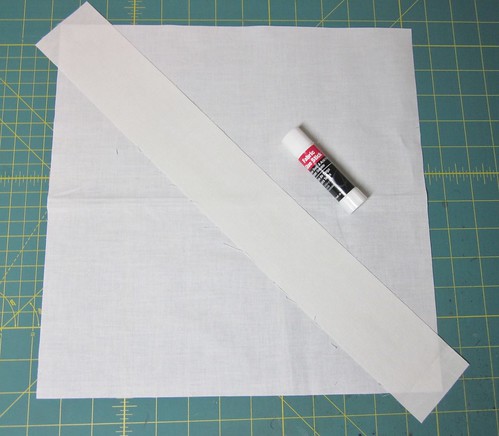
- one 18 1/2 inch strip of solid white (I used Kona PDF White)
- various strips at least 1 1/4 inch wide to 2 1/2 wide, varying lengths.
- fabric glue OR Elmer's Washable School Glue (the washable part is key!)
1) Take your muslin square, join a bottom corner diagonally to a top corner and finger press. You could also use a temporary marking tool to draw a diagonal line here. This is just a reference point, it is not essential.
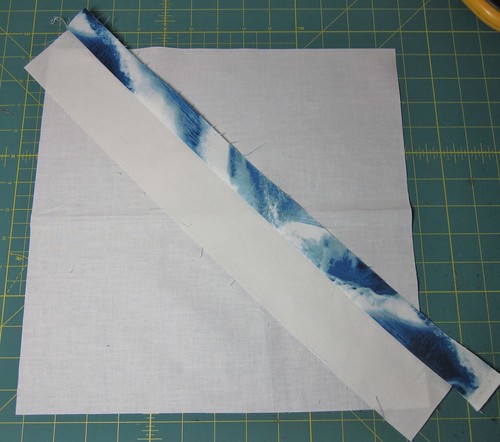
2) Apply a small amount of glue along this diagonal mark. Only a little glue is needed, don't go crazy. (If the glue makes you nervous, you can use pins.) Center your white strip of fabric along this diagonal line where you have put the glue. If your white fabric has a "right side", make sure it is facing up.
3) Take the first strip of fabric you want to use and lay it right side down on your white strip, lining up the raw edges. Secure this strip by sewing a 1/4 inch seam.
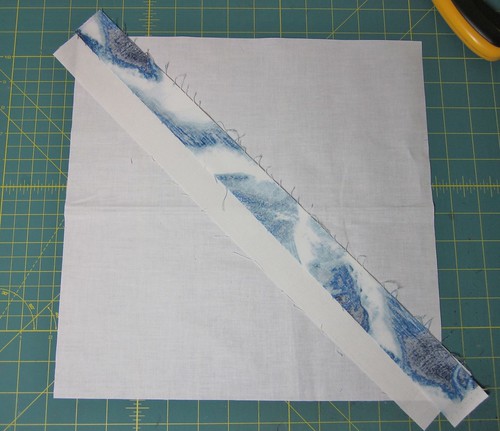
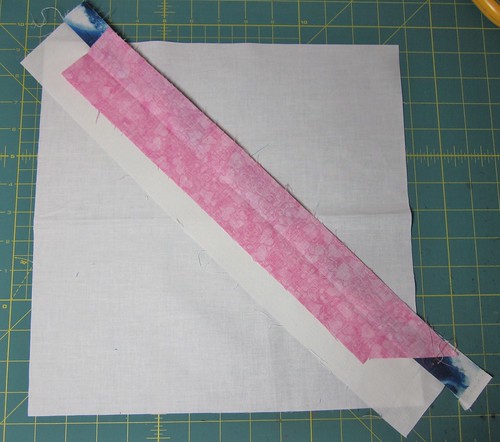
4) Press toward the fabric you just added.
5) Take your next strip of fabric, lay it right side down on the fabric you just added, sew with a 1/4 inch seam, and press.
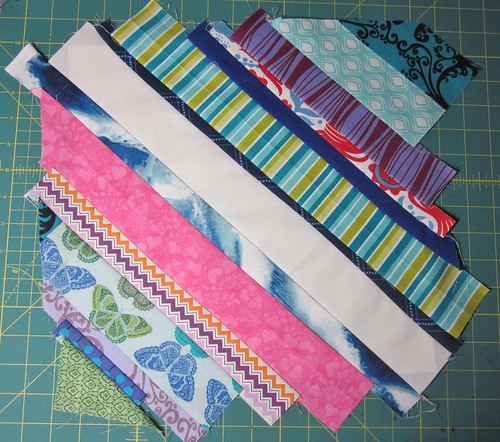
6) Repeat the process until you reach the end of this half of your muslin square.
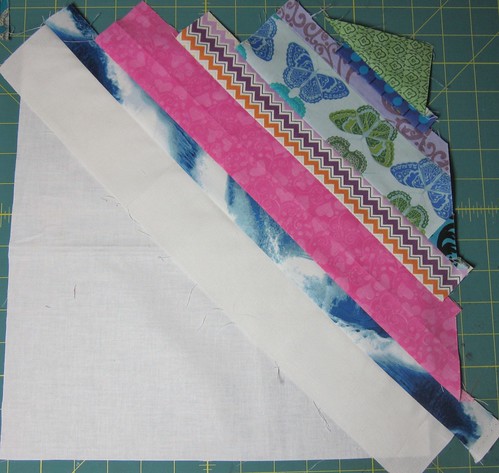
7) Turn the block and start adding strips of fabric to the other side of your white strip, using the same process, until the whole square is filled.
For those of you who are wondering, this is what the back looks like.
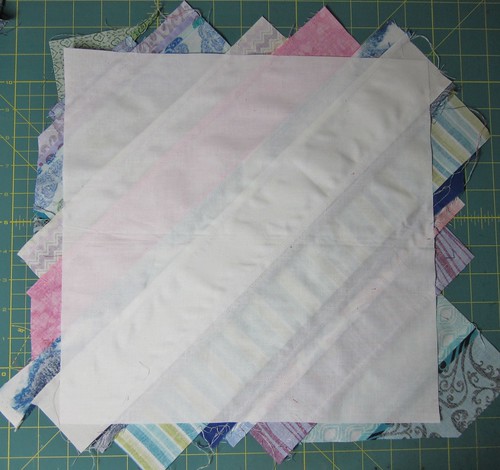
8) Trim the block to 12 1/2 inches square. I found it easiest if I did it from the back, that way I could make sure my diagonal stayed intact.
9) You are done!
I don't think that these blocks look like much on their own, but when you put them together.....
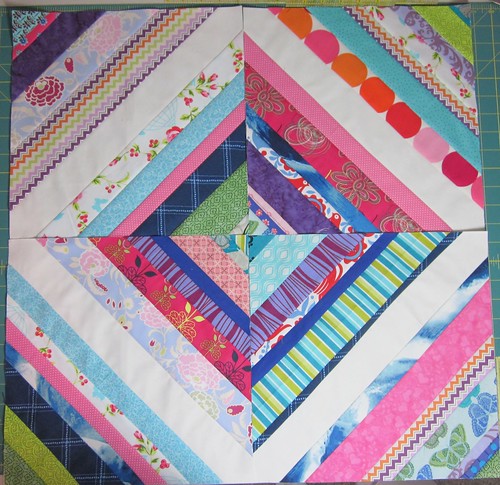
Nice, huh?
It is a very similar effect as the Depression blocks we made in January with the HST's. Just different.
Here are some additional tips:
I hope you enjoy the process like I did! If you have any questions, please let me know!It is a very similar effect as the Depression blocks we made in January with the HST's. Just different.
Here are some additional tips:
- the muslin is optional, but you do need some kind of foundation. You could use paper, but if you do, make sure it is very thin, like paper-piecing paper, or telephone book paper. Because I wanted my blocks to be 12 1/2 squared, and I didn't have any paper that size, I used the muslin. You can tape paper together, but it might leave a little residue on your needle when you sew through the tape. You will also need to remove the paper at the end after you have trimmed your block to size. I am LAZY and didn't want to deal with the mess. I had a bunch of cheap muslin laying around....you get the idea.
- OH!! If you use paper, make sure you shorten your stitch length to 1.5 or 1.3 so the needle will perforate you paper as you go, otherwise it is much harder to remove the paper afterwards.
- When laying your strips down, make sure they at least reach the edge of the muslin foundation. I had you start with a 13 inch square, so there will be some trimming. There is a little distortion though, so don't rely on that extra 1/2 inch.
- Strip width - I found anything wider that 2 1/2 inches just looked like an enormous chunk of fabric in the block. Likewise, anything smaller than 1 1/4 inch tended to be a little too thin and warped a little.
- The ends of you strips do not need to be perfectly cut, but it is easier to sew a strip that has a consistent width.
- Strips like it best when cut on the grain instead of on the bias. Leftover binding tails are wonderful!
- It seemed easier to use leftover triangle scraps in the corners instead of little thin strips. So get out those HST leftovers or the triangles you cut off when joining binding, etc.
- COLORS!! My eyes tend to be drawn to cool colors, but I don't want to limit you. So anything goes!
- However, please choose colors and fabrics that you like, otherwise if you use a fabric that isn't your favorite -- it will stick out like a sore thumb! I'll let you guess which fabric I used that I wish I hadn't!
So what have you been working on this week?
Link up your fabulous blocks. You put a lot of hard work into them - show them off! This free linky will stay open for a whole week. And spread the word!

Rules:
1) Please link up only to the page in your blog showing your wonderful blocks, not just the blog homepage. Flickr pictures are also OK.
2) Make sure to put your blog name as the description so people know where they are going or the name of your block!
3) Please grab my button and post it in your blog post or sidebar.
4) Visit other linky participants!
Thanks for reading,
Jen

This is a great tutorial! Well done. Not now, but someday,I want to make some of these string blocks. I have always liked them and the scrappy look they have.
ReplyDeleteI so love making string blocks! My favorite fun sewing project.
ReplyDeleteI've never made string blocks, but this looks like fun!
ReplyDeleteGreat tutorial.. I made your blocks tonight and added them to the group pool. Hope they are okay...not very cool in colors...so if you want me to redo them I will... let me know...it won't hurt my feelings. just want you to have blocks you like. Hugs.
ReplyDeletePs.. Love the name of your blog.... My blog is Quilt Monster in My Closet...so beware..hopefully it doesn't get ya :) LOL.
DeleteGreat blocks, no I have no idea which fabric bugs you! Lovely tutorial too x. I have a whole drawer of <2.5" strips, maybe I should use them up!
ReplyDeletegetting started on my blocks today! Great tutorial!
ReplyDelete