Showing posts with label finishes. Show all posts

Wednesday, March 4, 2020

Gouldian Finches - a finish!


Gouldian Finches, paper pieced

At New Year's, I knew that there was no better way to get me back into the quilting grove than to join a swap.  The trouble was, that I hadn't really seen any swaps in my Instagram feed for a while.  I guess that is what happens when you are out of the loop for a couple of years, the players change and new people that I didn't follow had replaced them.  Luckily, I did find a swap and joined the Quilters for Koalas swap hosted by @shoppershaz_swaphost (who hosts quite a few swaps in case you are interested).  This particular swap was to benefit the wildlife affected by the fires in Australia and had an animal theme (preferably Australian animals).

Based on my partner's inspiration mosaic, it seemed she preferred paper pieced designs and liked birds in particular, so I went about trying to find something special for her.  Now, when I signed up for the swap, one of the questions the form asks you is your level of experience.  Instead of "beginner" or "expert", one of the choices was "Not much intimidates me", which is true for me, not necessarily because I am an expert, but more because I'll try anything, so that's what I put.  Why, oh why, did I take that as a personal challenge though???  I decided to create my own paper pieced pattern for my partner.......

I started with a beautiful photo by David Clode.  Then I traced the image, got my ruler out to straighten all the lines, etc. and eventually came up with a paper pieced pattern with zillions of little pieces.  Ok maybe not zillions, but probably close to a hundred per bird - zero stars, would not recommend.

Untitled

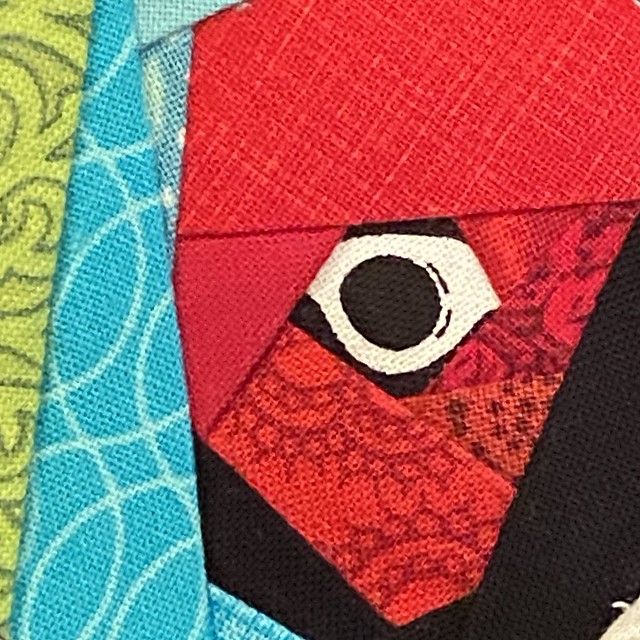
Then I got to work.  I lucked out on the bird on the left.  I found the perfect piece to use as his eye, so instead of having 15 little seams there, I ended up fussy cutting what used to be the handle of a pair of scissors.  It worked perfectly.
Untitled

Unfortunately, the bird on the right had a different eye, so I had to do a bunch of tiny seams there.

I also have a confession to make.  I had some difficulty quilting it!  It's been YEARS since I've quilted anything on my domestic machine and I'm embarrased to say that I am out of practice.  Plus, I didn't make things easier on myself by doing that jigsaw puzzle low volume background.  It created a ton of bulky seams that my machine was spectacularly finicky about.  As a result, the quality of the stitching is much lower than I would like.  I considered ripping it all out and starting over, but then realized that given those seams it was unlikely that I would do much better the second time around.  Hopefully, my partner will admire it from at least arm's length.  Fingers crossed that she likes it!!


Friday, August 11, 2017

Cherrywood Fabrics Van Gogh challenge - a finish!

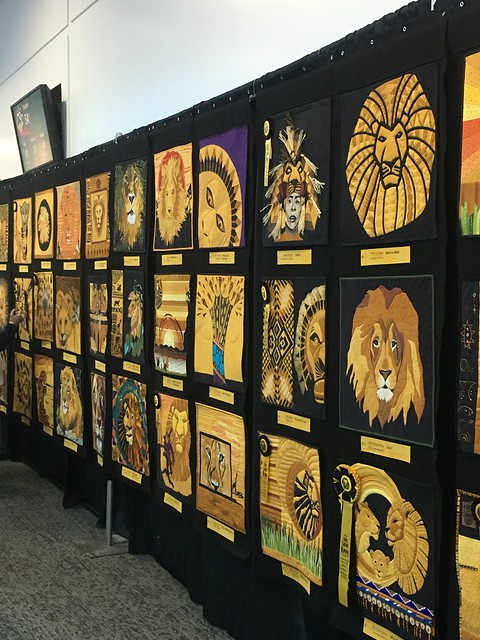
I have really enjoyed seeing the last two challenges hosted by Cherrywood Fabrics.  There was the Wicked challenge (see pics HERE) and last year, the Lion King challenge was phenomenal!

Lion King Cherrywood Challenge at Road 2 CA

While at Road to California in January, I was intrigued with the idea of entering this year's challenge - inspired by Van Gogh.  But I don't think I actually purchased the fabric bundle until QuiltCon in February.  I lacked the confidence and was worried about lack of time as well.  In the end, the colors won me over.  Who could resist the lovely blues??

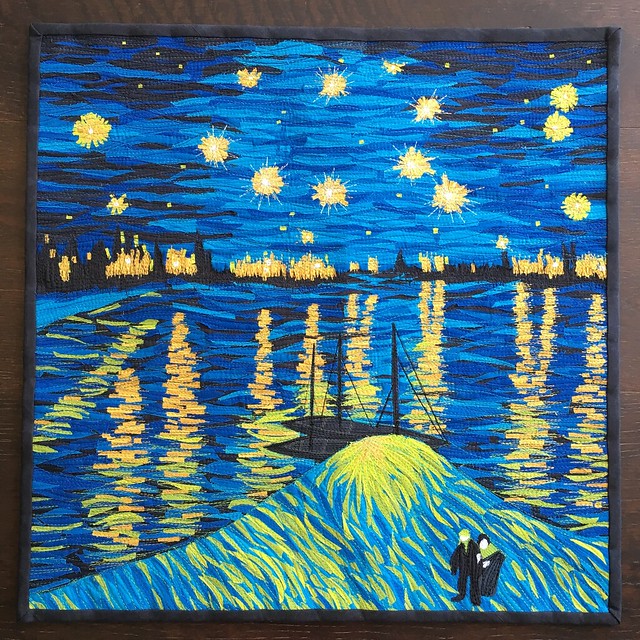
In true "Jen form", I waited until nearly the last minute to start my challenge piece.  I chose Van Gogh's "Starry Night over the Rhone" as my inspiration and got to work.  Here are some progression pics of the process I used.  I basically used the same technique as My Monet quilt, you can find the tutorial HERE, but I'm sure you will get the gist from the pics below.

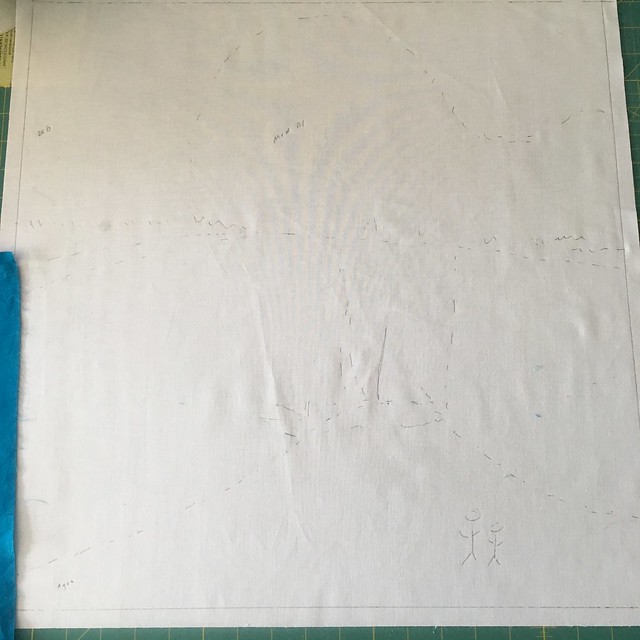
My rough plan:

Van Gogh: a rough outline of my project

I like to draw out a rough plan, like a road map to see where I am going.

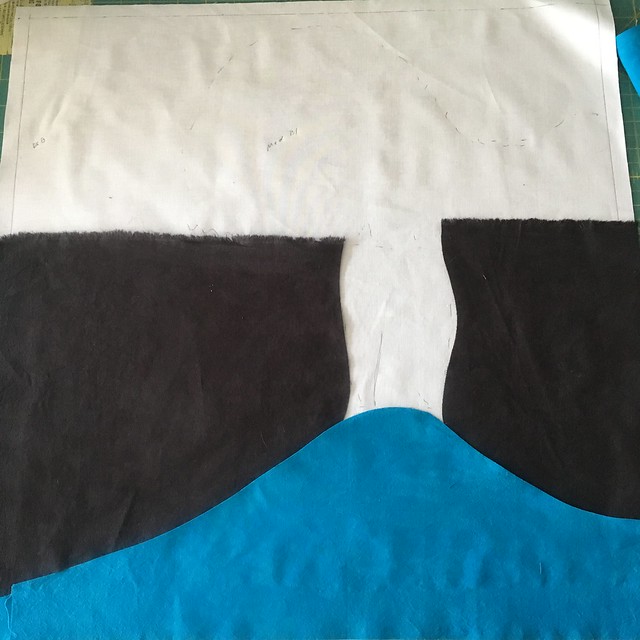
Van Gogh: the first few pieces in place


I started blocking in the background colors. I even kept some of the "fringe" edges where the fabric had been ripped.  I figured that rough edge would help me with a blended look along the horizon.

Van Gogh: background pieces in place

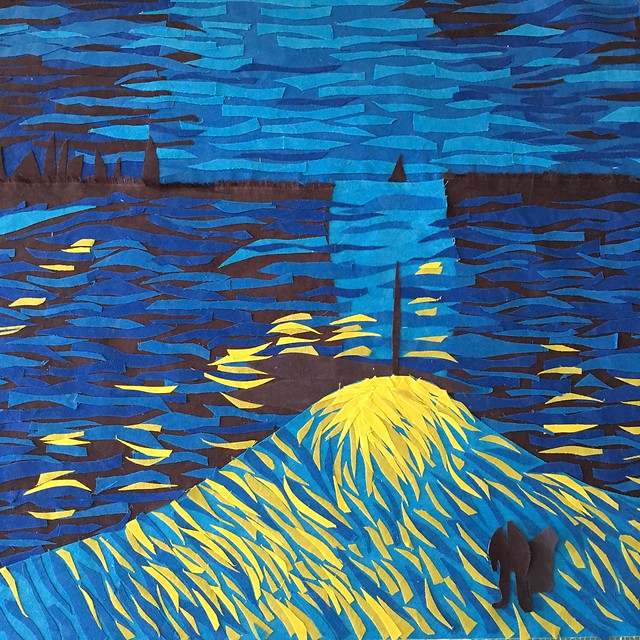
Finally, I started laying down the first "brushstrokes".  These were pieces of fabric fused with Steam a Seam Lite and then cut into random wavy strips.

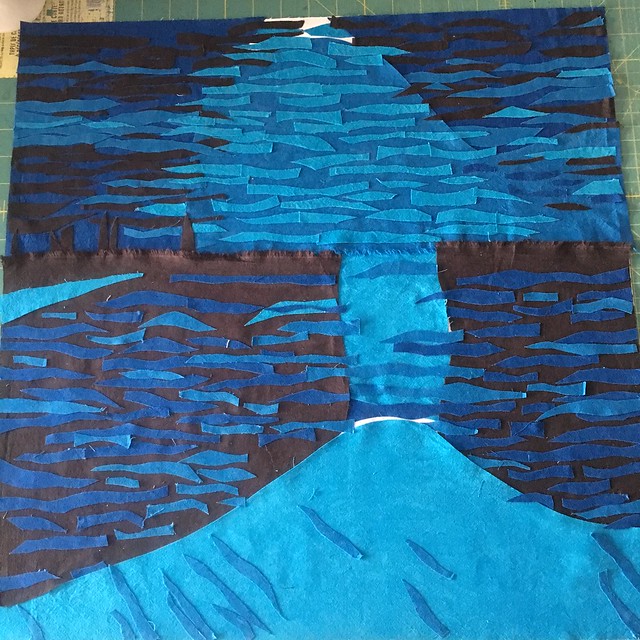
Van Gogh: first layer of "brushstrokes" down


I just kept adding more and more layers of these little pieces.

Van Gogh: brushstrokes in progress


More and more layers of detail.  As you can see, I started with larger pieces and moved on to smaller pieces to add details.

Van Gogh: I need starlight


Once everything was where I wanted it, I fused the pieces in place with my iron and started quilting in long wavy lines.

Van Gogh: a few more details and the start of stitching


Normally, I would have added tulle to the entire quilt before quilting on top of those tiny fused pieces, but I wasn't sure if tulle was allowed in the challenge and I really didn't have time to find out.  Boy, does tulle make things easier!!!  It keeps all your pieces in place and lets the quilting foot just glide over everything.  Without the tulle, some of my fused pieces wanted to flip over and get caught.
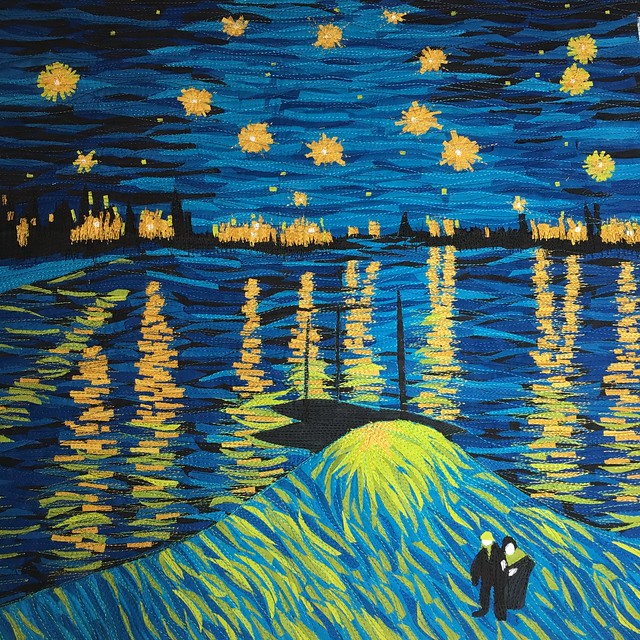
Van Gogh: just keep adding layers!

In fact, I started free motion quilting this project, but after a few minutes of my pieces getting mangled by the foot, I switched up to my walking foot.  I ended up quilting nearly the entire quilt with my walking foot.

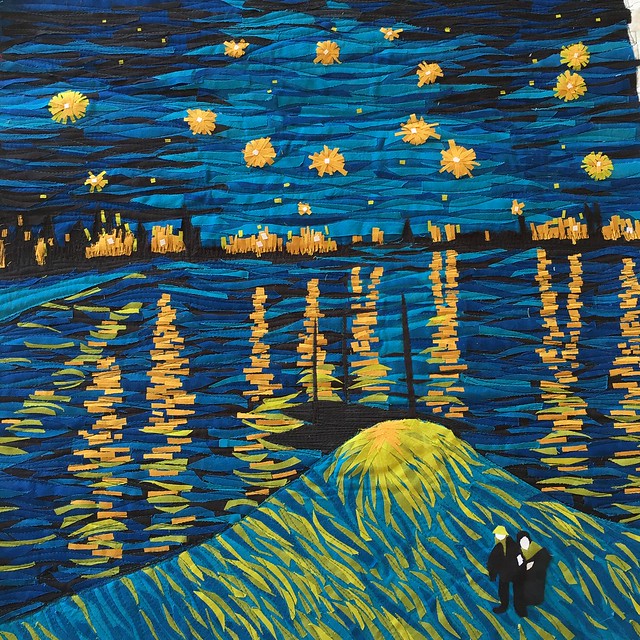
Van Gogh: people close up


When I first started quilting, I was a little mad at myself for "ruining a perfectly good quilt with too much stitching", but as I added more and more layers and colors of thread, I felt that was in keeping with what I was trying to accomplish as Van Gogh inspired.  I love how it turned out in the end.

Van Gogh: finished


What do you think?

I found out today that my quilt was juried into the finalist group.  But I have to send it off to be judged and only then will I know if my quilt was accepted into the traveling exhibition.  I'll find out sometime next month.  I really have my fingers crossed.  I just think it would be so neat to have a quilt traveling around for a year to a bunch of shows!  I may not sleep until I know if it was accepted.

Thanks for reading today!  I hope you found it interesting.

Jen


Friday, October 7, 2016

Holiday placemats - a finish Friday

Finally a finish!

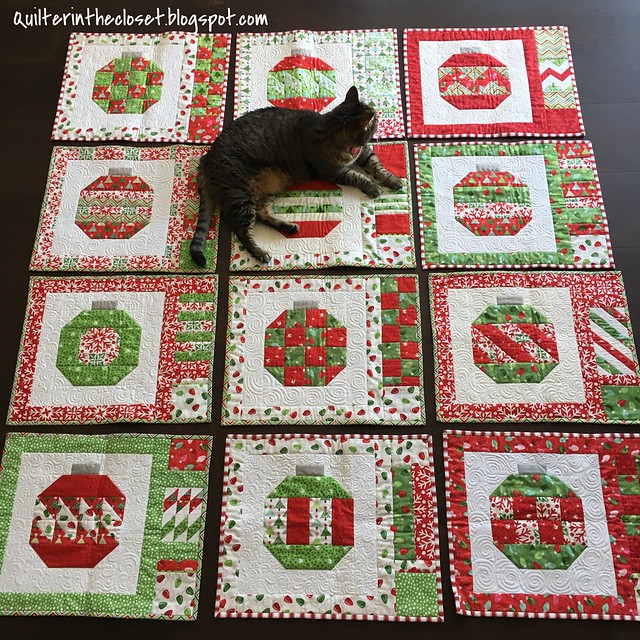
Tookie helping me display my Christmas placemats

I am almost embarrassed to say how long these Christmas placemats have been lingering in my UFO pile.

I first finished some of these ornament blocks way back in 2012 for the Vintage Holiday QAL.  You can see my finished quilt HERE.  I had a bunch of fabric left over so I decided it would be fun to make some holiday placemats with the leftovers.  It turned out that I had plenty - enough for 12 placemats!  I finished all the blocks themselves in December of 2014, and got them all quilted some time in 2015, and was trying to finish up the binding on Christmas Eve (2015).  I didn't realize at the time just how many placemats I had at the time, and I am the world's slowest hand binder, so didn't finish them and they got stored away for another day.  My Lazy Bum group chose this project as my September challenge, and I am happy to finally say that I finished up all the hand binding on these fun placemats.

As you can see, despite not having many finishes to help display, Tookie has not let her skills deteriorate.  She is more willing than ever to sprawl on my work.

Speaking of QAL's: Does anyone have any interest in participating in one after the holidays?  Is there a particular pattern you've been wanting to try in a group?

Thanks for reading today,


Jen


Linking up with:


**This post may contain affiliate links.  If you purchase something after clicking on one of my links, I may be compensated.

Tuesday, September 27, 2016

Sawtooth Stars - Building Blocks Tuesday

Happy Tuesday!  I can't believe September is nearly over!  And it doesn't feel like fall here either; yesterday it was 107!!!  I guess I should be thankful that we haven't had nearly as many triple digit days as last summer, and it is supposed to cool down a bit by next weekend.

I'm just looking forward to fall.  It is my favorite season.  The cool breezes, the occasional rain shower, soup for dinner, not to mention the desire to get into my sewing room and make stuff.....Fall!

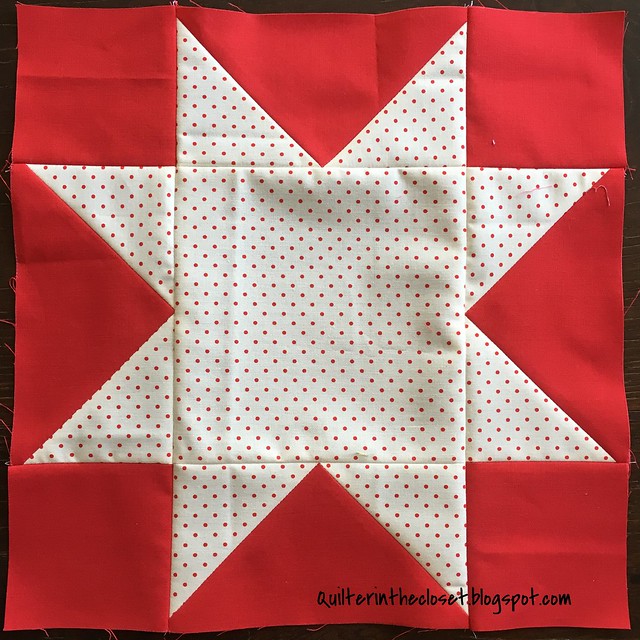
I made up these sawtooth star blocks as samples for my next commission project.  I find that it is hard for non-quilters to imagine how big the blocks will be without seeing them, so I made up this 12 inch one.

Sawtooth Star

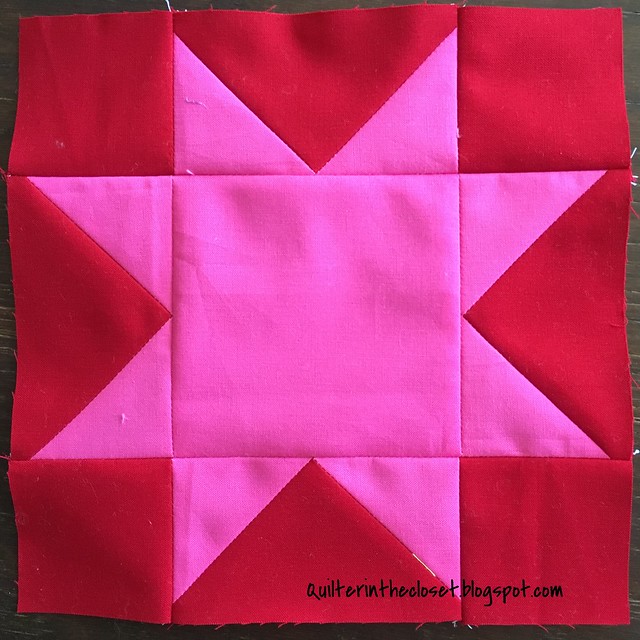
And then this 8 inch one.  The recipient also needs to choose between the two different reds that I have.  I like this darker one best, but it will be up to her.

Sawtooth Star

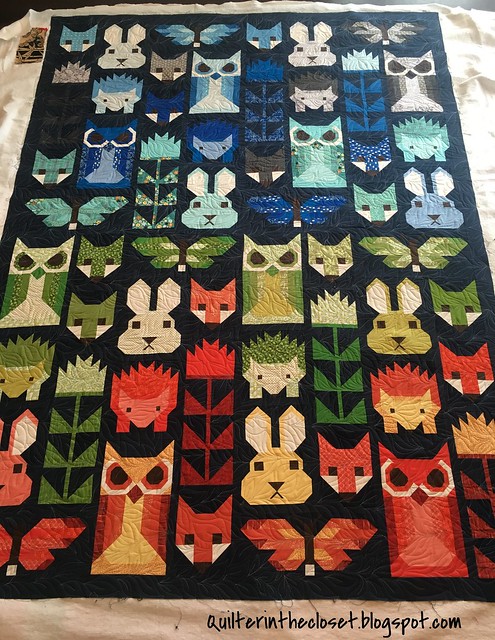
In other news, I did finish my "Friends of the Forest" quilt in time for the Quilt Walk in Blue Jay on Saturday.  This picture was taken when I finished up that all over leaf design that I was really worried about.  As I suspected, when it was all done and you stepped back a bit, it worked out just fine.  I used a light blue thread that blended well with the animal blocks, but stood out from the navy background.

Friends of the Forest - all quilted

In fact, I wasn't the only one that thought so, because it sold at the show!  My daughter was a little dissapointed, but she knows that I can make her another one.

Participants displaying quilts in the Quilt Walk, like many shows, are given the option of including a price in the discription if he/she wants to sell their quilt.  I usually price my quilts according to what they are worth, to me.  After all, I know how much time and effort I put into them, plus I would obviously like to keep them.  For example, last year I displayed my flag quilt (top left pic in the header), and I put a price of $1500 on it.  I had a pretty good idea that no one would buy it for that price, but I also really loved the quilt.  If I was going to part with it, I most definitely wanted to be compensated for the nearly year-long stitching by hand that went into making that EPP quilt.  I am not one of those quilters that just hopes to get the cost of supplies back.  Now, I will admit that this Friends of the Forest quilt was priced a bit more reasonably because I knew that I could make another and would enjoy doing it.

How do you price quilts that you post for sale?

What blocks have you been working on this week?  I would love to see.  Link up your fabulous blocks.  You put a lot of hard work into them - show them off!  This free linky will stay open until the first Monday of next month, but I will repost it every Tuesday until a new month starts.


Quilter in the Closet

Rules:

1) Please link up only to the page on your blog showing your wonderful blocks, not just the blog homepage.  Flickr and Instagram pictures are also OK.
2) Make sure to put your blog name as the description so people know where they are going or the name of your block!
3) Please grab my button and post it in your blog post or sidebar.
4) Visit other linky participants!

Thanks for reading,

Jennie


***This post may contain affiliate links.  If you purchase something after clicking on one of my links, I may be compensated, but at no additional cost to you!

Friday, August 26, 2016

Rainbow Road - a finish Friday

A finish!

Rainbow road

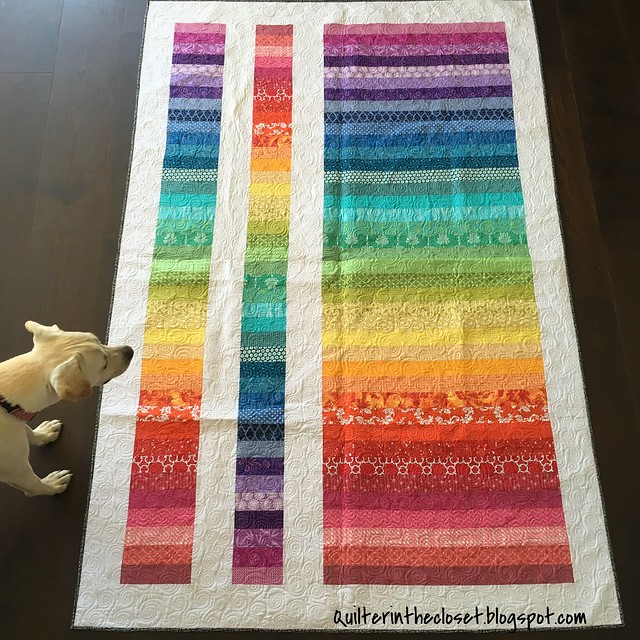
Reagan is surveying my quilting on this Strip and Flip quilt that I am calling "Rainbow Road".  I made two of these tops with the intention of donating one to the quilt auction coming up on September 24th, 2016 in Blue Jay, CA, that benefits the Ability First camp in Crestline.

I was inspired to make this quilt a while ago when I saw my roommate, the lovely Heidi from Buttons and Butterflies, binding one in our hotel room at QuiltCon 2015 in Austin, TX.  It took me that long to get it going!

I am also proud to say that this is the 2nd quilt that I have quilted on my longarm.  I was having a lot of trouble on my practice pieces doing my favorite spirals.  When I was first learning to FMQ on my domestic machine, I found that if I just did a whole quilt with one quilting design, by the end I was much better at it!  So, I implemented this same strategy on the longarm.  I am happy to report that it worked!  My first few spirals were oval or squarish, but by the end, they were round and nesting nicely.  Hooray!

The other Rainbow Road top is destined to be for my oldest daughter.  She had been waiting patiently for me to make a quilt for her.  She is only 10, so she has only been waiting a decade.

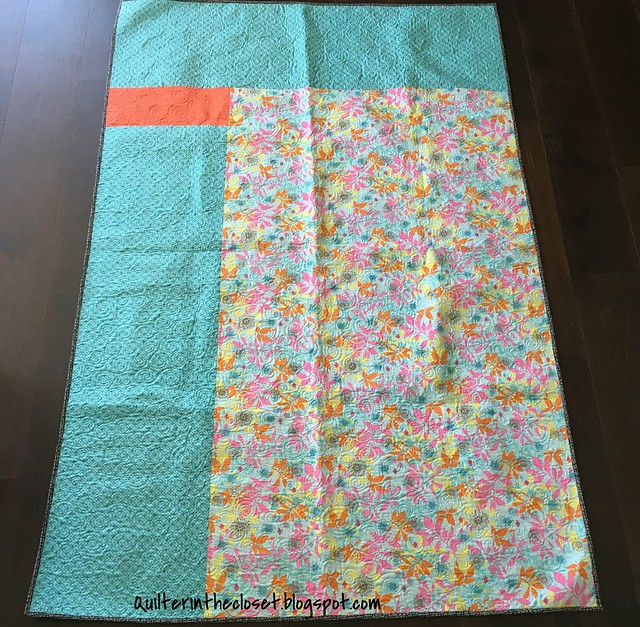
Oh, and here is the back, in case anyone is curious.

back of Rainbow Road


Thanks for reading today,


Jen


Linking up with:


**This post may contain affiliate links.  If you purchase something after clicking on one of my links, I may be compensated.

Friday, February 19, 2016

Wee Wander Spanish Tiles - a Finish Friday

A finish!

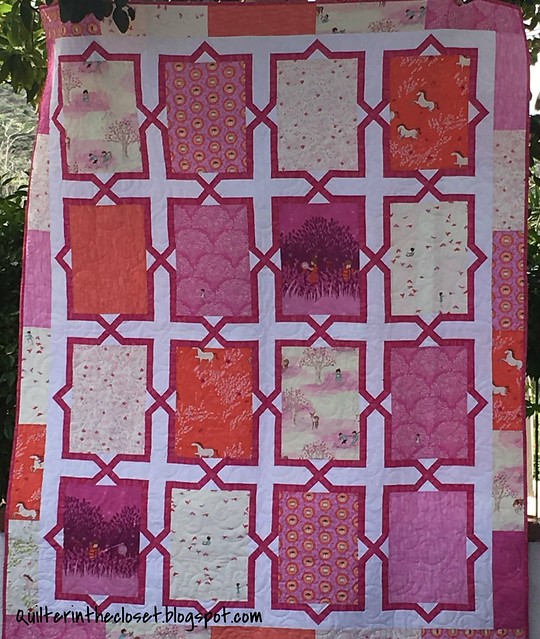
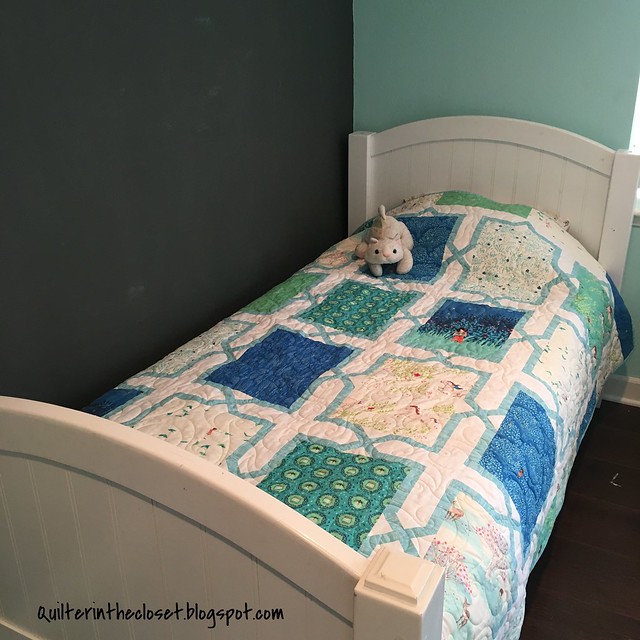
Wee Wander Spanish Tiles in Pink


I really shouldn't be so excited about this one considering how long it has been coming.  I mean I finished the top at least a year ago.  It and its aqua twin, sat waiting for me to quilt it until I got fed up waiting for time and gave it to one of the longarmers in the guild to quilt for me.  It was money well spent as it only took her a couple of days to do both of them.

I finished up the binding on the aqua one just in time for Christmas (quite literally Christmas Day), but the pink one still needed the binding.  Cue a full DVR and a day waiting for some deliveries, and it has finally been finished.

I intended to give the pink one to Olivia, who LOVES pink!  But, she saw that I had unicorn fabric in my stash, and some mermaids and asked for expects a quilt made with those fabrics too.  Cheeky of her!


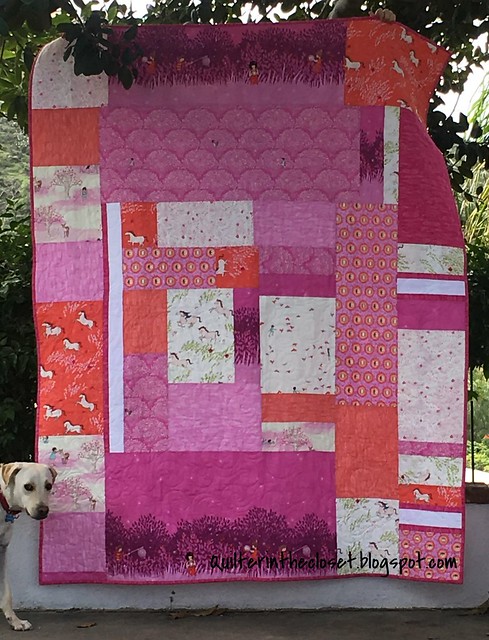
Wee Wander Pink quilt back


For the back, I just took all my leftover scraps of the line and kind of threw them together log cabin style.

The pattern is "Spanish Tiles" by Heather Peterson of Anka's Treasures.  It is in her book, Living Large 2, which focuses on patterns for large-scale prints.  I love the idea of this book, and the designs are really brilliant, using sashing in ways I hadn't thought of.  BUT, I must admit I wish a little more attention was given to the math for the size options.  I made the twin size and had to do some of the border math myself and had quite a bit of waste (which I used on the back, so it wasn't really wasted).

Here is the aqua one too!

Blue Wee Wander quilt - already on DD's bed

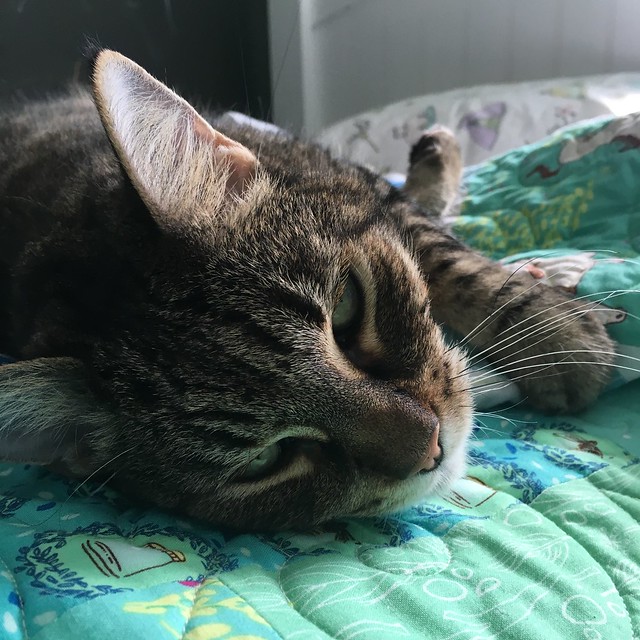
I just love the colors.  So does Tookie!

Drowsy cat


Thanks for reading today,


Jen


Linking up with:


**This post may contain affiliate links.  If you purchase something after clicking on one of my links, I may be compensated.

Friday, January 8, 2016

Deb's NY Beauty Circle of Geese - a Finish Friday

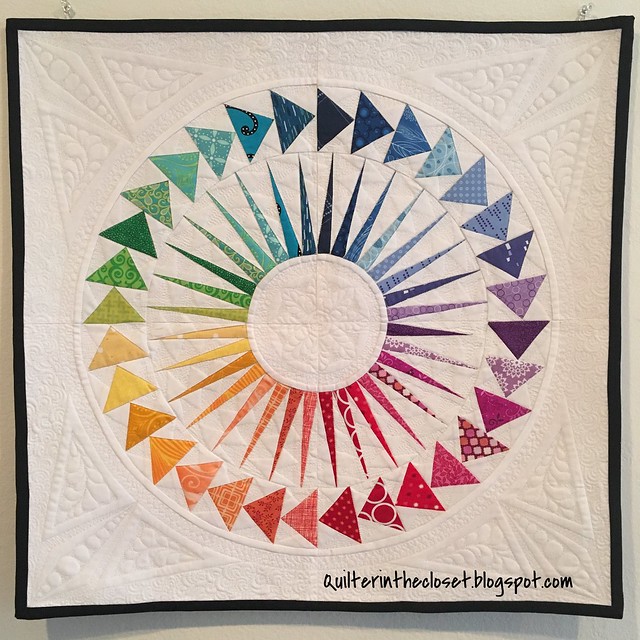
Ladies and Gentlemen.....this mini quilt has been 9 months in the making, which is about how long since I have had a finish Friday!

NY Beauty Circle of Flying Geese Mini for Deb

Deb's NY Beauty Circle of Geese mini is finally finished!  I completed the last few inches of binding up over the weekend.  I am completely ashamed that it took me so long to finish this one up.  Rather than rehash the excuses, I can only ask, and hope that Deb forgives me.

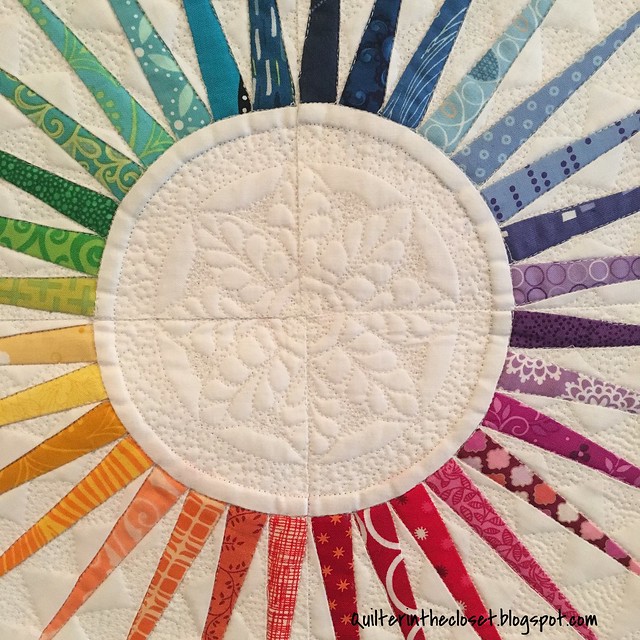
center of Deb's NY Beauty Circle of FG

This Beauty is already on its way to her.  Pray that it doesn't get lost on the way!  I'm not sure how long it will take me to make a replacement, LOL.

Thanks for reading today,


Jen


Linking up with:


**This post may contain affiliate links.  If you purchase something after clicking on one of my links, I may be compensated.

Friday, March 27, 2015

Rainbow Mini - a finish Friday

It's a finish Friday! and a colorful one too.

Rainbow Mini Swap item


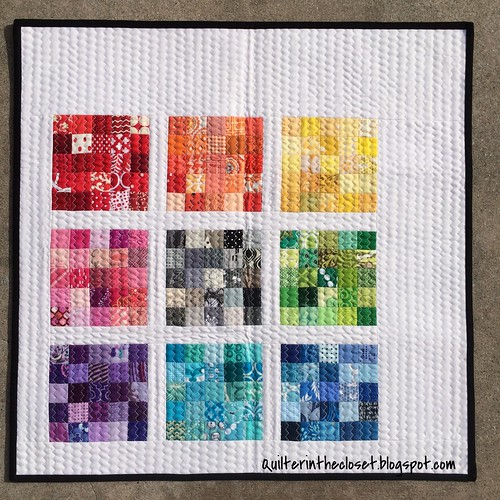
Behold!  My finished mini for the Rainbow Mini Quilt Swap on Instagram.  This mini is about 23 inches square, and each colored block is made of 25 one inch squares.

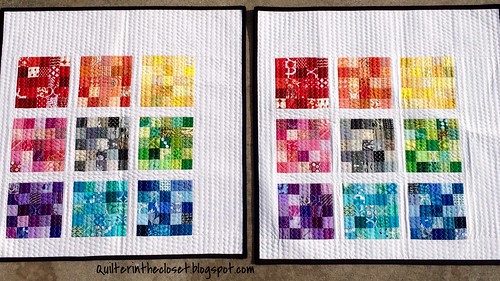
Speaking of those little scraps, I was getting a little nostalgic as I was putting them together.  Most of the pieces came from my scrap bins, and I used pieces not only from my most current projects, but also from my very first quilt!  So, in a way, this quilt sums up the last few years in fabric.  I hope my partner likes it.  I liked it so much, I decided to make one for myself too......

Twinsies!

I mean you can't take a trip down memory lane and not want a memento for your yourself!  Plus it is just as easy to make 2 at once.

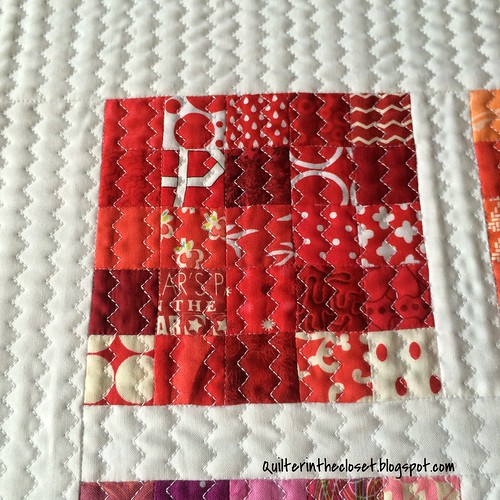
Rainbow Mini quilting up close

I quilted it using my walking foot and one of the more decorative zigzag stitches on my machine.  I learned how to do this in Jacquie Gering's, "Creative Quilting with Your Walking Foot"class (affiliate link**) on Craftsy.  She shares some great tips on how to keep those quilting lines straight!  It is an excellent class if you haven't checked it out - one of my favorites for sure and one I keep going back to for reference.  I reviewed it a little over a year ago HERE if you want to know more.

On to the next mini!  I'm currently working on one for the Spring Fling Mini swap, and I need to get going on my Outlander Craft swap item.  I have several ideas wandering around in my head, but I haven't started anything yet.  Oh yeah, and then there is the Cotton and Steel Mini that needs to be made and 2 fun minis for the winners of the 500+ giveaways.  So, I hope you like minis because it seems like that is what I'm doing around here for a while!


Thanks for reading today,


Jen


Linking up with:


**"Affiliate link" means that if you Purchase something after clicking on one of my affiliate links, I may be compensated.

Friday, March 20, 2015

Tula Pink Mini - finish Friday

It feels like a really long time since I've finished anything.  I guess I've been working on so many different things that "the finishing" has been spread a little thin.

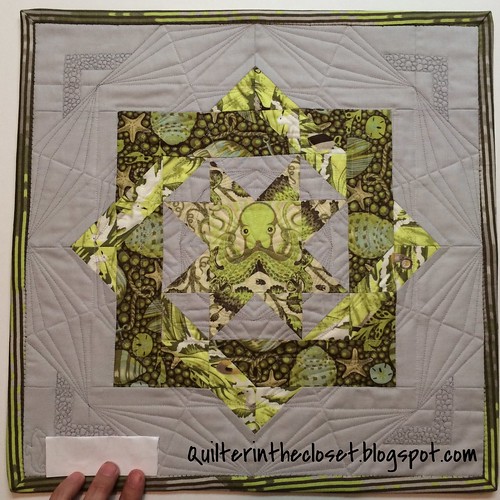
That said, there is nothing like a deadline to spur a finish, and the ship date for the Tula Pink Mini Quilt Swap (through Instagram) is next week.  The theme for this swap was obviously, Tula Pink's fabrics, and we had to use them in the majority.  My partner gave me just the right amount of information to come up with this mini for him/her.


Tula Pink Mini Quilt Swap item - front


This block is the Esme Restyled block, and I found it in issue 16 of Love Patchwork and Quilting magazine.  Lynne from Lily's Quilts had a BOM feature in the magazine and this was one of the blocks.

I was going to try to fussy cut the octopi, but I didn't quite have enough fabric.  In the end, I liked how it seemed like they were peeking out from sections of the block.


Tula Pink Mini Quilt Swap item

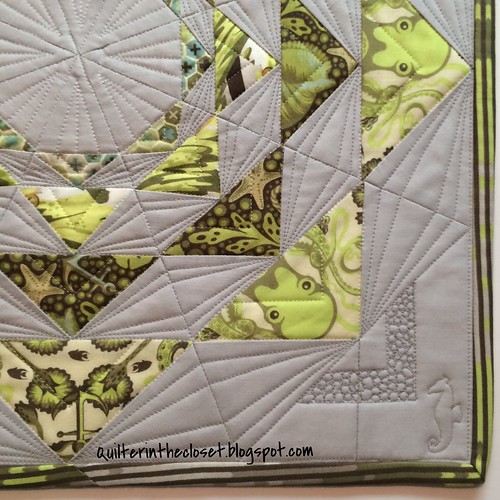
And, of course, I quilted it almost to submission.  On Instagram, I apologized to my partner, trying to explain that I have a condition, a form of neurosis called, Blank Space Aversion Syndrome.  I just can't leave background or solid fabrics alone.  I went on to explain that there was hope - not for this mini, but for future ones - as I did not quilt inside the diamonds as I was tempted to do.  Perhaps these little steps will one day lead to a cure?

I even quilted a little seahorse to go with the Salt Water theme.  It created the perfect place to put my label on the back.


Tula Pink Mini Quilt Swap item (back)


Yep, that is the back.  This swap had a strict "no extras" policy, which I can appreciate, but clearly had trouble with.  I was hoping by making a back just as fun as the front that my partner would have 2 minis in 1, and thus double the fun.  For this reason, I did not put hanging triangles on the back.  I've started hanging my minis with some refrigerator clips from Command.

This block is called the Woven Star, and is a free pattern on the StitchSupply Co's website.

So those are 2 new blocks that I tried out in one little mini!

Well, there it is, all finished up.  I just need to stuff it in an envelope and send it on it's way.  I hope my partner likes it.


Thanks for reading today,


Jen


Linking up with:


Celtic Thistle Stitches  


Friday, January 30, 2015

Feathers on Feathers - a finish Friday

This one has been a long time coming!

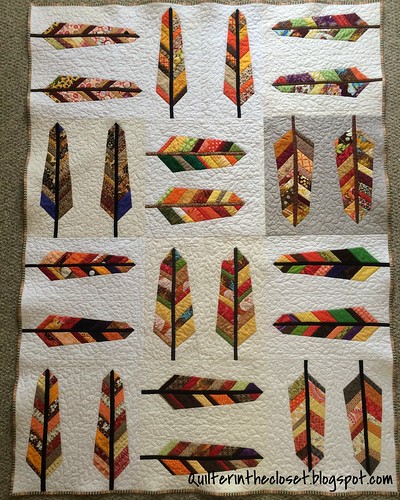
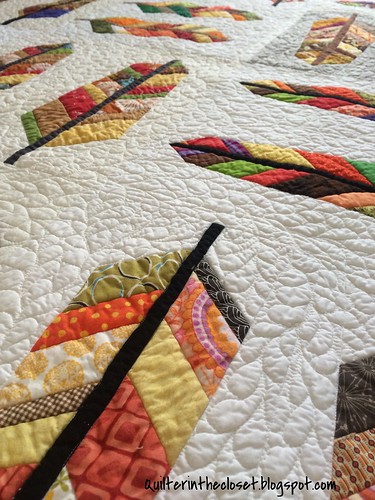
I finally finished my Feather Quilt, made from blocks from my Make It Modern Bee (from ages ago).  It was my January challenge for my Lazy Bum UFO group (it was also my November challenge that didn't get finished).  It's nice to start the year off with a finished challenge.

Feather Quilt Finished!

I asked my bee mates to make feather blocks in fall colors with a white, cream or gray background.  I really love how it turned out.

I also tried out a new background filler - all over feathers.  From a distance, my quilting looks pretty good, but up close, my feathers still look like drunken seaweed.  However, as I tell people who ask about other FMQ motifs, sometimes it takes quilting a whole quilt to really let a design sink in.  I could definitely see some improvement in the plume shapes towards the end.


Feather Quilt

I may need to revisit this feather block again soon too.  I've seen some really lovely mini's made from just one feather.

Also, just a heads up:  I am participating in a Eclectic Elements Blog Hop coming up on Wednesday, February 11th and hosted by Nicola at Sunshine Reflections.   So if you are a fan of the line from Tim Holz, I hope you will stop by and see what I've been making.


Thanks for reading today,

Jen


Linking up with: