Tuesday, May 27, 2014

Open House and Frozen - Building Blocks Tuesday

I hope everyone had a lovely weekend (a nice long one for those of us in the States).

Caution!  Real life ahead - I have no blocks to share this morning, so feel free to skip down to the link up if you only want to see quilty things; last week I was busy with a bunch of other things.....

Thursday night was Open House at the elementary school.  As the art docent for my daughters' classes, I was responsible for saving one of our projects during the year and displaying it in the cafeteria for all to see.  Here is a picture of the kindergarten class projects.

art with the kids open house display 2014

These were abstract paintings of inspired by tribal masks.  Don't worry, I did not advertise my blog there in the center.  I just took a picture of the work before I put up the teacher's name and project title.  I guess I didn't snap a picture of the 2nd grade class display, but their projects were lovely too.

Also at school, the kindergarten class hatched baby chicks just in time for Open House.  My youngest was mesmerized by them.  I couldn't help but post this pic of her little face pressed up against the glass.

Olivia with the chicks

This past weekend was also my middle daughter's birthday.  Of course, she wanted a Frozen themed birthday.  Talk about a challenge!  Frozen is extremely popular and many items are sold out in our area.

Lizzy's 6th Birthday

We got a lovely (and delicious) cake from Torrance Bakery, and they also made us gorgeous snowflake cookies for our favors.  I think getting these cookies was the best thing for favors.  I always stress over putting together little goody bags for our guests, and let's face it, they are usually filled with little trinkets of junk!  These cookies were a hit with the kids and the parents.  I'm definitely doing cookies for favors from now on!

yummy cookies

The day was a success, and Lizzy was very happy.  As you can see from the pic below, she is ready to take over the world.

Lizzy's 6th Birthday


Now back to quilting.....

I've come to realize that my schedule over the summer is going to be a little crazy.  July in particular is extremely busy.  I am wondering if there is anyone out there who would like to host Building Blocks Tuesday during July??  If you have ever visited TGIFF, I'm thinking it would work like that --  you would sign up for a particular Tuesday, show off your work, and I will give you the code for the link up and direct anyone stopping by here where the link up is for the week.  Is anyone interested?  Please leave a comment below or just email me direct at intheclosetquilter(at)gmail(dot)com.

What blocks have you working on this week?  I would love to see.  Link up your fabulous blocks.  You put a lot of hard work into them - show them off!  This free linky will stay open until the first Monday of next month, but I will repost it every Tuesday until a new month starts.


Quilter in the Closet

Rules:

1) Please link up only to the page in your blog showing your wonderful blocks, not just the blog homepage.  Flickr pictures are also OK.
2) Make sure to put your blog name as the description so people know where they are going or the name of your block!
3) Please grab my button and post it in your blog post or sidebar.
4) Visit other linky participants!

Thanks for reading!

Jen


Friday, May 23, 2014

Voting Time! - Blogger's Quilt Festival vote


AmysCreativeSide.com

It's voting time!

Please go on over to Amy's Creative Side and vote for your favorites in each category.  Voting starts today and only goes through Thursday, May 29th.  Also, be sure to check out the Viewer's Choice Award category.  My favorite quilt of Jess at the Elven Garden has been nominated in this category.

There are some stunning quilts this year, and I am sure everyone participating appreciates your consideration.  I know I do!

Monet Inspired wall quilt
My Monet, entry in the art quilt category

Doll quilt turned wall hanging or sewing mat
Quilts and Friends Make Life More Colorful, my entry in the ROYGIV category

Thanks for stopping by today,

Jen


Creative Quilting with Your Walking Foot - a class review and a finish Friday

I've got two finishes to show you this week, and a class review!

Alber's inspired modern mini
Josef Albers inspired modern mini quilt

This is one of the modern mini's I started in March.  I chose several modern artists and made mini quilts inspired by their work.  The quilt above was inspired by Josef Albers and his Homage to the Square series.  Those are all Kona solids, and I quilted it using a radiating lines design with my walking foot.

Next up, is a mini inspired by the work of Mark Rothko.  I used a mixture of Kona solids and Free Spirit solids for this one.  I quilted curvy lines with my walking foot.  I just love the texture it gives to the quilt without throwing the simplicity of the piecing design off balance.

Rothko inspired modern mini

The piecing and color play of these minis were not difficult; however, deciding how to quilt them was a bit of a challenge.  I was afraid that my usual "quilt the daylights" out of a piece would ruin the simple lines of the piecing.  Lucky for me, a solution presented itself when I took a new Craftsy class by Jacquie Gering called Creative Quilting With Your Walking Foot (affiliate link).  Jacquie teaches how she likes to quilt her beautiful modern quilts, using her walking foot.

I feel using a walking foot takes a little stress out of quilting.  With free motion quilting, you have more variations in design possibilities, but you have to constantly be thinking about consistent stitch length.  The walking foot is essentially designed to give you consistent stitches.  If you thought you would be limited to just straight lines, you are wrong.  Jacquie shows how to do curvy lines like the ones in my Rothko quilt above, as well as circles and spirals.  There are also segments for radiating designs like the ones in my Albers inspired quilt above, turning designs, how to quilt text into your background (like she did on her Building Bridges quilt below), and even a segment on how to use some of your decorative stitches with your walking foot.  Want to know how to do matchstick quilting?  It's covered!

"Building Bridges" by Jacquie Gering and Sheryl Scheicher, close up
quilting text into your background like this on "Building Bridges" by Jacquie Gering

This class would be excellent for someone just learning how to quilt and who might be a little timid about free-motion quilting.  It would also be great for someone who does a lot of free-motion quilting and might want to change things up a bit.  Jacquie shows you that there are multiple looks you can achieve with your walking foot and that you aren't limited to straight lines in the ditch.  I really enjoyed the radiating lines segment, and I am really looking forward to trying continuous spirals on my next modern mini.

Jacquie's teaching style is so relaxed.  If you've been reading my blog for a while, you know I am not very friendly to the idea of "Quilt Police".  That's not to say I am a "rules are meant to be broken" type of gal either.  It is just that I quilt to have a creative outlet and to have fun.  If I allow myself to get too weighed down with "should's" and "always" rules, it becomes a little less fun for me.  Jacquie does an excellent job of teaching you how she does these techniques, without any egotism about it being the only way.  Plus she is light and funny.  I feel like I could spend days with her and the time would just fly by.

I highly recommend this class!

Thanks for reading today,

Jen


Linking up with:


Tuesday, May 20, 2014

A Snail's Pace - Building Blocks Tuesday


September 2013 Lucky Star BOM

I finished up another Lucky Star block from Don't Call Me Betsy's 2013 Lucky Star Block of the Month.  This one was September's block.   At this snail's pace, I might be done with my quilt top by this September - LOL!

I will be spending the rest of the week preparing art for Open House at the elementary school.  I've got a bunch of painting to mat and display for Thursday night.  Then on Friday I get to take them all down again.

I should also have a finish to share on Friday.  I hope you will come back to see it.

What blocks have you working on?  I would love to see.  Link up your fabulous blocks.  You put a lot of hard work into them - show them off!  This free linky will stay open until the first Monday of next month, but I will repost it every Tuesday until a new month starts.


Quilter in the Closet

Rules:

1) Please link up only to the page in your blog showing your wonderful blocks, not just the blog homepage.  Flickr pictures are also OK.
2) Make sure to put your blog name as the description so people know where they are going or the name of your block!
3) Please grab my button and post it in your blog post or sidebar.
4) Visit other linky participants!

Thanks for reading!

Jen


Saturday, May 17, 2014

My Monet art quilt - a Blogger's Quilt Festival entry

Welcome those of you visiting from the Blogger's Quilt Festival at Amy's Creative Side.  My I present my entry for the Art Quilt category: My Monet.

Monet Inspired wall quilt

I created this quilt for the 2014 Pantone Quilt Challenge.  It was inspired by an art lesson that I taught about Monet's Houses of Parliament series of paintings.

My Houses of Parliament close up

I had so much fun making this quilt!  And I must admit, it came out MUCH better than the painting I made during the art lessons!!  I am embarrassed to even show that.

My Monet stitching

I think it is Purpilicious!

Quilt Stats:

Size:  This wall quilt measures 19 inches by 15 inches
Design: is inspired by Monet's Houses of Parliament series of paintings, and an art lesson taught through the Hands on Art program at my daughter's school.
Techniques: I used fusible to create the scene, then quilted the daylights out of it!
Quilting: by Me!  I used a variety of threads for the quilting.  Basically anything I had that was purple; I know several of them were Auriful.  The gray threads were a So Fine Superior Thread.
Fabric: various Kona cotton solids.

If you are interested in a more detailed step by step how I made this quilt, I took photos along the way and here is the tutorial so you can make your own Monet.

I hope you will consider my entry in the art quilt category.

Thanks for stopping by,

Jen


AmysCreativeSide.com

ROYGBIV quilt - a Blogger's Quilt Festival entry

Welcome to those of you visiting from the Blogger's Quilt Festival at Amy's Creative Side.  I would like to present my entry in the ROYGBIV category (or the Rainbow category as I like to call it).

Doll quilt turned wall hanging or sewing mat

I made this quilt for my dear friend, Benta, a few months ago.  The pattern is NY Beauty Circle of Flying Geese by Better Off Thread.  (you can get it in various places including HERE at Craftsy).  I added pockets, a thread catching bag, a loop for scissors (per request) and some loops at the top for hanging.

Doll quilt finish

As you can see, I quilted the daylights out of it, but it was so much fun!

Center of my mini quilt

I also added a little message to Benta in the center using some Rainbow variegated thread.  Friends and quilts really do make life more colorful!

Here are the Quilt Stats:

Size: approximately 22 inches x 28 inches
Pattern: NY Beauty Circle of Geese by Better off Thread, plus a little pocket of my own design
Quilted by: ME!  I used white So Fine thread by Superior Threads, and a Rainbow variegated thread also by Superior Threads

I hope you will consider my entry.

Thank you for stopping by!

Jen


AmysCreativeSide.com


Hands 2 Help finish - a finish Friday-ish

I have a quick finish to share with you today.  It has actually been done for a few days.  I was waiting for Friday to link up with all the finish Friday links, but got so busy on Friday that I never had time to sit down and write this post.  That's just the way it goes around here.  Oy vey!

A couple of months ago, I visited the Glendale Annual Quilt Show in Pasadena, CA.  It was a lovely small show, complete with a ton of raffles and door prizes.  I actually won one of the door prizes and it included this quilt kit.

quilt kit turned charity quilt

Now, these fabrics weren't exactly "my style", which I find funny because I am still trying to figure out what my style is!  But, at this point, I find it easier to identify what ISN'T my style, and these fabric weren't.  Since I still needed to make a quilt for the Hands 2 Help charity quilt challenge, it seemed fortuitous that this quilt kit become one of the quilts for the drive.

I even tried using the pattern that came with the kit, but ran into some little execution problems.  First, the kit didn't quite follow the supply list for the pattern.  Also, if you look at the fabrics included, there are a lot of lights, one medium (the yellow) and one bold color (the red).  It didn't seem like this pattern was going to look right with that imbalance.  So, I looked through my stash and added a dark blue to the mix.  Another execution problem came with the piecing.  Despite reading the pattern a couple times before I started, my brain did not take notice of one of the steps.  And as many of you know, once fabric is cut, it is a little hard to make it bigger again.  I made the mistake of cutting all of my pieced strips into units, and I was supposed to leave a few of them long.  DOH!  So I had to improvise a little and arrange the units in a different configuration.  I think it still looks alright...

Hands 2 Help front

For the quilting, I just did some organic chevrons with my walking foot.

Hands 2 Help charity quilt - quilting

And I was able to use that one big cut of the yellow fabric as the back.  It was a tight squeeze, but it worked.

Hands 2 Help back

Have you ever won anything that wasn't your style?  What did you do with it?  Give it to a friend?  Put it away in case your style changes one day?

Thanks for reading today,

Jen


Linking up with:


Thursday, May 15, 2014

How to pin baste a small quilt - a How "I" do it Tutorial

Want to know how to pin baste a quilt?  Check out this free tutorial.

Continuing with some of the process of "finishing" your quilts, today I am going to share how I pin baste a small quilt.  I say "small" but I am really talking about a quilt larger than 30 inches square.  I consider anything smaller than 30 inches a "mini" quilt, and I baste them differently.  Larger than 30 inches, we are talking about baby quilts that are likely to be USED.

Why is that important?  I suppose it is not vital.  But if a mini quilt is going to be hung on the wall, it is not a huge, life shattering matter if there is a small pucker on the back.  No one is really going to see it unless they take the quilt off the wall.  But, if a quilt is going to be used, there is a good chance that someone is going to see the back as often as the front and I don't want any puckers in the quilting.

Where am I going with this?  I spray baste my mini quilts.  Spray basting is not as secure as pin basting.  Things can still shift a bit and cause puckers.  On a mini quilt, the surface area is much smaller so the puckers are small; whereas across a bigger quilt and more surface area, your puckers can be pushed and pushed across the quilt and end up HUGE.  Pin basting is a bit more secure for baby quilts and larger - not to mention much easier to do by yourself!!  Let's get started.

My basting table

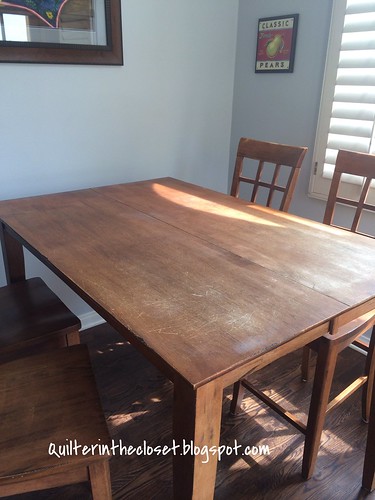
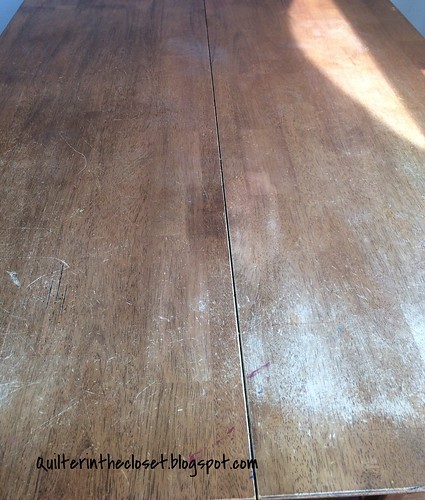
I pin baste on my kitchen table.  This table is great for many reasons:
  • It is already all scratched up thanks to the kids
  • my basting table
  • It has a leaf in it which allows me to expand the table from about 36 inches wide to 54 inches wide for bigger quilts.
  • It is less than 1 inch thick all the way around, so I can use binder clips easily
  • Without the leaf in, I have this nice seam right in the middle of the table.
What if I don't have a gorgeous table like yours?  Well, you can baste on the floor, or there are other clips you can use if your table is a bit thicker (for example, I have a craft table from Costco, but it is about 2 inches thick - I could use picnic table clips in this case).

Just keep in mind that whatever you use, the pins will leave tiny scratches.  So I don't recommend basting on any surface that you don't want scratched up.  Also, don't baste on carpet.  You will just end up pinning your quilt to the carpet.  So pick a hard surface that you don't mind scratching up - a clean garage floor would be my personal 2nd choice for example.

Step One: Prepare your layers

Before I begin, I press both my backing and quilt top.  My backing is usually at least 3 inches larger, on all sides, than my quilt top, and my batting is about the same size as my backing.  Personally, I haven't found these "extra" inches that important in the shifting of the layers while quilting as it is in the difficulty of lining all the layers up in the basting process.  No matter how perfectly centered I think my backing and batting layers are, they end up getting smoothed out of alignment a bit and those extra inches come in handy.

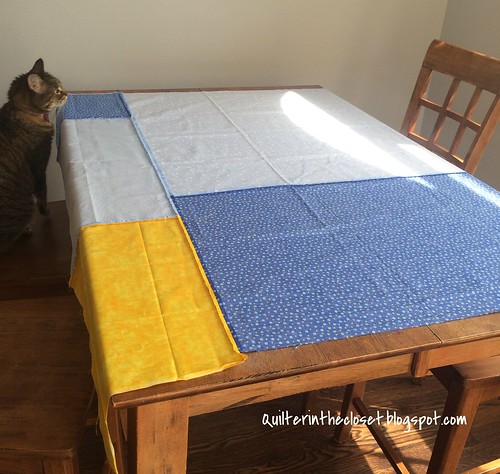
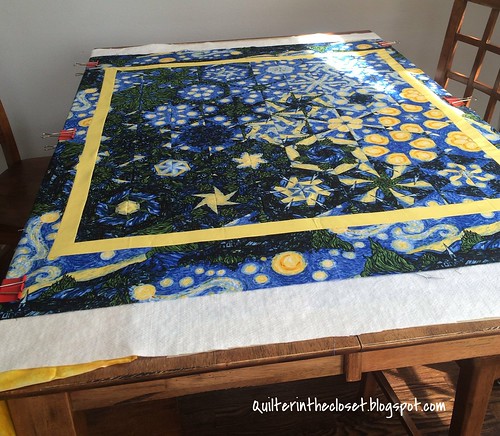
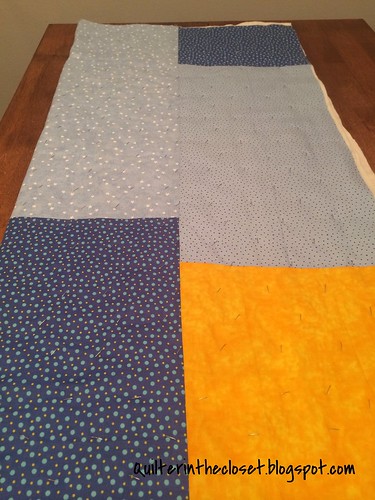
Step Two: Place your backing on the table

Place your backing, right side DOWN on the table.

basting

For small quilts, I find it pretty easy to guess where the middle of the backing is, but if you want a process that is a little more accurate, see the way I lay out the top below and do the same for the backing, making sure that it is right side down.

helper cat, basting

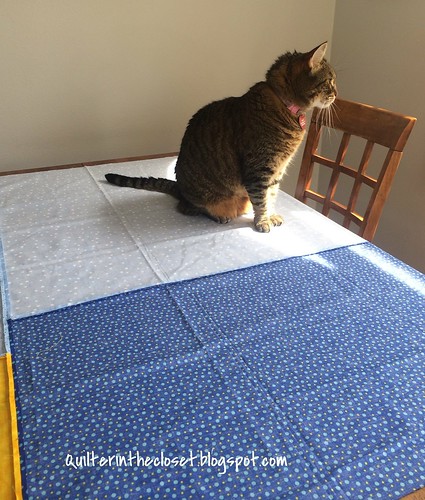
Make sure your "helper cat" is in place.

secure backing to table

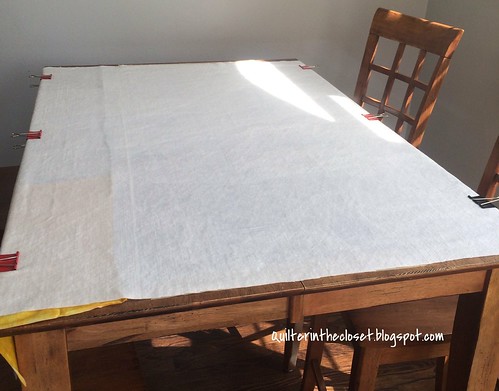
And clip your backing into place.  Please notice 2 things in the picture above.  First, my table is 54 inches long and is too long for the length of this quilt.  SO, I have used plain old masking tape to tape those edges to the table.  If you are working on the floor, this is what you will do instead of clipping (you can't clip to the floor, can you?).  Also notice that many of those tiny fold marks (that for some reason didn't press out) that are in the pictures above have been SLIGHTLY stretched out.  I don't advocate pulling your backing so tight that all those fold marks are completely gone.  If you run your fingers along the backing, it should still move slightly.  Otherwise, when you release your pinned quilt, the backing is going to be tighter than your batting and top and will seize up creating puckers on the FRONT of your quilt.

Ideally we are going for all your layers to be the same "tension" -- smooth, but not tight.

Step Three: Put your batting on the table.

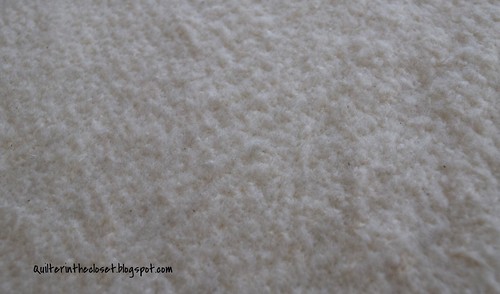
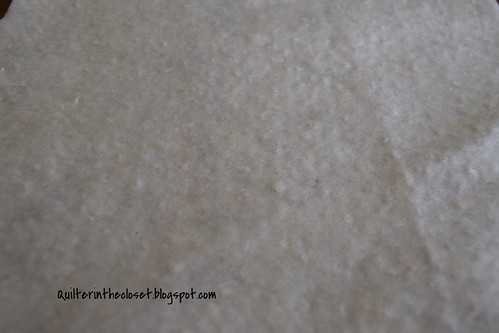
Did you know batting has a right side and a "wrong side"?  It does.  Well, at least cotton batting does.

If you look closely at your batting, and I mean closely.  You will notice a bunch of little holes.  Those come from the process of making the batting - they actually punch it with a bunch of needles to make the cotton play nice.  They punch those needles from one direction.  The "right side" of the batting is where those needles entered the batting.

right side of batting

The "wrong side" is where the needle punched through.  So while your wrong side will have some holes in it, it also has some little nubs where the cotton was pushed out of the way by the needles.

wrong side of batting

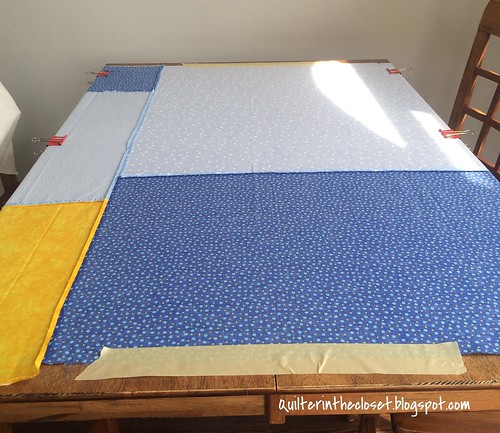
Since you will essentially be punching your needle through the batting during the quilting process, you want the right side of the batting to be up when basting.  So put your batting on the table, right side UP, and clip it to the table using the same clips you used for your backing.  I like to squeeze the area right next to the clip, holding the layers in place while I re-clip.

batting goes next

I usually DON'T tape down my batting.  Keeping my backing in place with tape is important.  The batting will stick to the backing enough to keep it reasonable in place on those edges.  If my quilt had been large enough to cover the table completely, yes, I would have re-clipped on all sides.

Step Four: Time for the Quilt Top

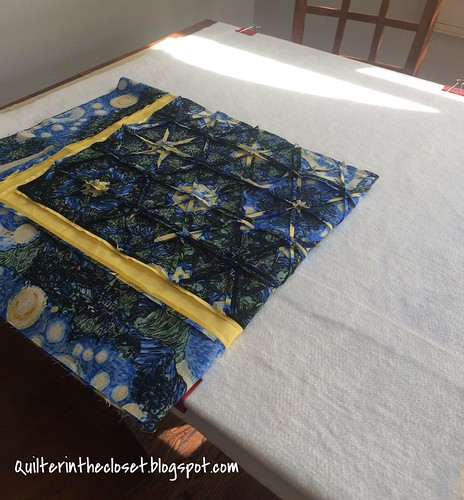
Fold your quilt top in half, wrong sides out, and then in half again (wrong sides out).  Now place your folded quilt in a quarter of the table (easier to show in a pic than say in words).

time for the top

I've lined up my folds to be on the center lines of the table.

basting, top

As I unfold my quilt top, it will be centered on my table.

basting, top

Once it is all unfolded.  I smooth it out from the center out and clip it to the table.

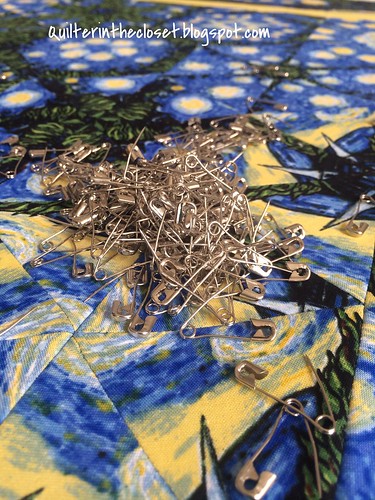
Step Five: Get out your pins!
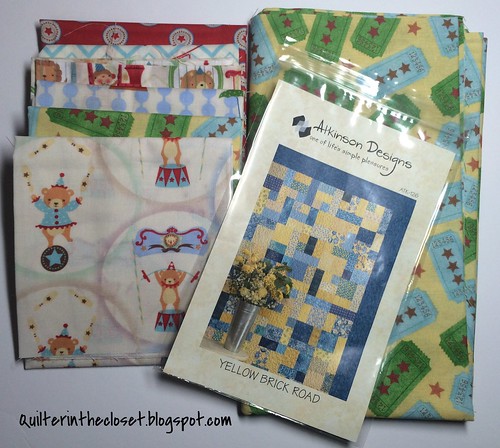
get out your pins.

I use Dritz Quilting Curved Basting Pins  ( this is an Amazon link (use a coupon at Joanns and get them even cheaper)).  How many do you need?  LOTS!  It depends on how large your quilt is.  For a small quilt, you can probably get away with a pack or 2 of 300 pins.  I personally own  over 3000 pins at this point because sometimes I like to have more than one quilt basted and waiting for me to get around to quilting it.

The curved pins are a bit easier to use in the basting process.  Plus, buying pins specific to quilting usually means they are plated differently than regular safety pins, which means they shouldn't rust.

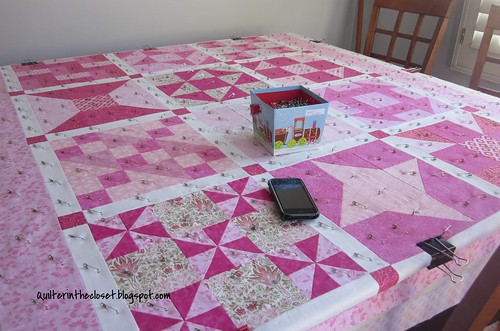
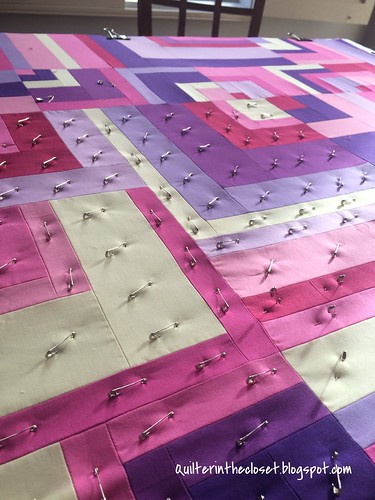
Start along the center lines of your quilt and pin all your layers together by sticking a pin in from the top, hitting the surface below (the table) and then pushing the pin back to the top layer.

pin basting

I like to pin one quarter of the quilt at a time, but that has more to do with how my table is set up.  I just have to move from one chair to another to get to the next quarter of the quilt.

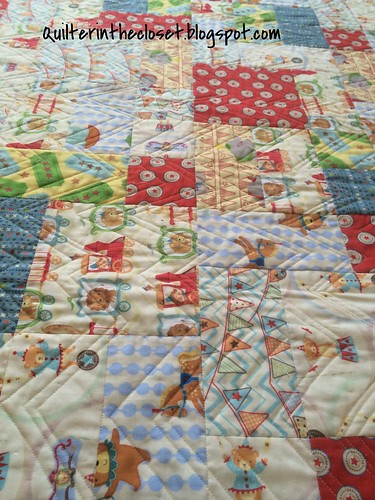
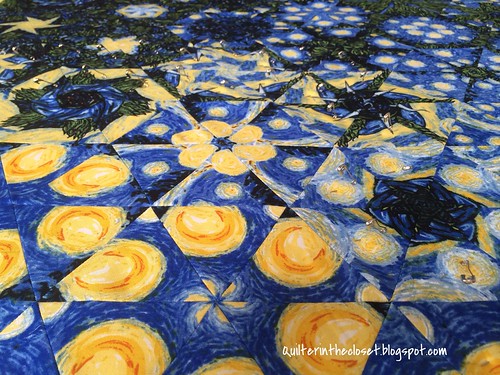
Pin at least every 3 to 4 inches.  I've heard many people say that if you put your hand down on the quilt, it should be touching at least one or two pins.  But you should also place your pins where they make sense.

I think about the blocks themselves and let their designs dictate where I place my pins rather than just a standard every 3 inches in rows.

BQA finally basted

Also remember, what are you going to do after your quilt is basted?  Quilt it, right?  So, when possible, I also like to pin far enough away from the seams that I don't have to move the pins when I stitch in the ditch.

basting another pink baby quilt

There really isn't any such thing as too many pins.  As you can see in the picture above, my pins are much closer than 3 inches apart in some areas.  Yes, it took longer than if I just placed pins in rows, but I also didn't have any shifting when I quilted it.

Soon, the entire surface showing on the table will be pinned.

pin basting

Um, Jen?  What if my quilt is bigger than the table?  Well, you do need to pin those areas too.

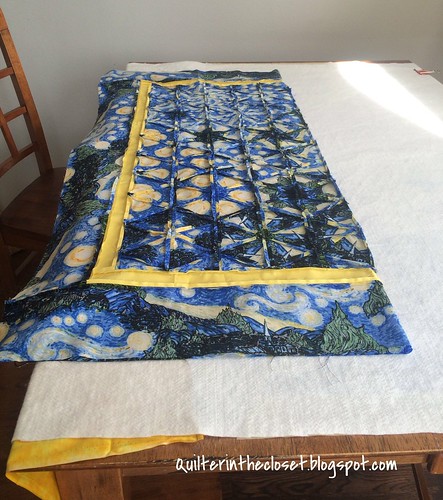
Un-clip your quilt completely, slide your quilt in one direction** to get a long (border in this case) section of the quilt onto the table, clip the opposite side first, then reach under your quilt and grab your backing, pull it slightly (again not to tight) and clip it to the table, smooth out your batting and clip it to the table, then smooth out your quilt top and clip it to the table.  You are essentially building the tension in the same way you did the original setting of the quilt, that way all your layers are the same.  (I don't bother re-taping for such a small area.)

You only want to slide the quilt so that the edge of the quilt is on the edge of the table.  That way it is still able to be clipped into place.  Cindy Needham also recommends that you leave at least 6 inches of pinned quilt on the table to avoid puckers.  For this small quilt, I only had a few inches that didn't get basted during the first set up; but for larger quilts, you might have an entire table worth of un-pinned quilt. In that case, you would need to leave 6 inches of pinned quilt on one side of the table, clip it in place, pin the exposed quilt, un-clip it, shift the quilt again and repeat the process to finish up any un-pinned area.  I hope to address this in another tutorial.  I just have to get my big Swoon quilt ready.

basting borders

**Why only one direction (or side of the quilt) at a time?  For example, readjusting to get a whole corner of the quilt.  This is another tip I picked up from Cindy Needham.  If you shift your quilt to expose more than one side a time, you are adjusting the tension of your backing and batting layer in a different way than your original set up.  Thus, you are more likely to get weird puckers in those areas.  I didn't want to believe Cindy, but through trial and error, I have found this to be true.  If I don't get a strange pucker, then I get a stretched out corner.

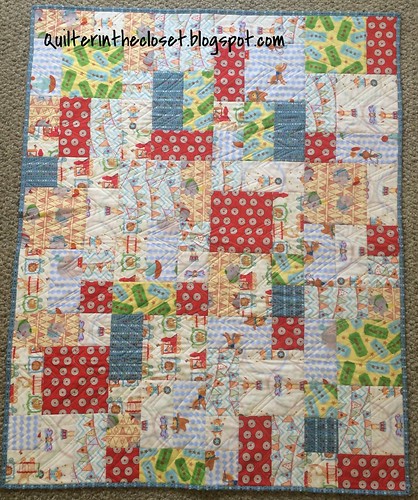
Step Six: Check the back.

When you have your entire quilt top pinned.  Un-clip your quilt, flip it over and look at the back.  Check to make sure you don't have any puckers, and that your pins went all the way through the layers.

basting, check the back

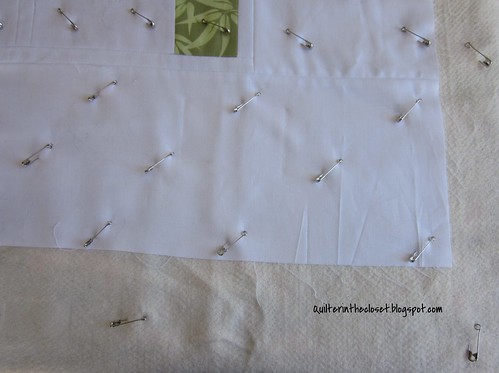
One final tip for beginners.  You might consider pinning a little off the quilt.

Basting tip

Why?  When you are quilting right up to the edge of the quilt, and rotating it, etc.  It is really easy for those "extra" inches of backing and/or batting to roll under the edge of your quilt and get quilted.  It usually isn't any more than an inch or two, but man is it a pain in the butt to discover after you are all done, that you have to pick out the stitching in those areas.  Pinning off your quilt an inch or two (and you don't need to keep the "every 3 inches" guideline) keeps those areas clear.  It only takes a few extra seconds, and is well worth it.

And don't forget to have your "helper" hold down the quilt when you are basting it.

Tookie helping me baste
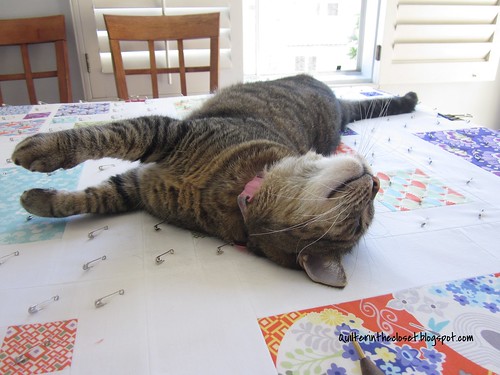
Using a cat to weigh down your quilt as you baste it, is always recommended.

How do you do baste your small quilts?  Link up your tutorials here (on this or any other quilting subject).


Rules:

1) NO QUILT POLICE ALLOWED! - if you are making a tutorial, keep it friendly, as if you were teaching your best friend.  If you are visiting a tutorial, please remember that the authors are simply sharing what they have found to work for them.

2) Please link up tutorials from 2014 only.  Feel free to point out any previous tutorial in your new post, but let's try to keep the links current.

3) Visit other linky participants to see how they do it.

4) Did I mention no quilt police allowed?

Thanks for joining me today!

Jen