Since the theme of the Let's Get Acquainted Blog Hop is novelty prints, I figured it was the perfect opportunity to try out a few new techniques.
I only thought it appropriate when using novelty prints to use a fussy cutting technique. I mean, what is the point of all those cute little prints if you can't showcase them? I haven't done much fussy cutting in the past, and it does seem a little wasteful, but I tried it anyway. And, what better way to frame up those fussy cut items than a stained glass inspired quilt?
This is semi-improvisational piecing due to the random sizes of your fussy cut items. The fabric I have chosen, Peak Hour by Riley Blake, has a rather wide range of sizes of the subject matter in the prints. Because of this, the amount of fabric you need might vary greatly depending on your subject matter sizes. Here are some approximations of what you need:
- 1 yard of solid for the sashing to frame up your blocks (I used black)
- 1/2 yard of large sized novelty print
- 3 times 1/2 yards of medium sized novelty prints
- 4 times 1/2 yards of blender fabrics to be used as "fillers" (I used the red dot, blue dot, the newspaper print and the stripe fabric as my fillers)
- 1/2 yard of binding fabric
- 1 1/2 yards of backing fabric
Step One:
Start fussy cutting out some items from your large and medium sized prints. Just place your ruler on your subject matter and cut around it. Remember to leave at least 1/4 inch around your focal point for the seam allowance. I chose to keep my fussy cut items in squares and rectangles, but this quilt would work "wonky" too, and likely look marvelous!
Soon, you will have a whole pile of fussy cut items.
Step One and a Half:
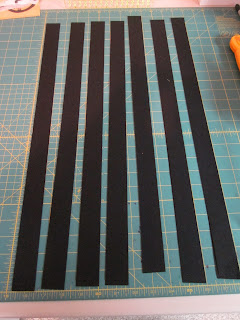
You might as well cut some sashing strips while you are at it. I cut mine at 1 1/2 inches wide, and yes, I starched the heck out of the fabric before cutting it! Keep these nearby as you will be cutting them down to size as you go.
Step Two:
Take your largest fussy cut item and add sashing on two sides by measuring the side(s) and cutting the sashing to measure the same. The picture below shows items completely framed by sashing - I learned as I went that I actually wanted to expand my blocks in one direction (say, right to left), and then in the other direction (up and down). This was easier if I added the sashing on only 2 sides at the beginning.
Step Three:
Start adding blocks together, making sure there is sashing between each one. Soon, you will have a decent start to your quilt. Notice how I used the blender fabrics (below the red, blue, stripe and newspaper print) to "fill" in the block to make it square. This is important if you have all different sized fussy cut blocks like I did. Yes, this required math, I mean, a calculator nearby and it was used frequently (especially since that target circle was actually cut at a size with 1/8 inch), and I did make a few mistakes here and there and had to rip and re-cut a few times. Don't get too frustrated, it is part of the process.
Keep adding fussy cut items and fillers until the quilt is the size you want. I found the more random the placement of things, the better it looked.
I chose not to add an additional border. At this stage I just backed, sandwiched and started quilting. I was going to go with an all-over quilting design of cars and trucks, but in the end I just quilted straight lines in the sashing and was pleased with how it looked. If I had more time, I might have even hand quilted lines in the sashing to look like the dashed lines on a highway, but alas, I did not have the time this go around. If you are interested in the car/truck quilting design, you can email me.
I hope you enjoyed this project. This quilt is travelling with me next week to Prince Edward Island, Canada to be given to my cousin's baby boy. They live in Australia, so the little kangaroo crossing sign seemed a bonus feature of this fabric!
Thanks for reading! I hope you visit again soon.
Jen


That's gorgeous Jen, I'm loving all that fussy cutting. Your cousin and her little one are going to love it too :)
ReplyDeleteJen, I just love this quilt is so beautiful and your fabric choices so cute. I love the little cars.
ReplyDeleteI Love this quilt! It is just so cute, and your tutorial was great, and now I want to make one. You are so clever and creative. I love how the black makes the colors in the fabric pop. I love it all.
ReplyDeleteSweet quilt for a sweet child. Thanks for sharing...Judith, Texas
ReplyDeleteI really like this project! Especially the whole improviness of it all. I have wanted to do one of these before but I really didn't want to take the time to.do all the required math.
ReplyDeleteThis quilt looks awesome! I have some fabric that is calling for this pattern:)
ReplyDeleteThat's such a clever idea, and it looks gorgeous - perfect for a little boy!
ReplyDeleteVery nice. Love the kangaroo!
ReplyDelete