Showing posts with label bags. Show all posts

Friday, May 1, 2015

Outlander swap tote - a Finish Friday


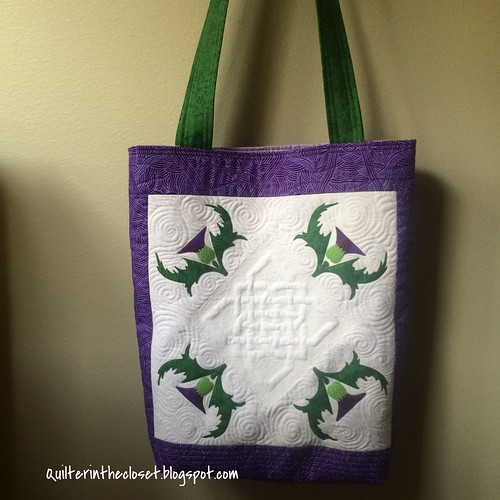
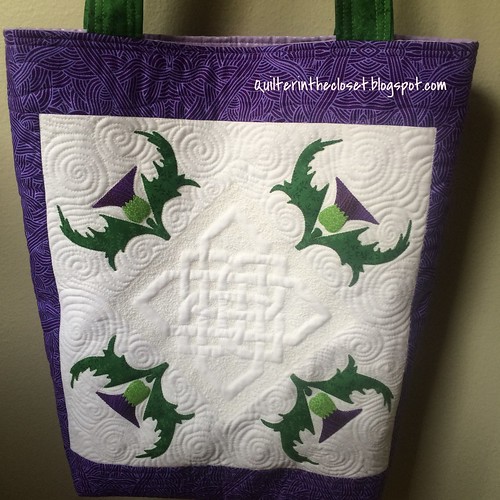
Finished tote for Outlander craft swap

Behold!  My finished tote for the Outlander Craft Swap.

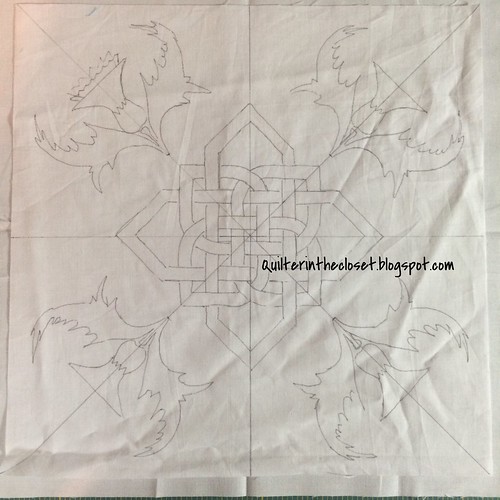
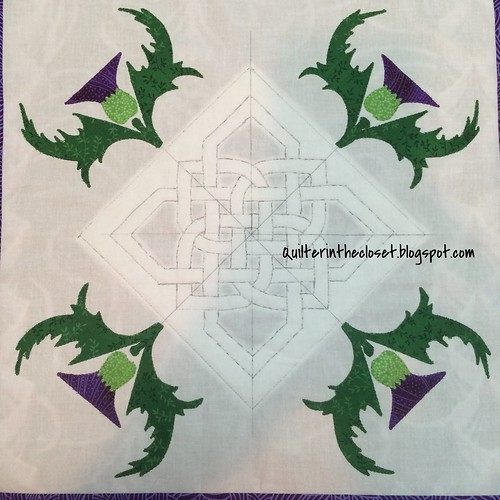
It started with a plan....

design for Outlander swap

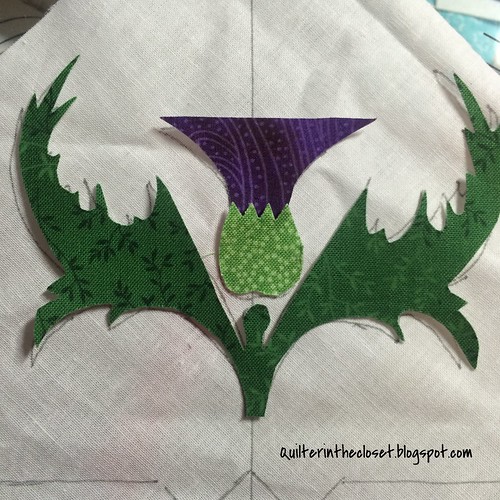
Then, I got to work on the thistle applique.  I used a fusible to help give me a bit of support for those tiny jagged leaves and keep them in place.  Then I used a small blanket stitch to machine applique them to my white background.

Thistles in progress

Next, I moved onto the trapunto for the knot portion.  I have not done trapunto before, so I was kind of winging it.  I put a small piece of batting behind the knot, then stitched on the lines of the knot. Then I used my applique scissors to trim the batting away as close to the stitching lines as possible in the areas that I wanted to be shaded.

Outlander swap item, work in progress


Then, I added batting to the entire piece, and when to work adding quilting to the shaded area of the knot.  I used Cindy Needham's "Scribbling" technique to do this.  She talks about it a lot in her Craftsy class, Design it, Quilt It - with Cindy Needham (affliate link**).  I highly recommend this class!!!  It is chock full of awesome quilting designs.


Celtic knot in progress

When I was all done quilting the knot, I moved on to the background behind the thistles.  Can't not have some swirls!

Next, I turned the whole thing into a tote bag.  I debated making it a pillow.....it would have been a lovely pillow.  But, I thought my partner would never get to show it off if it was just a pillow.  Rarely do I see people walking around town with pillows in their hands.  So, a tote.  A nice, useful, practical tote (with an interior zip pocket and a regular interior pocket too).

My finished tote for the Outlander Craft Swap

I hope my partner likes it!  I used up practically all of my favorite 2 purple fabrics.  I hope she likes purple!


Thanks for reading today,


Jen


Linking up with:


**This post contains affiliate links.  If you purchase something after clicking on one of my links, I may be compensated.

Friday, August 22, 2014

Another Tinker Tote - a finish Friday

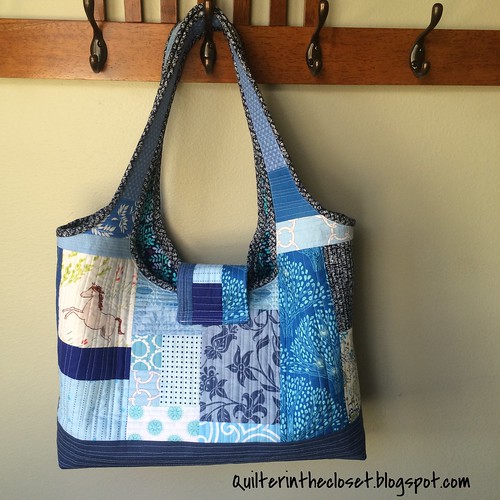
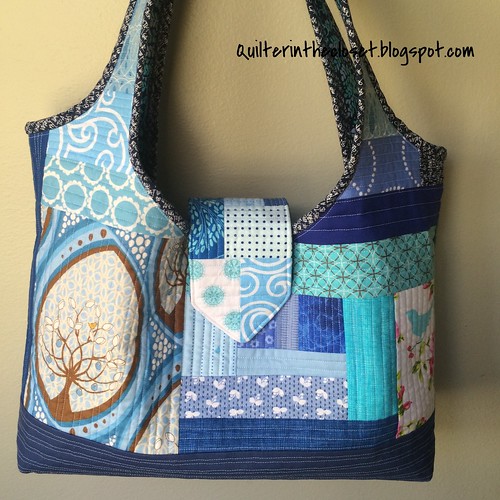
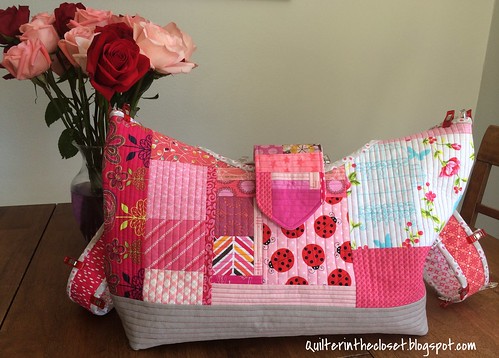
I've made another Tinker Tote from the Craftsy class,  "Quilt-As-You-Go: Patchwork Bags with Tara Rebman" . It seems these fun little totes are becoming my "go-to" handmade gift this year.  This one is for Arianna, who is visiting from Italy.

**This post contains affiliate links and I will be compensated if you make a purchase after clicking on my links

Tinker Tote #4, front

It takes me about 3 days to make one of these bags.  Usually around the time I making the bias binding, I start thinking about how I probably could have made a simple quilt in the same amount of time.

Tinker Tote #4, back

But, since Arianna will likely not have room for an entire quilt in her luggage anyway, I am happy I made her this bag instead.

Tinker Tote #4, front

Her favorite color is blue.  I had to add in some aqua scraps to fill out the bag.  I hope they make it "interesting" and not just "weird".

If you want to make your own Tinker Tote (cough, Patti), I highly recommend  "Quilt-As-You-Go: Patchwork Bags with Tara Rebman" - I reviewed the class HERE.   I also talk about the adjustments I made to the pattern for my 2nd bag  HERE.

Thanks for reading today,

Jen


Linking up with:


Wednesday, June 4, 2014

Teacher gifts in progress - WIP Wednesday

Before I begin, I want to thank everyone who left a comment on my recent post about originality in patchwork.  Your advice and encouragement are just what I needed to work out my own feelings and move forward.  Thank you all!

There are only a few more days of school left, and I can't believe how much there is still left to do.  I've focused all my spare time on teacher gifts and I'm nearly done.

teacher gift in progress

I'm working on a Divided Basket (pattern from Noodlehead), and my 3rd Tinker Tote from the Craftsy class, "Quilt-As-You-Go: Patchwork Bags".

Tinker tote #3

I just need to sew down the binding on the tote, and of course fill both with summer goodies.  I also picked up copies of Outlander (Amazon affiliate link) to include as summer reading.  No reason not to share my addiction with someone else, right?  I am counting down the days for the next one to be released (5 more, in case you are interested), and I have my Kindle all charged up.

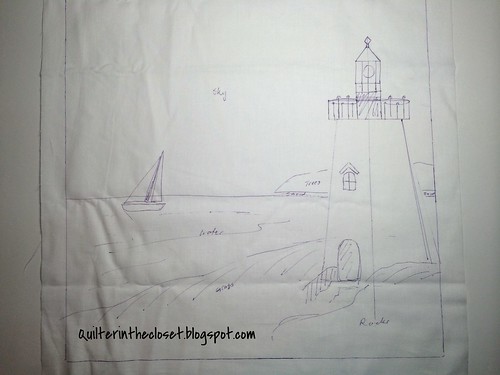
I've also been sketching out my thoughts for my blocks for the guild quilt show at the end of September.  The theme is "Across America" and I have 5 states to make finished mini's for.  Each mini has to be between 10 and 15 inches square, so I've drawn mine 15 inches.  I don't have any paper that large, so I find it helpful to draw my idea directly onto a piece of cheap muslin.  It gives me a better idea of how the final block will look.  Here is my road map for Massachusetts.

Massachusetts mini design in progress

As you can see, I still have a lot of work to do, but at least I took the first step today.


As always, thanks for reading,

Jen

Linking up with:


 WIP Wednesday at Freshly Pieced

Friday, September 13, 2013

Tinker tote 2, the sequel - a finish Friday

I told you I would be making more of these bags!  I made this one for my friend, who happens to be away with me on Mom-cation this weekend.

Front of Tinker Tote 2


What better "Welcome to Paradise" gift than a beach tote complete with beach towel and a couple magazines?  Her favorite color is blue, so I tried to stick to blue, navy, and aqua.

Back of Tinker Tote 2

I just love the lining fabric!  I used up nearly all that I have of this chevron.  I may have to get some more.

Inside Tinker Tote

As I mentioned previously, I took the Craftsy Class,  Quilt-As-You-Go: Patchwork Bags, a few months ago and really enjoyed it.  I made my first bag a couple of weeks ago, but wanted to tinker with the pattern a bit.  I choose to shorten the length of the bag a bit, which brought the center section up so it wasn't quite so low.

Front of Tinker Tote 2

With the first tote, I had the feeling that if it really were full of stuff, some of it might fall out because the midsection was so much lower than the sides.  I also lengthened the straps a couple of inches.  The original tinker tote had plenty of room for my arms to fit through the straps and I wasn't bothered by where it fell on my hip, I just didn't want it right up under my armpit.  Again, if the bag was actually full of stuff, this area might be a little uncomfortable.  Plus, since I altered the height of that midsection anyway, I needed a tad bit more room.

One more alteration I made....I inserted some Peltex into the bottom of the bag, after I boxed the corners, but before I put the lining in.  When you make the bag, you have a large bulky seam at the bottom of the bag.  It didn't bug me too much, but I thought if I could eliminate the bump it created, it would be better, right?  I simply cut a rectangle of Peltex roughly the size of my boxed bottom, and sewed it in place as best I could right through the seam on the bottom of the bag.   I didn't want it accidentally shifting, so I felt some stitches were necessary, but I didn't worry too much about going deep into the corners.  It was an awkward part to sew as it was.  The Peltex just smoothed out the bottom enough that you don't feel that bulky seam.  It had the added benefit of giving even more support to the shape of the bag.

I can still say that I highly recommend Quilt-As-You-Go: Patchwork Bags!  I know a sale is right around the corner, it would be an excellent grab at a good price.  Personally, I can't wait to try the technique on some other things.

Thanks for reading today,

Jen


Linking up with:


Friday, August 30, 2013

Quilt As You Go Patchwork Bag - a finish and a class review

I bought the class, "Tara Rebman- Quilt-As-You-Go: Patchwork Bags" just before we went on vacation this summer, and I immediately wanted one for our trip.  BUT, time was not on my side and I had to wait until we returned.   Then, of course, life with the girls got a little crazy, yada yada yada, it wasn't until school started this week that I had time to start a new project.  This one was top on my list (sorry Star of Africa bee mates who's blocks I should be doing)!

First, the class review:

This class shows you several techniques, including:
  • Quilt As You Go - well, of course!  She shows you both straight-line and Free Motion quilting options
  • Boxing the bottom of the bag
  • How to make a regular pocket
  • How to make an internal zip pocket
  • How to install a magnetic snap - I used this technique to put on onto my sewing mat's thread bag
  • 2 different binding techniques
  • Using glue to aid binding
Tara starts you off with a small potholder to show you how to do the QAYG (which I promptly skipped), and then you move onto your bag.  Here is my first attempt....

Tinker Tote front
Quilt As You Go Patchwork Bag, front
I love this bag.  I loved making this bag.  The "quilt as you go" technique is fun and straight forward.  I suppose it does save you some time since you are piecing and quilting at the same time.  I chose to do all straight line quilting on my bag, which seemed to take a while, but I'm not sure if free motion quilting would have been much faster.

Tinker Tote back
Quilt As You Go Patchwork Bag, back
I would say that it took me a total of 12 hours to put together.  I am a slow stitcher.  I'm sure some of you could whip one of these out in half the time.  I also could have used bigger pieces of fabric for my patchwork, which would have saved a little time.

My bag has a regular pocket sewn into the lining:

Tinker Tote regular pocket


And a fun zip pocket too!  Oh, you do feel smart learning this one.

Tinker Tote zip pocket

I doubt anyone would be able to lose something in this bag with that color lining!  It reminds me of orange creamsicles.

I made this bag for my friend from college, Kim.  She is not afraid of color!  I love aqua, but orange?  Eh.  She loves orange, so I hope this bag is fun enough for her tastes.

Tara says this bag is the perfect size for a quick trip to the grocery store.  I would agree, if you were buying a gallon of milk and supplies for tonight's dinner.  It is BIG.  Much bigger than I anticipated.  I actually put a rolled up beach towel in the bottom to get the bag to stand up for the photos above.  Do you see the towel?  Nope.  This bag is also big enough to fit an entire cat, with room to spare!

It is big enough to fit a cat into
This photo was not staged!
I set the bag down on the kitchen table to go get my "white boards" for backdrops for my photos and returned to find Tookie "helping" as usual.  She was purring away as if to say, "aren't you so proud of me for getting in here?"

Tookie in Tinker Tote

Who let the cat out of the bag?  Alright Tookie, you've had your fun.

My only complaint about the bag is that the binding didn't come out as nicely on the inside as I would like.  I think next time I will either hand sew the binding closed or choose the other method she shows you in the class (which involves hand stitching too).  I think it looks fine from the outside, but it is a bit inconsistent on the inside.  Totally my fault, I think.

I really enjoyed Tara's class.  She is a fun and energetic teacher, and the bag is fun to put together too.   The bags (or potholders) would make excellent holiday gifts.  I'm sure this isn't the last one you have seen from me!  While I haven't really developed a rating system for my reviews, I can say that I highly recommend Quilt-As-You-Go: Patchwork Bags.

This class is not on sale at the moment, but I'm sure a good sale is just around the corner!  So put it on your wish list and pounce (like Tookie) when the timing is right.

Thanks for reading today,

Jen

Linking up with: