 |
| Quilter in the Closet Quilt Tutorial: How to Bind A Quilt |
When I finished my first quilt, I needed to know how to bind it. I searched the internet for help and found a lot of tutorials that showed how to attach the binding to the quilt, but many referred only to attaching it to one side. They finished their tutorials off with a "flip your binding to other side and attach it", some specified to attach it by hand but didn't say how. It was disappointing, because I needed help and I was still left with an unbound, unfinished quilt.
If you are a beginner and wondering how to bind a quilt by machine, I am pleased to tell you that this tutorial will show you how to attach your binding to both sides by machine! Yeah! I had to break up the tutorial in to two parts because it was too large, so please look at both tutorials.
Part One will cover:
- Attaching your binding to your quilted quilt (side 1)
- Joining the tails of your binding
- How to use the Binding Tool by TQM Products
- How to trim and square up your quilt
- Attaching your binding to the quilt (side 2)
- Using glue to baste your binding to the quilt
The method I use, attaches the binding to the front first. There is another method out there that attaches the binding to the back first, but I have had some mixed results with that method. I have chosen to stick to this method because I can at least be sure that my quilt will look wonderful from the front (which is the important side, right?).
If you need a refresher on
how to make Straightgrain Continuous Binding, see my tutorial HERE for that.
 |
| Quilter in the Closet Free Quilt Tutorial - How to Bind a Quilt |
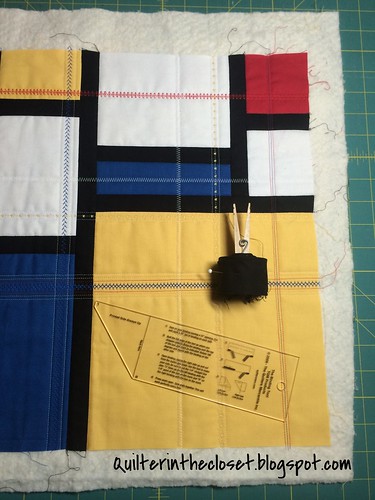
To get started, you will need:
- your quilted quilt
- continuous binding - I am using 2.5 inch wide, straight-grain, double folded binding
- the Binding Tool by TQM Products**
- a walking foot (highly recommended)
- a rotary cutter and cutting mat
- some pins
- a cutting ruler
- and of course your sewing machine and thread (I choose a color to match my binding)
**The binding tool is optional, it just makes life so much easier! If you have ever tried to join your binding tails and gotten them turned the wrong way, twisted, or trimmed them too long or too short, this product is for you. I was that person! I could never remember which way to turn my bindings to attach the tails, and even though I have had quite a bit of practice at this point, I still use this tool EVERY time!
And if you are thinking, why would I buy something that only has one purpose, I doesn't!!
Missouri Star Quilt Company (which is where I bought my binding tool), also has a
video tutorial on how to use this tool to make a Friendship Braid quilt! My tutorial here will use the binding tool, because that is "How I Do It".
 |
| Quilter in the Closet Free Quilt Tutorial: How to Bind a Quilt |
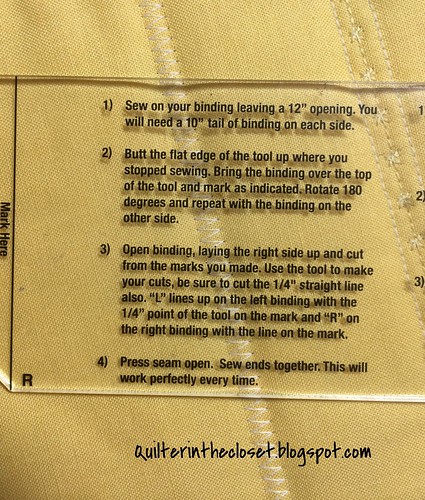
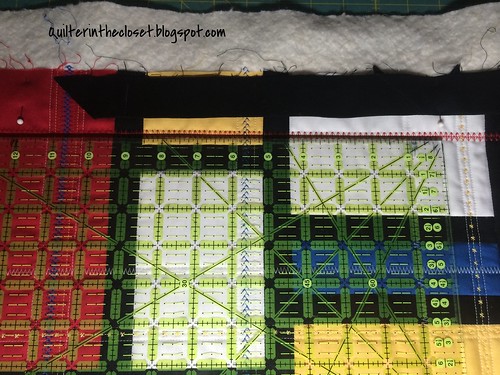
And look! The binding tool even has directions printed RIGHT ON the tool itself, so you will not need to print out or find the directions every time you bind your quilt. Brilliant!! Just Saying.
 |
| Quilter in the Closet Quilt Tutorial - getting started attaching your binding |
Per the instructions on the binding tool, you will need to place two pins, 12 inches apart, and start with approximately 10 inches of binding. Pin the binding in place using the pin on the right, aligning the raw edges of the binding with the raw edges of your quilt. I will be referring to this pin as the "Start Pin".
The quilt I am binding in this tutorial is rather small, so I chose one of its long sides, and my 12 inch span is right in the middle of that longer side. If I was binding a large quilt, I would probably choose to put my 12 inch span near the end of one of my sides. This 12 inch span is where you will be joining your tails, so you want to choose a part of your quilt that will be easily folded or bunched up, giving you room to join your tails. This will be more clear when we get to that step and you are doing it yourself.
 |
| Quilter in the Closet Quilt Tutorial - place a pin 1/4 inch away from the end of the side you are stitching |
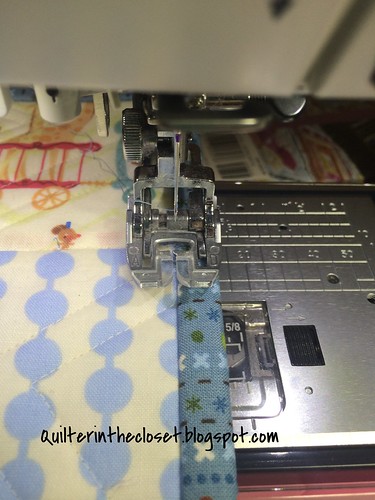
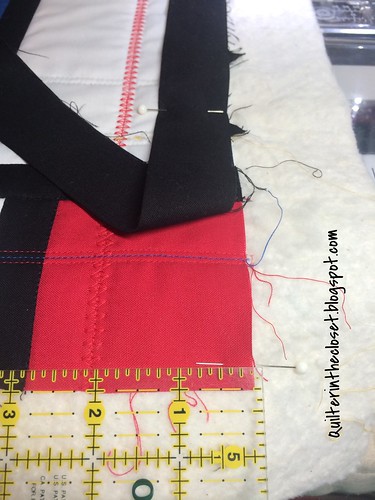
Before we start stitching, place another pin 1/4 inch away from the end of the side you are stitching. Make sure you can see your pin even when the binding is laying over it!
 |
| Quilter in the Closet Quilt Tutorial: start stitching at the Start Pin and stop 1/4 inch away from the end |
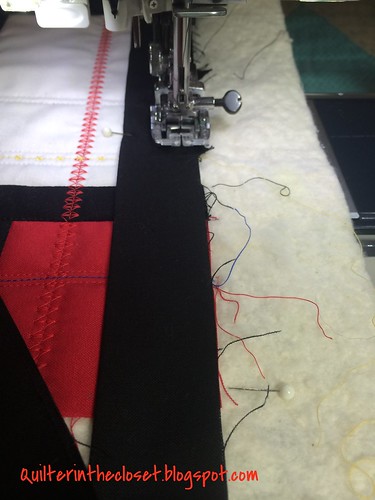
Start stitching at the "Start Pin" by stitching a few stitches 1/4 inch from the edge of the quilt, backstitching a couple of stitches and then continuing down the first side of the quilt. STOP when you get to your pin that is 1/4 inch from the end! Stop with your needle down.
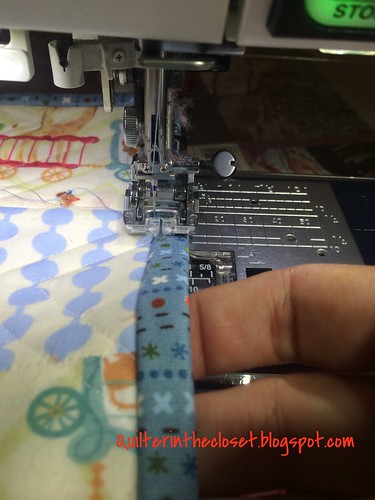
Here is another few of approaching a corner (because my other pics of the first corner were out of focus).
 |
| Quilter in the Closet Quilt Tutorial: stitch down binding 1/4 inch from the edge of the quilt |
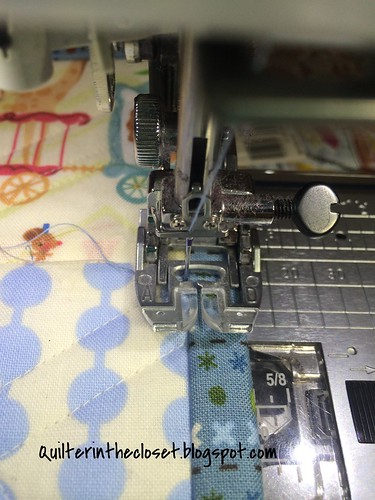
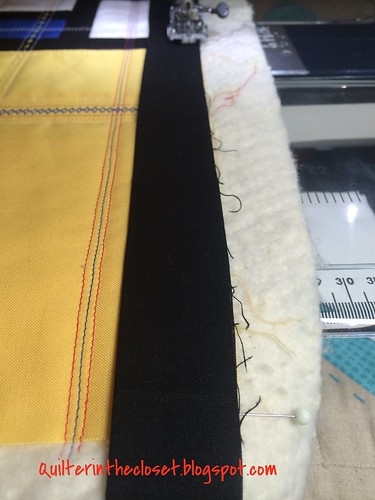
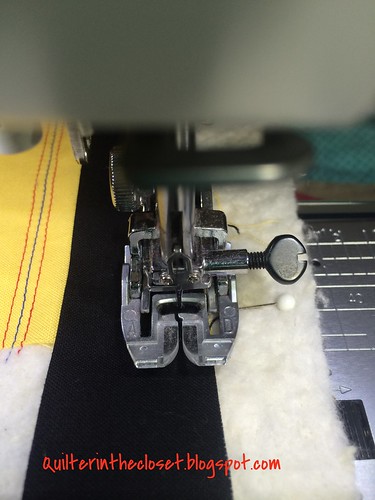
Remember to stop with your needle down right on the pin that marks the 1/4 inch from the end of the side you are stitching.
 |
| Quilter in the Closet Quilt Tutorial - stop with your needle down 1/4 inch from the end of your side |
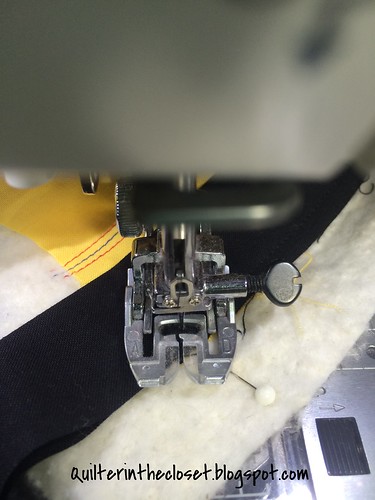
Then pivot your quilt so that you will be stitching at a 45 degree angle from the edge of your quilt (see photo).
 |
| Quilter in the Closet Quilt Tutorial - pivot your quilt, stitch at a 45 degree angle off the edge of the quilt. |
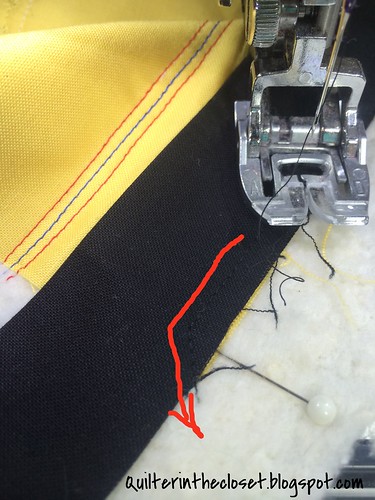
Now stitch right off the edge of the quilt.
 |
| Quilter in the Closet Quilt Tutorial: black thread on black fabric is impossible to see! SORRY!! |
I realized at this point that black thread on black fabric was difficult to see, but that is what I was using. The Red line is right next to my stitching line. It makes a 45 degree pivot and goes right off the edge of the quilt. I then cut my threads.
I used to take the quilt back over to my table at this point to prepare the corners, but now I do it right in front of me. One less trip!
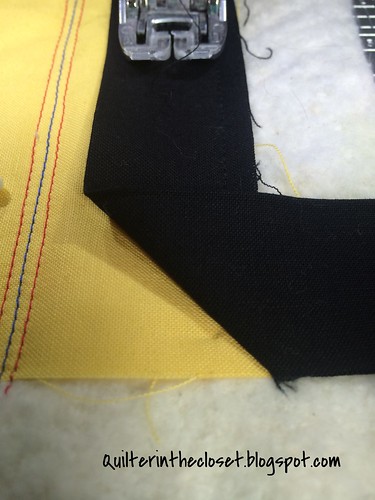
Fold your binding in the direction that is away from the body of your quilt (I think for all of us that would be to the right). Because we stitched a 45 degree line off the edge, the binding will make a nice 45 degree fold.
 |
| Quilter in the Closet Quilt Tutorial - turning the corners |
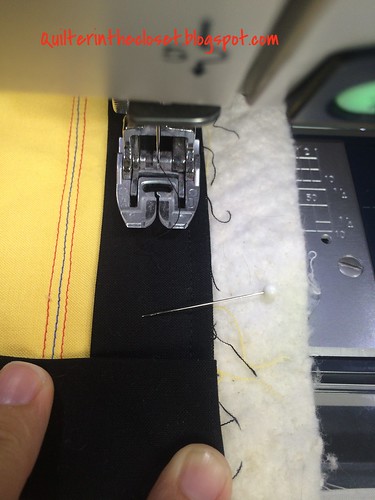
Maintaining that 45 degree fold (I usually use my left hand to hold it in place momentarily), now fold the binding back toward the quilt (to the left). The fold created in this step will be aligned perfectly with the edge of the quilt that you just stitched down AND the raw edges of your binding will now be aligned with the raw edge of the side of your quilt that you will be stitching next!
 |
| Quilter in the Closet Quilt Tutorial - folding the corners of the binding |
Pin this fold in place!
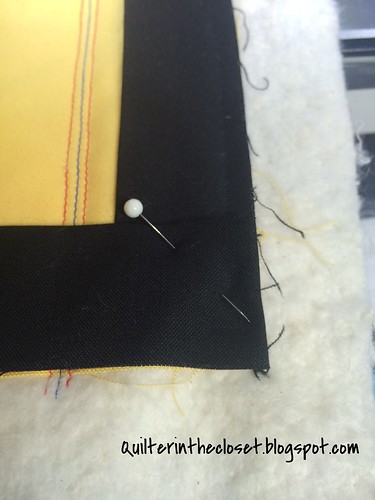 |
| Quilter in the Closet Quilt Tutorial - pin corner in place |
Now pivot your quilt so that the new side is ready to stitch down. I like to start a few stitches off the quilt, and I backstitch a stitch or two once I get on the binding. Then I continue stitching 1/4 inch away from the edge of the quilt, all the way down the new side. I also make sure that I've put a pin 1/4 inch away from the end of this new side, so I know where to stop and prepare my corner.
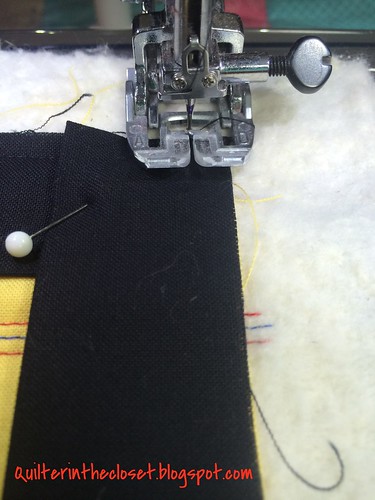 |
| Quilter in the Closet Quilt Tutorial - continue stitching down new side |
Continue in this fashion until you have attached binding to all but the last side of your quilt. Prepare the last corner**.
** Again, because the quilt I am working on is small, I usually pin my corner and stop here. By doing so, I actually give myself more than the 12 inches to fold my quilt in the next step. The pin holds the corner secure and I don't have to really worry about it skewing the measurements for the joining of the tails. If I was working on a larger quilt, I would turn the corner, stitch, and stop at least 4 to 6 inches away from the pin that marks my 12 inch gap. With a bigger quilt, sometimes those extra few inches saves me a lot of cursing.
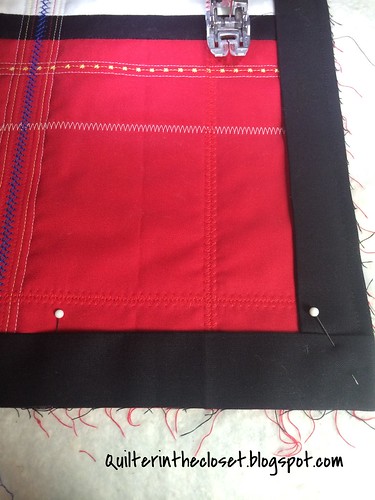 |
| Quilter in the Closet Quilt Tutorial - the last side |
Now get out your binding tool. Align the straight end with your "Start Pin", and mark a line on your binding where the tools says "Mark Here". I used a Sewline chalk pencil in this case. Make sure the printed side of the tool is up (so you can read it).
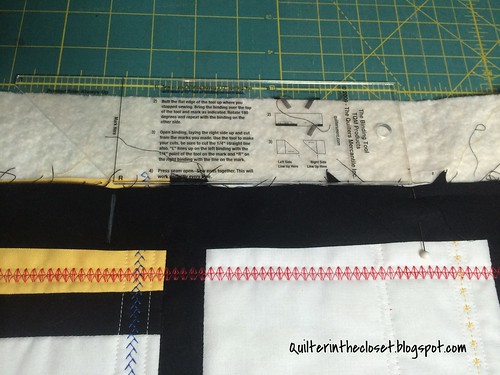 |
| Quilter in the Closet Quilt Tutorial: using the Binding Tool |
Now rotate the tool 180 degrees around to the other pin that shows your 12 inch gap. Don't flip it over. Make sure you can still read the printed side and it is up. Align the flat edge of the tool with your other pin.
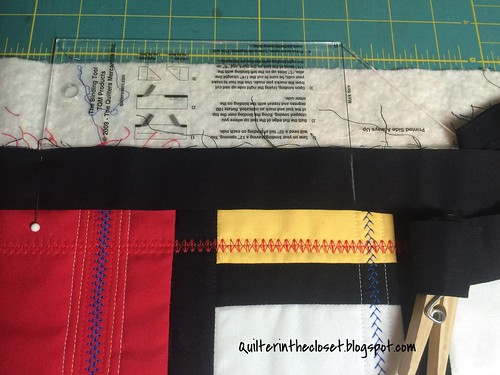 |
| Quilter in the Closet Quilt Tutorial - marking with the Binding Tool |
Mark another line on this tail of the binding where it says "Mark Here".
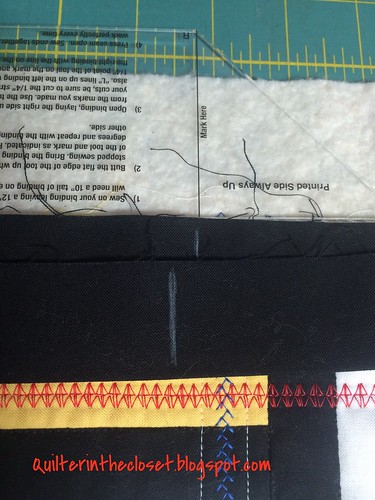 |
| Quilter in the Closet Quilt Tutorial - one could use this information to join binding tails without the Binding Tool |
I just wanted to show you that the lines you have marked on the tails are approximately 1/2 inch apart.
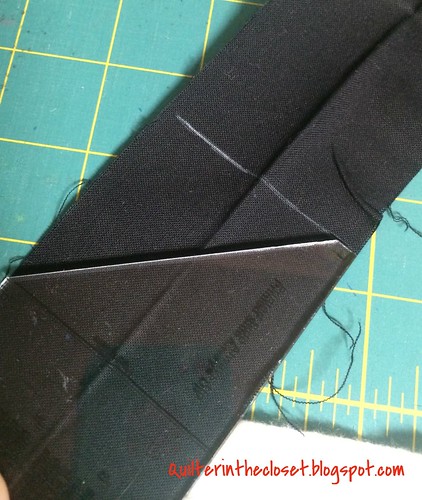 |
| Quilter in the Closet Quilt Tutorial - trimming the tails |
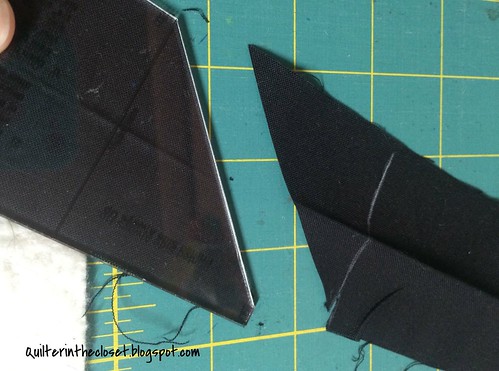
Now choose one of your tails, and line up the end/tip of the tool with your marked line. Check to make sure the printed side is still UP! and that the body of the tool is along the binding that is attached to your quilt. In other words, you want to make sure that you are trimming off the loose end of your binding.
 |
| Quilter in the Closet Quilt Tutorial - trimming the tails |
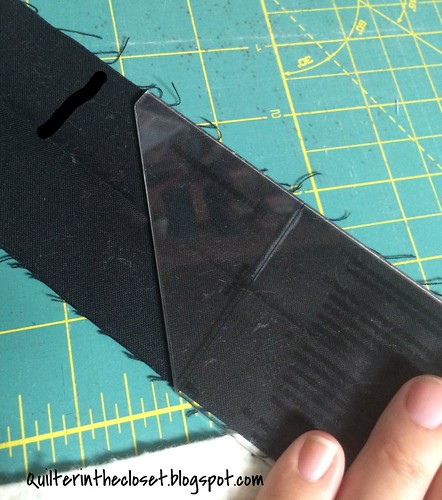
Now, using your rotary cutter, trim the tail along the edge of the tool. That little notch at the end is important, so cut it as well as the diagonal. Now take your other tail...
 |
| Quilter in the Closet Quilt Tutorial - trimming the tails (this one is different!) |
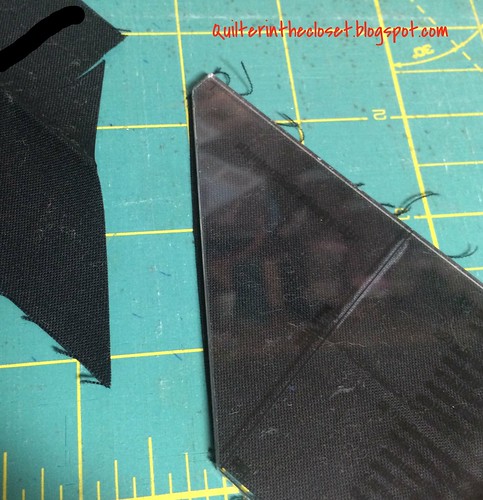
THIS time you will line up your marked line right underneath the "Mark Here" line. To reiterate: first tail, line up your marked line with the end of the tool, 2nd tail line up your marked line with the "Mark Here" line. This is important. Again make sure the printed side is UP and that you will be cutting off the loose end of your binding. Now make your cut.
 |
| Quilter in the Closet Quilt Tutorial - trimming the final tail |
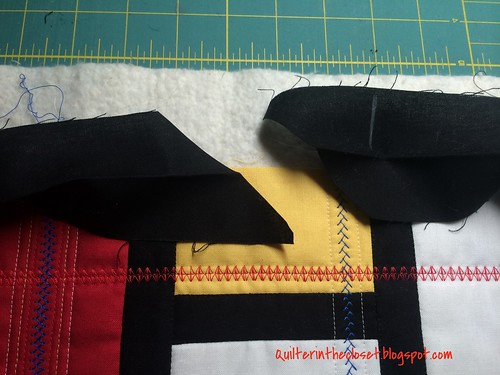
Aw, look at that! Your tails are all ready to be joined and are going to fit together perfectly!
 |
| Quilter in the Closet Quilt Tutorial - your tails are ready for joining |
Now you are ready to join your tails. Put right sides together and pin you tails together aligning the sides and notches created from the tool. I told you those notches would come in handy - they should line up with the straight sides of the binding fabric from the opposite piece.
If you are using a solid fabric like I did, just pay attention to the folds in your binding to give you a clue to which side is the right side in your case. Remember your folds will make the wrong sides fit together when folded.
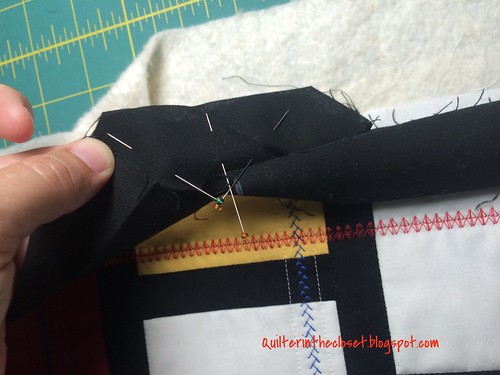 |
| Quilter in the Closet Quilt Tutorial - Pin your tails together, not on the donkey |
Now take everything over to your machine, fold your quilt slightly so you can sew your tails together using a 1/4 inch seam. This is when that 12 inch gap is important. If you don't give yourself enough room, you won't be able to keep your quilt out of the way enough to stitch your seam, or it will at least be very awkward.
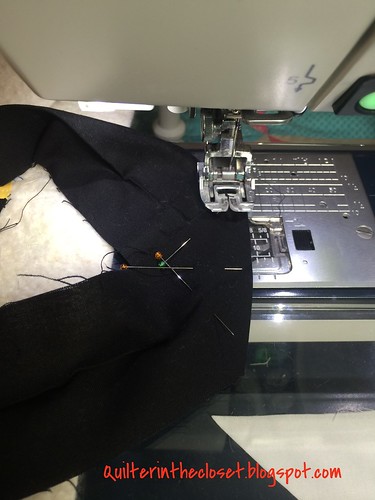 |
| Quilter in the Closet Quilt Tutorial - sew your tails together |
Once you have sewn your tails together (gosh that sounds weird), press your seam open.
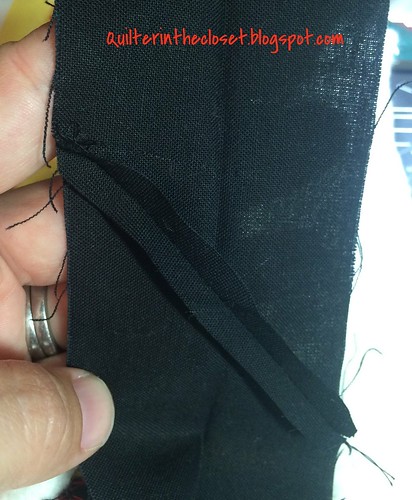 |
| Quilter in the Closet Quilt Tutorial - press your seam open |
Yes, finger pressing is OK. Now fold your binding in half again and align the raw edges with the raw edge of your quilt, and pin in place in a few places. I find it especially helpful to pin in the area of that new seam you just created so you don't get any strange puckers.
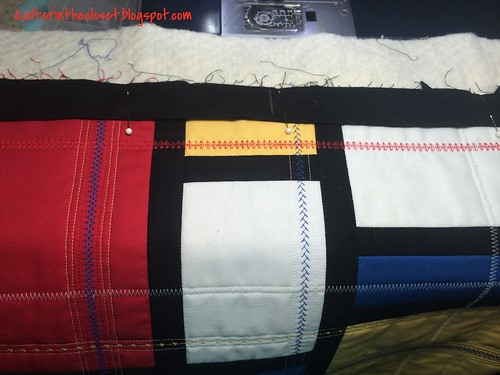 |
| Quilter in the Closet Quilt Tutorial - Pin the now joined binding down |
Now I go back to the corner, and start stitching (1/4 inch away from the edge) down the final side.
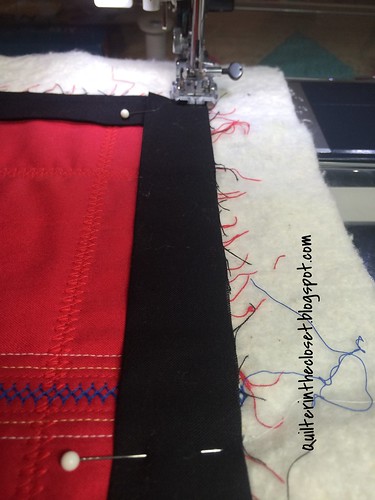 |
| Quilter in the Closet Quilt Tutorial - stitch the final side |
If I had been working with a large quilt, I would return to the area that I stopped stitching, perhaps 1/2 inch from the end of my stitching line and start stitching again, backstitiching at the beginning of my new stitching line.
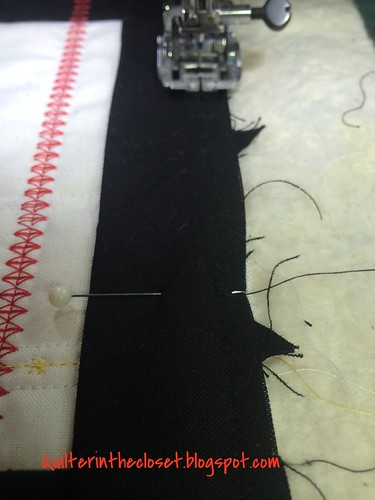 |
| Quilter in the Closet Quilt Tutorial - stitch until you meet up with your first stitches |
Once my final stitching line meets up with my "Start Pin", I will continue stitching past my first stitches a bit, then backstitch a bit, then cut my threads.
You now have your binding attached to the front of your quilt! But now what?
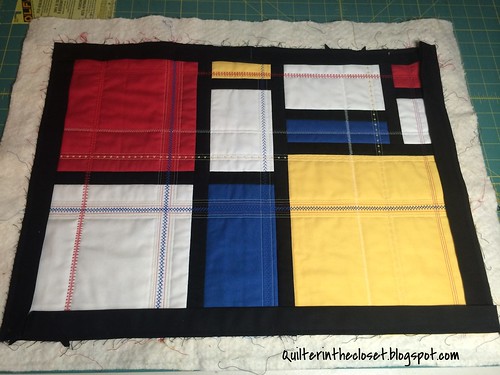 |
| Quilter in the Closet Quilt Tutorial - binding attached, now what? |
You might have noticed throughout this tutorial that I still had a bunch of batting showing. I like to wait until my binding is attached before I trim it. I have tried trimming it before hand, but find that I actually have a harder time stitching my binding on straight. Go figure! I also noticed that my corners were not always square because the act of sewing down my binding stretched out my corners a little. I don't know why. And, my binding is more likely to be empty if I do it this way - more on that in a minute. So I trim after my binding is attached.
Get out your ruler. Choose a side. Line up your stitching line under the 3/8 inch mark of your ruler. In theory, this would also look like leaving 1/8 inch of batting showing from the edge of your quilt.
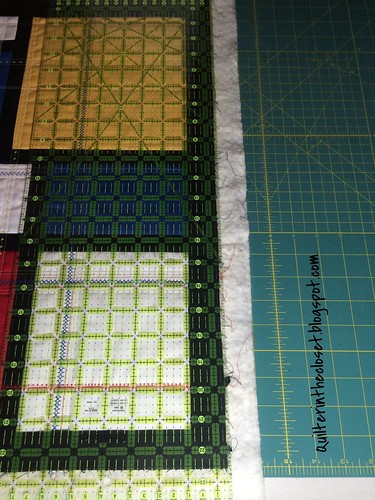 |
| Quilter in the Closet Quilt Tutorial - trim your quilt |
I like to line up my stitching line instead because sometimes I don't always stitch my binding straight. GASP! What can I say, sometimes I turn my head when stitching long lines and I go a little crooked.
If your quilt is longer than your ruler, just cut it in sections, lining up your stitches as best as possible. As I just said, sometimes I go a little crooked, and that is OK. If you have plus/minus 1/8 inch of batting in one place, it is unlikely to cause too much havoc.
Why 3/8 inch? If you trim at this distance, your binding will be "filled" when it is completely attached. "Filled" meaning not empty. If someone rubs the binding between their fingers, you want it to feel like it has something inside it, like your quilt. Is this a big deal? Not really, but it is nice. If you are entering your quilt into a judged show, it is a big deal, but if you are making a potholder, I doubt it will make much of a difference.
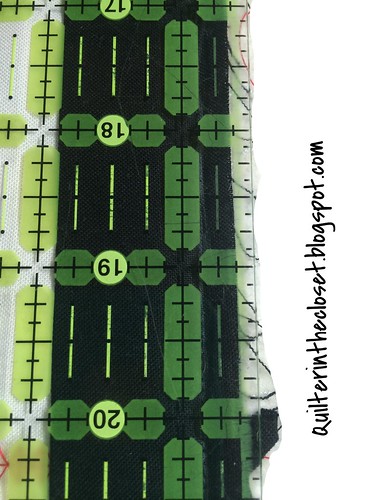 |
| Quilter in the Closet Quilt Tutorial - 3/8 inch from your stitching line |
Now trim away the excess batting with your rotary cutter.
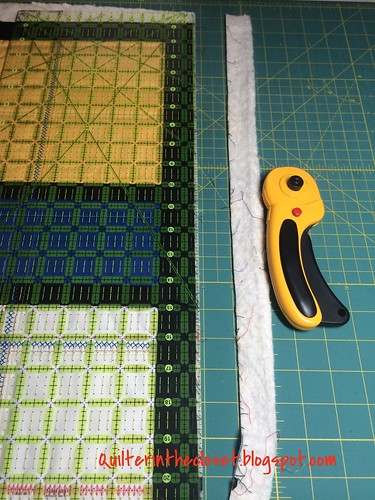 |
| Quilter in the Closet Quilt Tutorial - trim excess batting |
Pivot your quilt so that a new side is on the mat, line up your stitches with the 3/8 mark of your ruler and also check the side you just cut and the next side (see red arrows) to see if they are square along a line of your ruler.
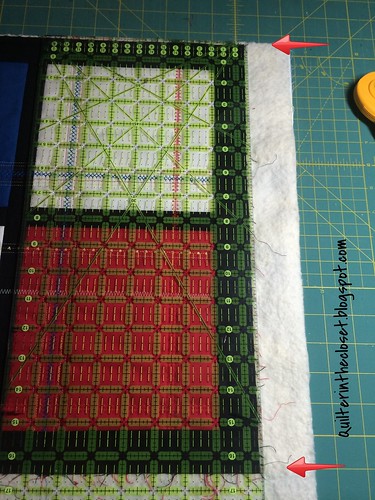 |
| Quilter in the Closet Quilt Tutorial - squaring your quilt |
If one of your sides does not line up with one of your ruler's lines, it means your quilt is not perfectly square. Call the quilt police!! Just kidding. Unless you are entering your quilt into a judged show, it is not that essential. You can always fudge your trimming a little (like plus/minus 1/8 inch) to get a square corner, then trim the standard 1/8 inch in the middle of your sides. Unless someone is coming at your quilt with a ruler to check specifically for squareness, no one will notice the slight inconsistency.
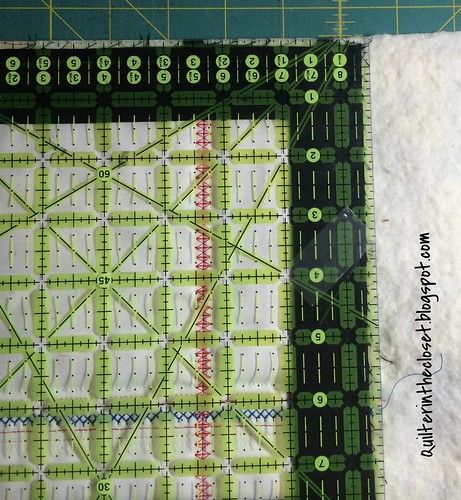 |
| Quilter in the Closet Quilt Tutorial - squaring your corners |
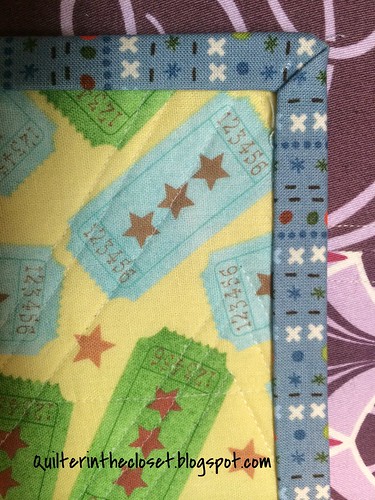
Now you have your binding attached to the front of your quilt, it is trimmed and ready to be turned to the backside and stitched down.
See Part Two: Machine Binding Your Quilt.
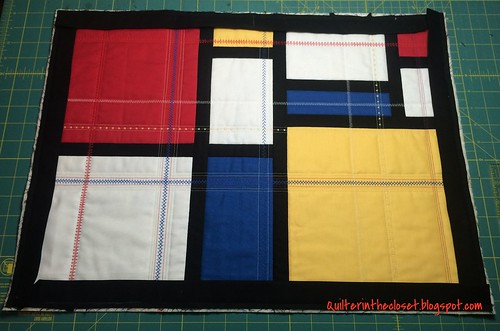 |
| Quilter in the Closet Quilt Tutorial - trimmed and ready for Part Two |
How do you attach your binding? Do you attach it to the front or back? Do you trim your quilt first before attaching your binding?
How do you do it? Link up your tutorials here (on this or any other quilting subject).
Rules:
1) NO QUILT POLICE ALLOWED! - if you are making a tutorial, keep it friendly, as if you were teaching your best friend. If you are visiting a tutorial, please remember that the authors are simply sharing what they have found to work for them.
2) Please link up tutorials from 2014 only. Feel free to point out any previous tutorial in your new post, but let's try to keep the links current.
3) Visit other linky participants to see how they do it.
4) Did I mention no quilt police allowed?
Thanks for joining me today!
Jen
