
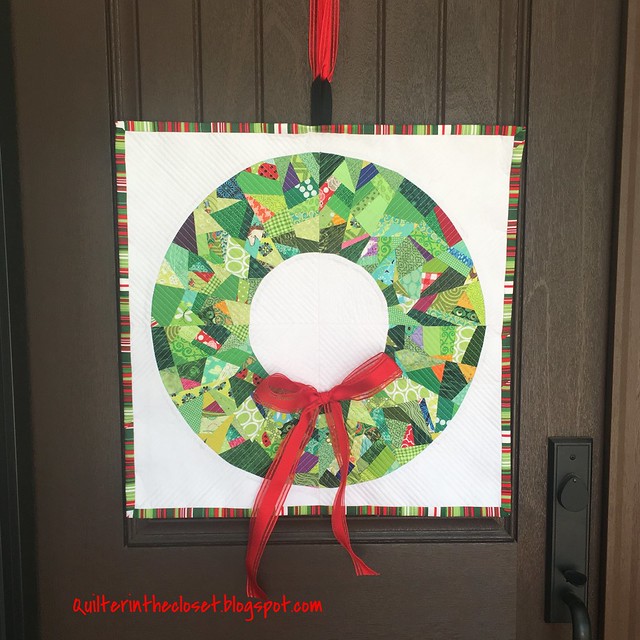
Today I am sharing a tutorial for this Modern Improv Christmas Wreath mini.
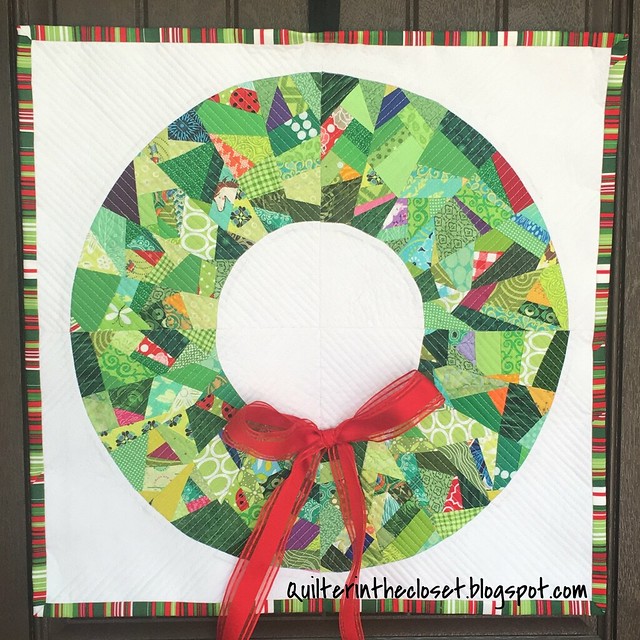
It looks rather nice on the door, no?
When I was contemplating what kind of project I wanted to create for this blog hop, I remembered how many of my friends don't have the space to store a holiday wreath year round while waiting for the holidays. Everyone is short on storage, but especially those that live in apartments, condos, etc. This wreath is still festive enough to put on your door, yet will roll up quite compactly! In fact, you could make one for each month and it still wouldn't fill up the same amount of space as one regular holiday wreath!
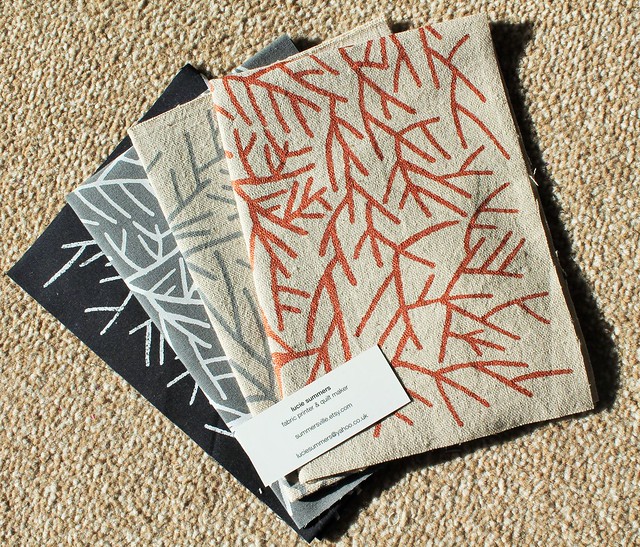
Before I get to the tutorial, let's talk about the prize for this month's link up! The giveaway prize for June is 4 FQ's of lovely screenprinted fabric generously donated by Lu Summers of Summersville! Check out these beauties:
OK, now on with the tutorial!
You will need:
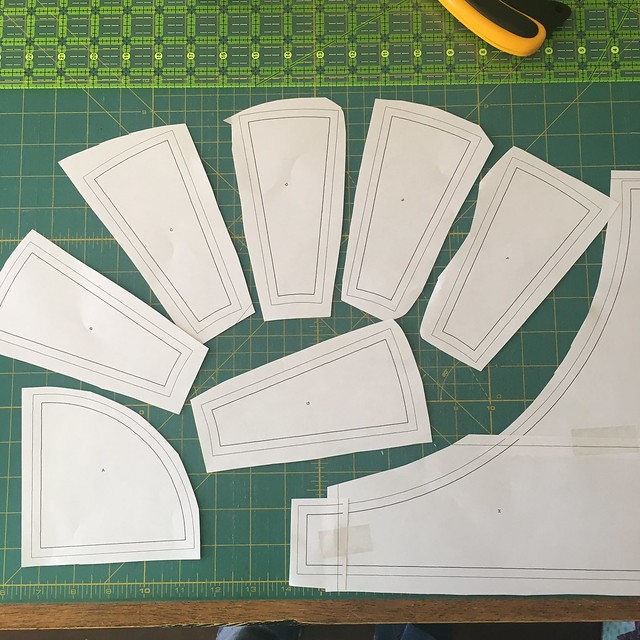
4 copies of the wheel pattern.
Download it HERE. Now, fellow crafters, I am not a computer genius. If you recall our grandmothers or great grandmothers might have swapped quilt pattern templates made out of cereal boxes and sent through the mail --- this is the computer version of that! My EQ7 doesn't always print out a nice, print ready, pretty copy of things and I just haven't gotten around to learning Adobe anything.
You will also need:
12.5 inch x WOF background
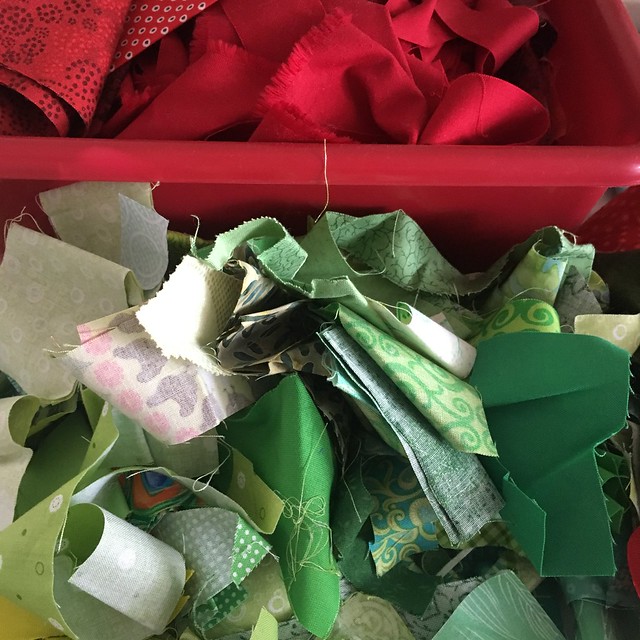
various scraps (mostly green)
24 inch piece of backing fabric
24 inch piece of batting
approximately 112 inches of binding
optional loop of fabric (mine was 7.5 inches long)
optional bow (you choose the size)
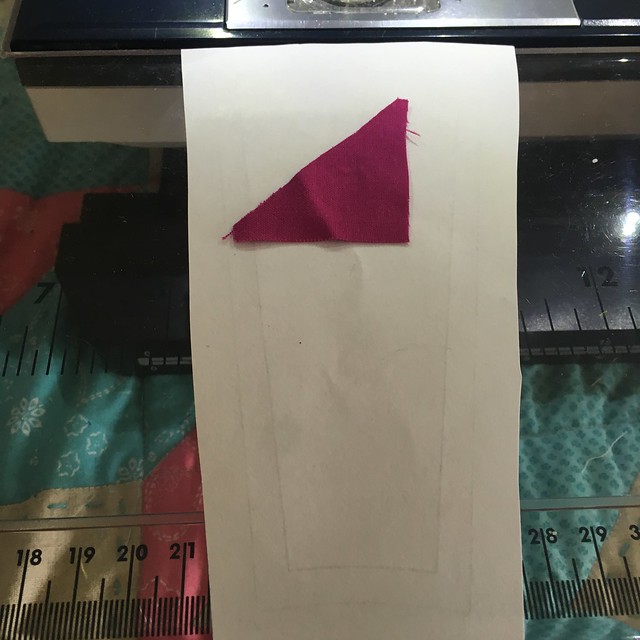
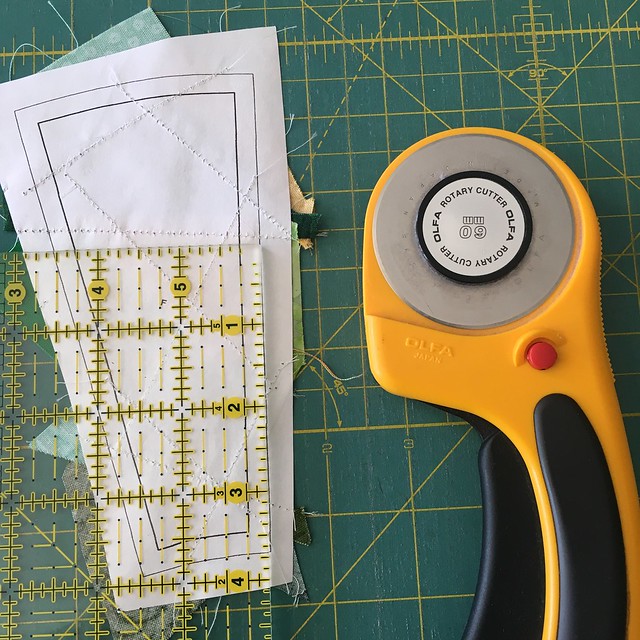
First, print out the templates and cut them up, leaving a little space around the seam allowances. We will be working with the wedges first.
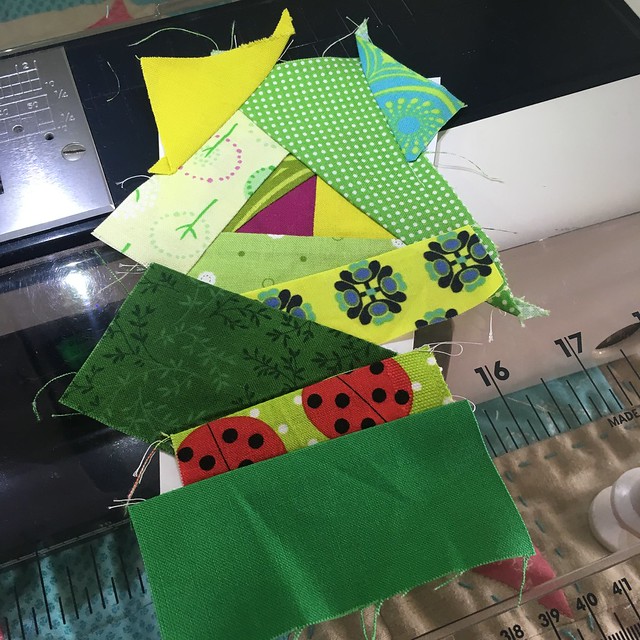
Get those scraps ready! I pulled out all my small green scraps. This project is perfect for those "crumbs" you were wondering why you keep. All shapes and sizes can be used in this project, but small scraps will give you the most variety.
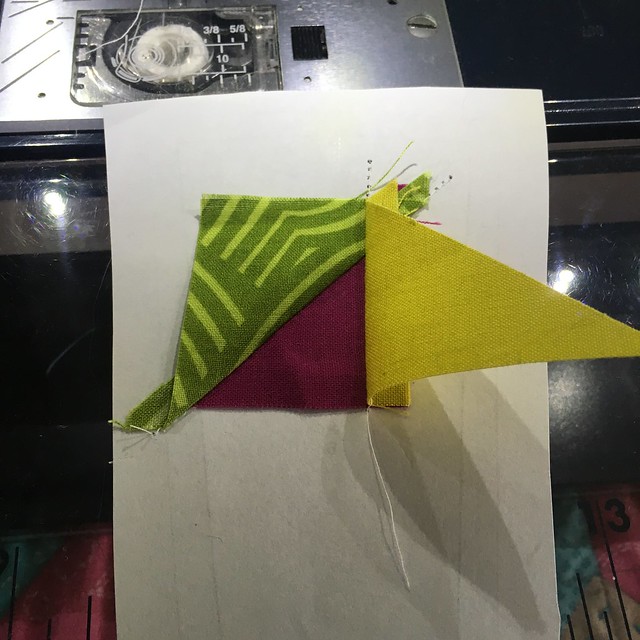
If you have done paper piecing before, this will look familiar. Place you first scrap Right Side UP on the Wrong Side of the paper wedge. I like to use a little washable glue to hold it in place.
OH, and shorten your stitch length to about 1.5, like you would in paper piecing. I forgot to do this, and removing the paper later sure was a pain.
Why do we even have the paper? I found the paper is needed to provide stability to all those small scraps during the improv process. It is easy for them to get distorted without it.
Place your next piece of fabric, Right Side DOWN on the first and sew into place using approximately a 1/4 inch seam. Yes, sew the fabric right to the paper.
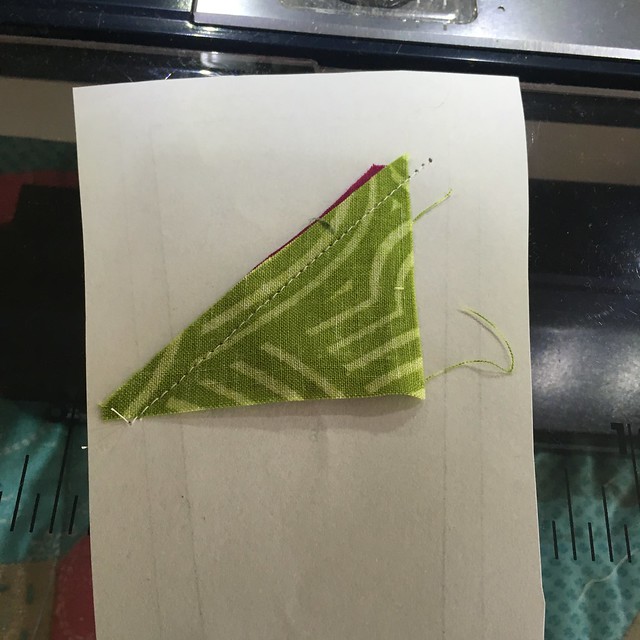
Finger press that open. NO, don't get up to press it with the iron! It is unnecessary and unless you are trying to get some exercise, don't bother. Just finger press it open and grab your next piece of fabric. Place it Right Side down, and sew it into place.
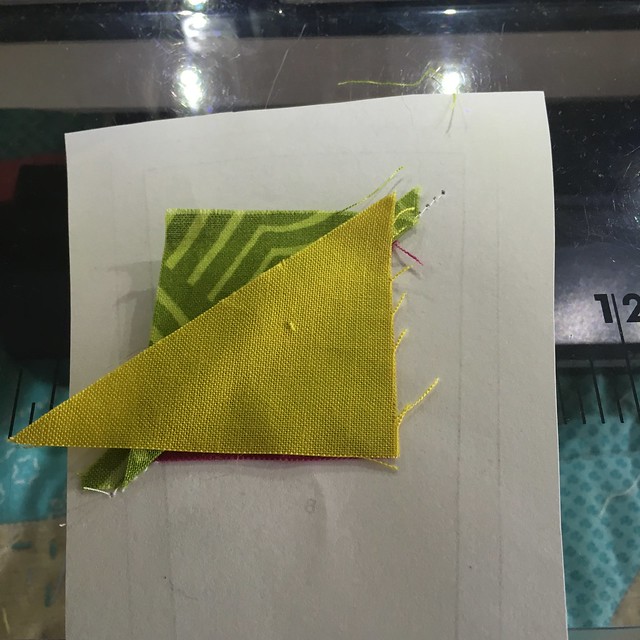
Finger press open and continue with your next piece of fabric.
Now is probably a good time to mention: I've taken some improv classes where the instructors really encourage you to ponder the placement of each fabric piece in the project. I don't recommend that for this project. Think about it a little, but there is no need to meditate for 30 minutes about each scrap. As long as each wedge ends up with a decent balance of color, you should be OK.
You might notice that I started this wedge with a piece of pink. I wanted my wreath to look like it had little, colored lights in it, so I started most of my wedges with a little splash of color.
Around and around you will go. You do not have to line up your pieces perfectly with what you have already sewn. As long as the piece you are putting down covers the edge of what you already have, and you sew it with 1/4 inch seam, you should be OK. If you have ever done an Improv Quilt As You Go technique, this is the same thing. If you haven't, after this project you are fully qualified!
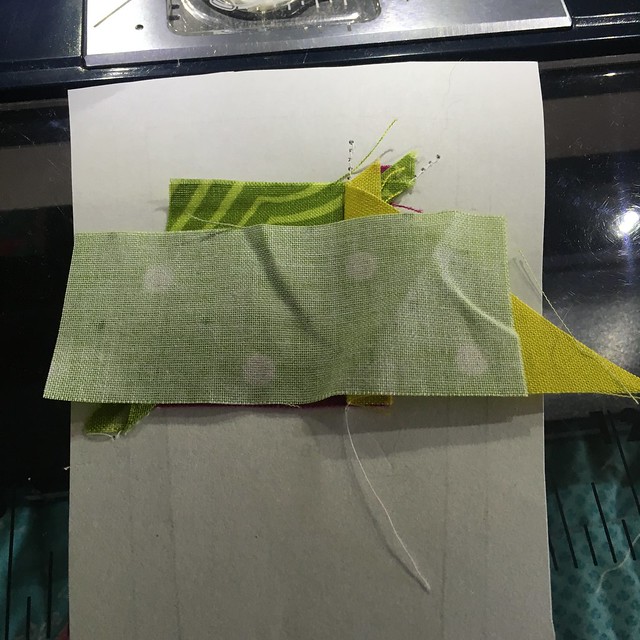
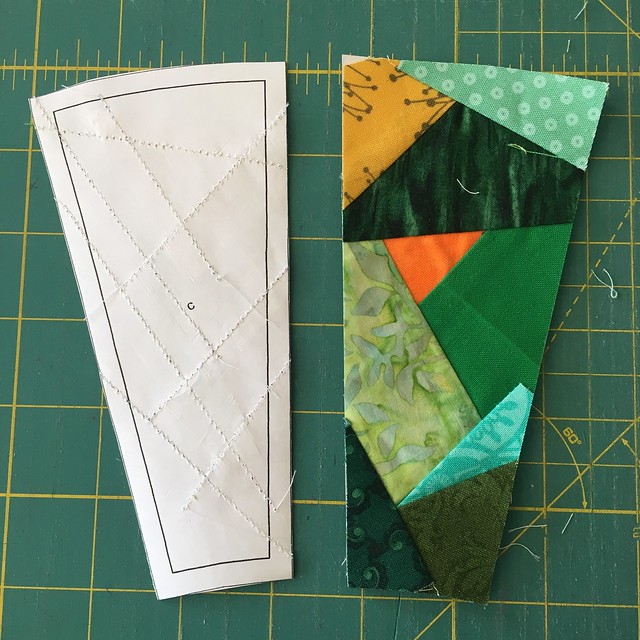
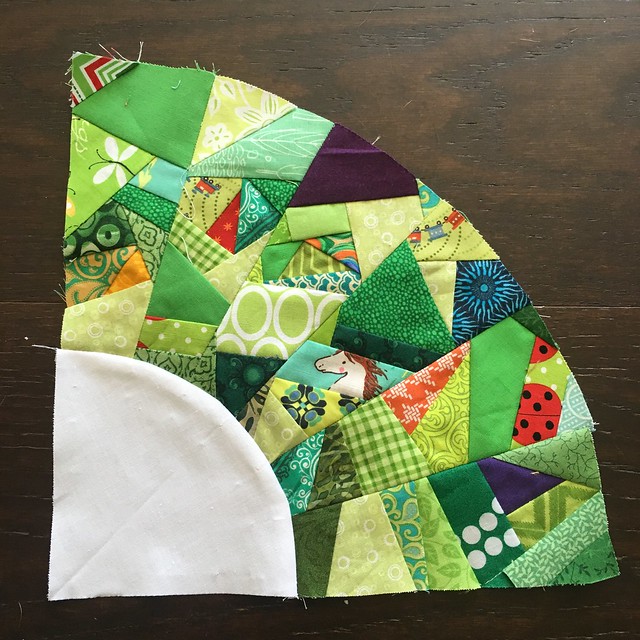
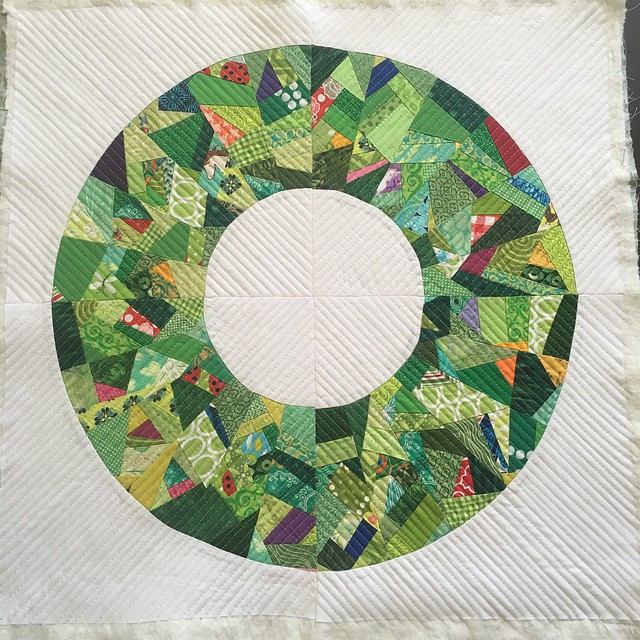
Keep going until you have covered your entire wedge piece. It should look something like this.
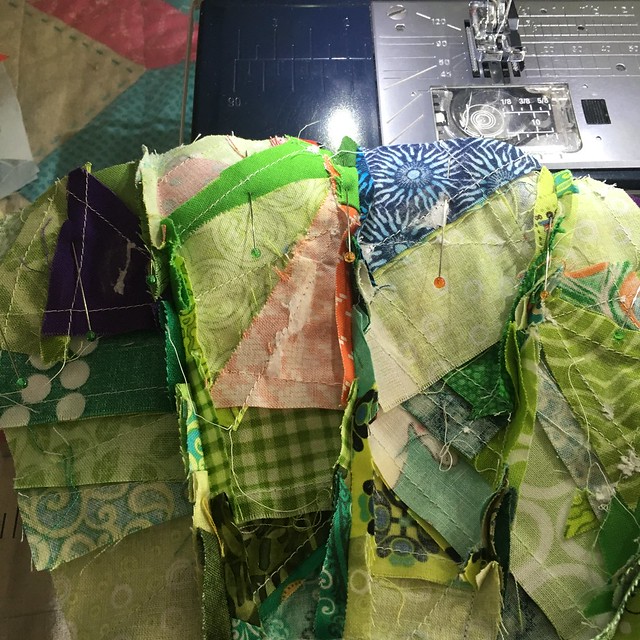
You can do each wedge one at a time, or I like to chain piece mine. I glued a little scrap of colored fabric randomly on each wedge and just chain pieced all my wedges at the same time. It does make for a more quick, and random, improv process.
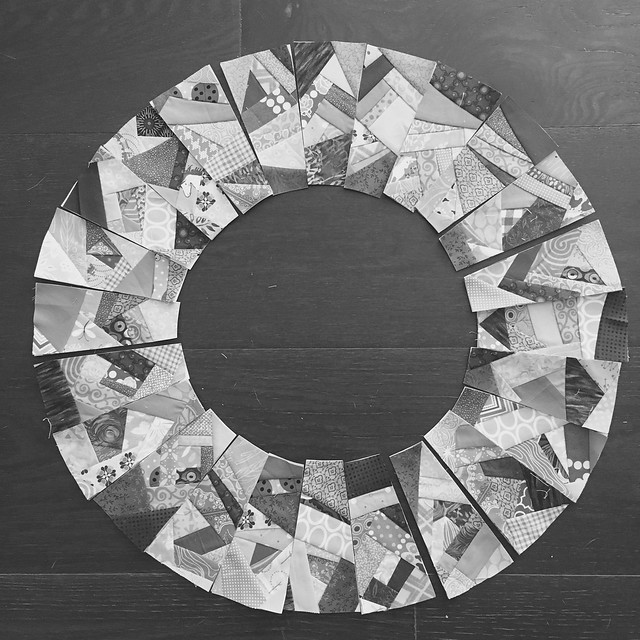
When you have all your wedges done, they will look something like this!
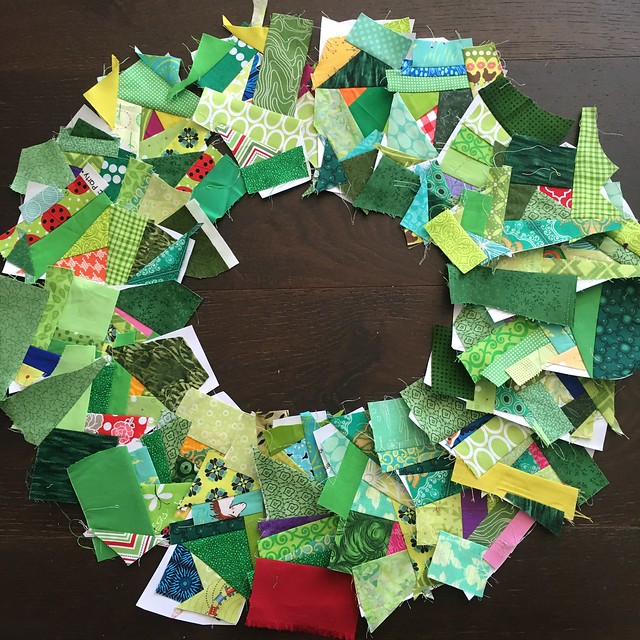
What a mess! Now take them over to the cutting surface and trim off the edges, leaving a 1/4 inch seam!!!
Ah, that's better. Look how sharp those wedges look now!
OK, now the fun part. Lay them out and start arranging the wedges as you like. Each wedge is labeled "B" through "G", but they are completely identical, so mix them up as you like.
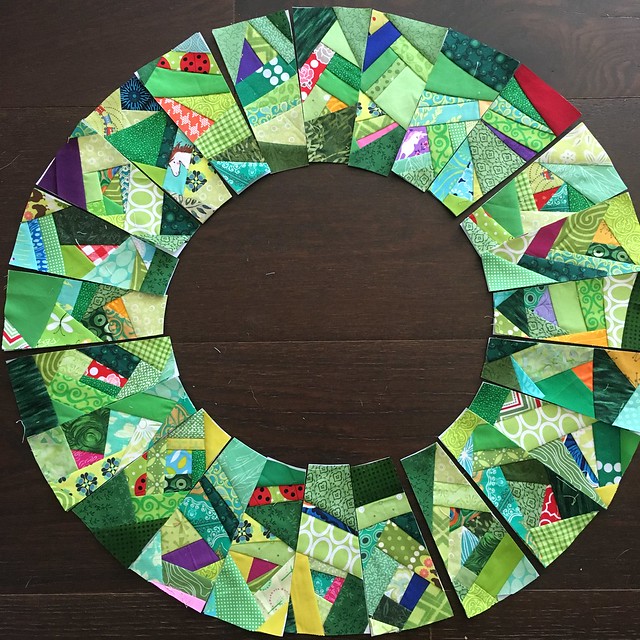
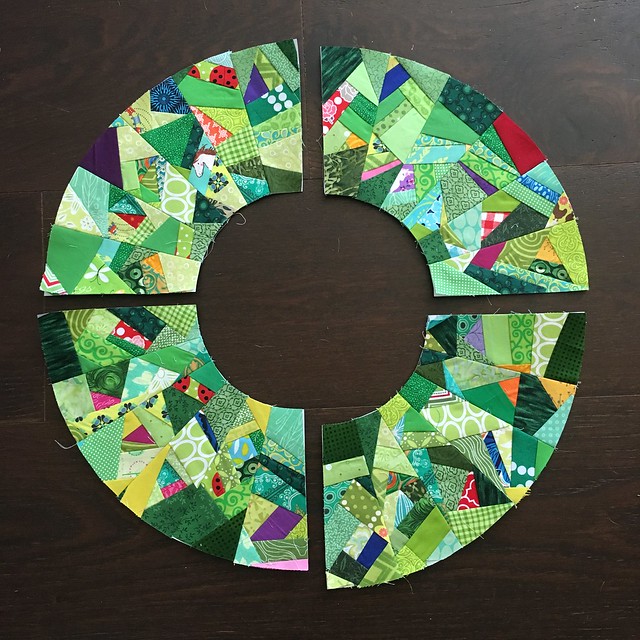
I find taking a black and white photo with my phone helps me get a nice balance with the values of green.
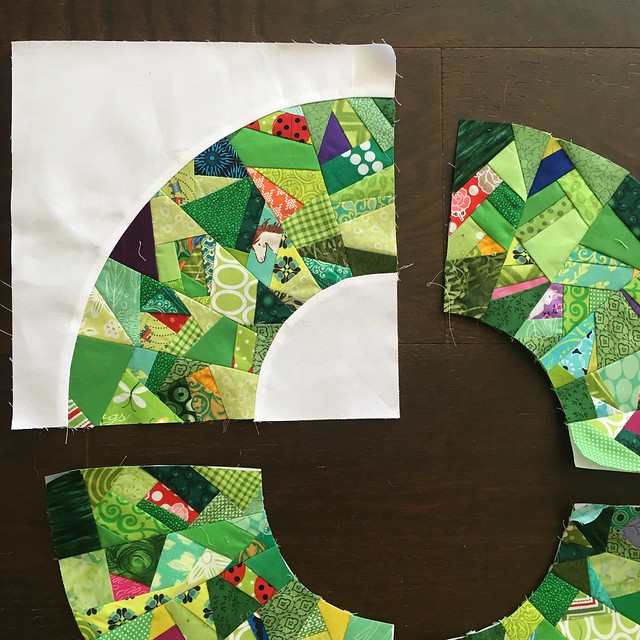
When you get a configuration that you like, piece together six wedges to form a quarter circle. Press these seams open, and then remove the papers from the back.
Now get out that WOF background fabric and your "A" and "H" templates.
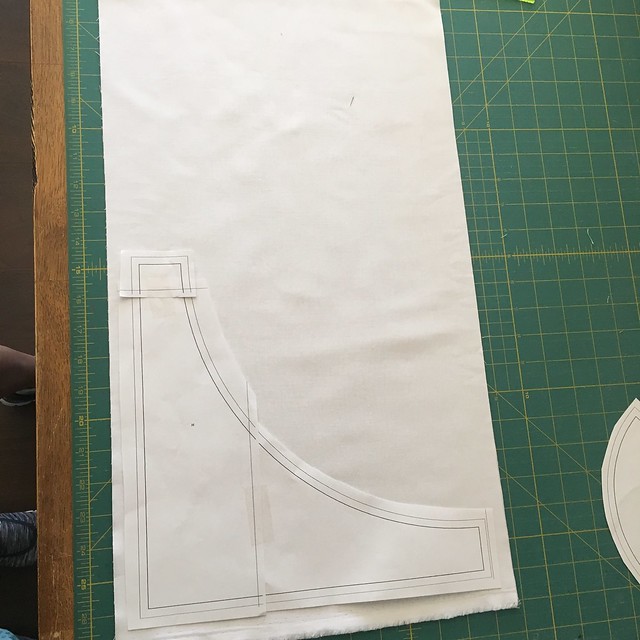
Keeping the folded fabric, well folded, put your "H" template near the selvage end. Either carefully use your rotary cutter and ruler to cut out the "H" piece, or trace the template onto the fabric and cut it out using your favorite method. By keeping the fabric folded, you get two "H's" with one cut.
Use your "H" template again, but slide it down the fabric a bit to give you enough room to fit template "A" in the football shaped scrap that will be created in between the "H's" you cut. I find this helps use the fabric more efficiently, and the scrap that is created near the fold of the fabric will be big enough to use in another project.
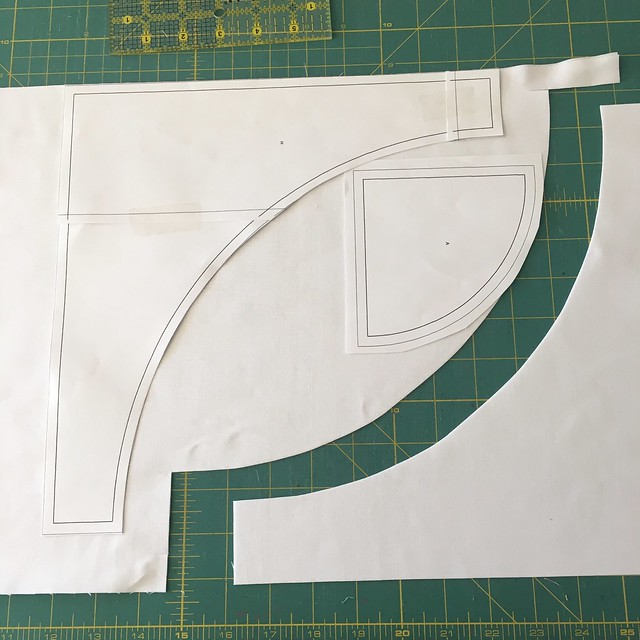
When you are done cutting this second "H" out, you should have four "H" pieces total.
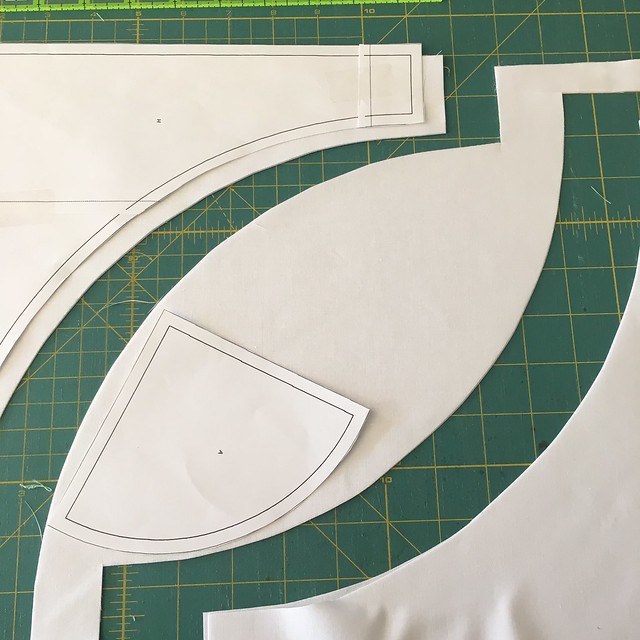
Place your "A" template on the football shaped scrap. There should be enough room to place it a second time and thus get the four "A" pieces you need.
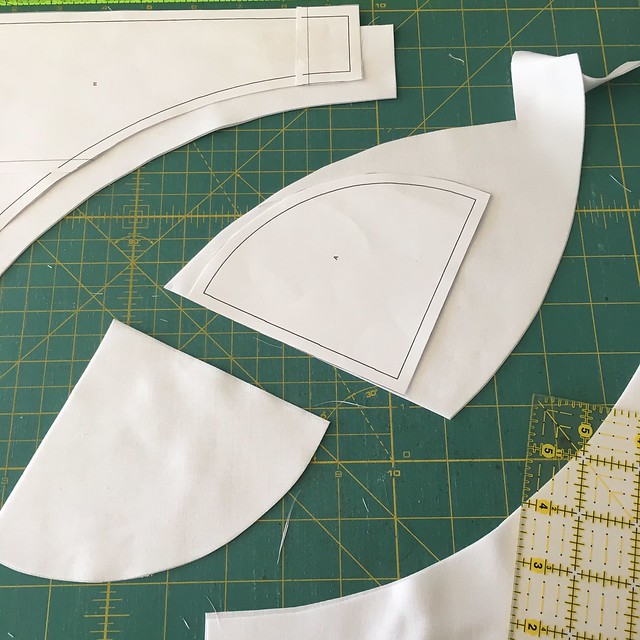
There you go! And like I said, the scrap that is left over near the fold is a good size, so you can use it in another project later.

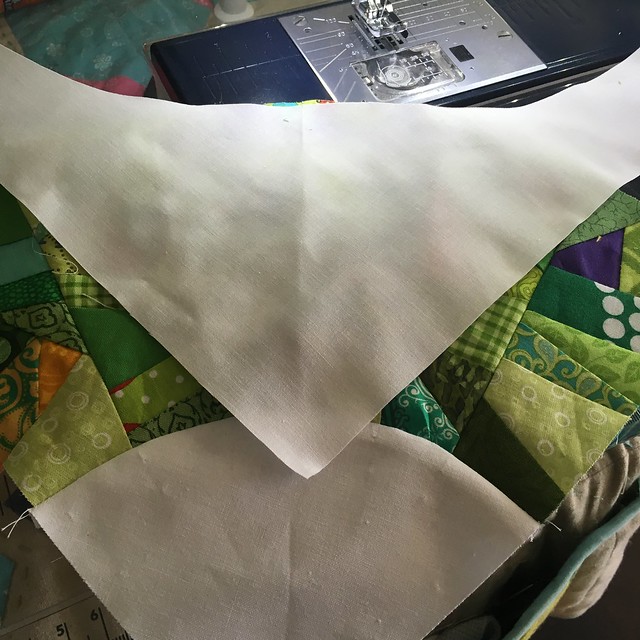
Now take your "A" and "H" pieces and fold them in half, and finger press.

We are going to work with the "A" piece first. Line up the crease from your finger pressing with the center seam of your wedge quarter circle. Pin in place.
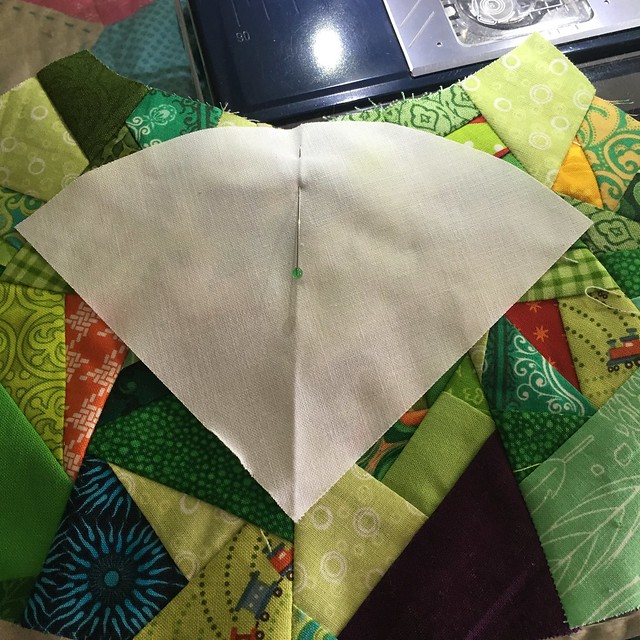
Now pin the edges to line up, and put a pin in each seam. I forgot to take a picture, but you can get the idea below. It will want to stay bunched up in a curve, let it!
Sew a 1/4 inch seam all around this curved piece. Don't try to flatten out the curled up piece, just make sure the part going under the presser foot is straight and pivot it slightly around the curve as needed.
When you are done, press the seam toward the background. I know this means you will see the seam through the white, but trust me, all those crazy improv seams want to have their way. Just go with it!
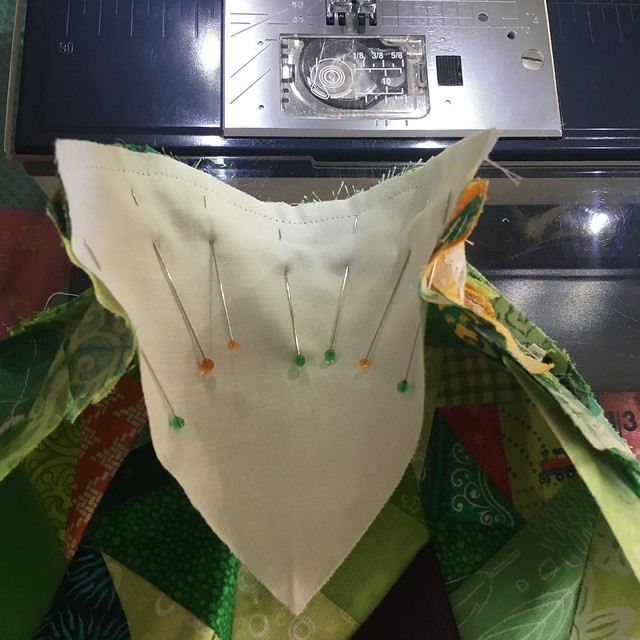
Now take your "H" piece and line up the center crease with the center seam of your wedges. THIS time, pin in place from the wedge side of the fabric!
Like this! I like to pin the center, then the far edges, every seam, and in between each seam. Sew with a 1/4 inch seam all around. I know pinning is a pain, but I am NOT one of those people that can hold my pieces of fabric together and just feed them through the machine and end up with the perfect curved piecing.
Again, press toward the background. Doesn't that look pretty? Now repeat for your other three wedge quarters, and then sew the four blocks together. Press any seams open.
Add your batting and backing and quilt as desired. I considered doing some of my usual FMQ swirls or paisleys for this project, but the modern aspect led me in the direction of straight line quilting.
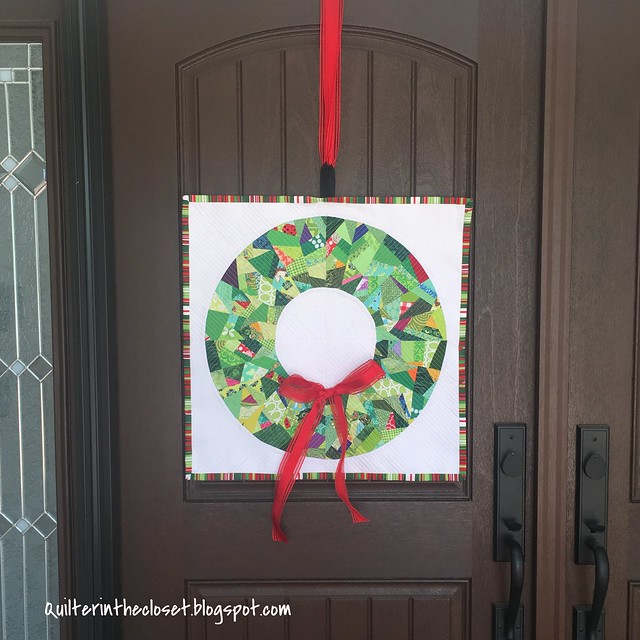
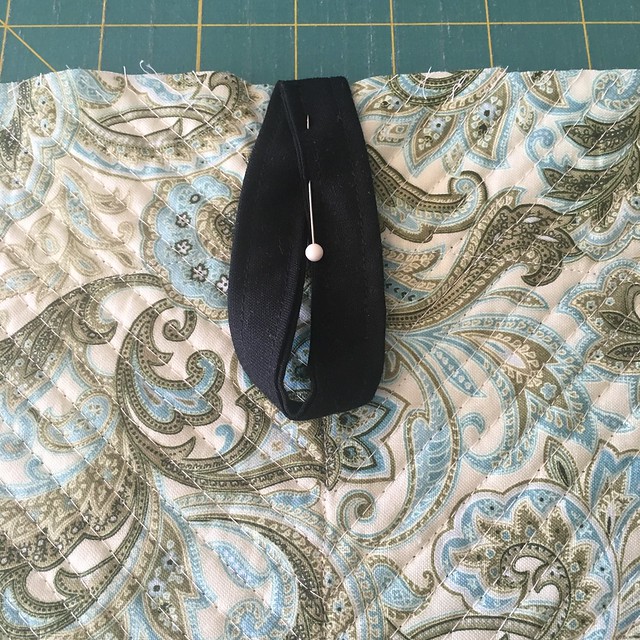
Before you add your binding, consider adding a little loop to the back of your quilt (by the center seam), so you have something to hang your wreath from. If you do this before adding your binding to the front, the loop will be secured by two sets of stitches (when you sew the binding to the front, and when you sew it to the back).
Next, hang your pretty wreath on your door! Or give it to a friend that lives in an apartment, condo, or assisted living (this would really brighten up one of those places).
I hope you enjoyed this tutorial!
Thanks for reading!
Jennie
And here is the link up so you can enter to win those lovely fat quarters!
If you have time, visit our sponsors!


Jen this is fabulous! When I am reunited with my scraps I might have a go at making one myself :)
ReplyDeleteI love this.....looks tricky, but actually very easy! I am pinning it as a must make project! thanks for the tutorial!
ReplyDeleteWow your wreath is just fantastic Jen!
ReplyDeleteWhat a beautiful Christmas mini quilt, Jen.
ReplyDeleteI love patchwork - this is SUCH an awesome design!
ReplyDeleteLove it Jen - great tutorial, and fab quilting as always!
ReplyDeleteLooks great. I'm going to make one or 2 oe maybe 3... we will see.
ReplyDeleteLooks great. I'm going to make one or 2 oe maybe 3... we will see.
ReplyDeleteLooks great. I'm going to make one or 2 oe maybe 3... we will see.
ReplyDeleteLove it, looks great, your tutorial is great, I'm going to make one!
ReplyDeleteThis is so cool. I love the scrappiness and how it works for the wreath. I've never done paper piecing, but with your great tutorial I think I could do it. Thanks!
ReplyDelete