I know while many of you appreciate art quilts in general, you prefer more traditional quilting methods. So, this week's quilts are more traditional in nature. Enjoy!
This first one is called, "Milady" by Sheri Hohman of Indianapolis, Indiana. It is paper pieced and the design source is Lady of the Lake blocks.
Her quilters statement, "My 'Want to Do' quilt folder had a picture of this quilt layout for Lady of the Lake blocks, which I believe came from one of McCall's quilt magazines. I loved it, but had no real expectations of completing such a quilt project. Then, in 2009, Edyta Sitar sponsored a half-square triangle exchange at The Back Door quilt store, in Greenwood, Indiana. It included a deadline in spring of 2010 to complete a project using those half-square triangles. Having a deadline and meeting Edyta for a show-and-tell inspired me to set a goal and complete the quilt."
I think the way she finished the edges of the quilt is neat.
Here is another Lady of Lake quilt. This one is called, "Summer at the Lake" by Rahna Summerlin of Port Orange, Florida. It is machine pieced and machine quilted.
She says, "The quilt was inspired by a Lady of the Lake quilt in the Land's End collection by Maggie Potter. I reinterpreted it using over 200 different reproduction 1930's style fabrics. No two blocks are the same. While piecing the quilt over the summer, the fabrics reminded me of vintage children's playclothes, hence the title."
Have you ever looked through a catalog and seen a quilt you would like to make? There's a particularly attractive clamshell one in the Pottery Barn catalog I would mind trying!
The next one is called, "Sunburst" by Connie Watkins of Waco, Texas. It is hand pieced and hand quilted!! The design source is a picture of an antique quilt from the 1800's.
She says, "I saw a picture of an antique quilt that is in the Folk Art Museum in New York and knew I wanted to try to make it. I didn't have a pattern, just a small picture."
Isn't this just amazing? The hand quilting is really something too!
Have you ever tried to duplicate a quilt based on a small picture you took somewhere?
This last one is called, "Meadow Lily" by Joan Cooper of Hemet, California, and quilted by Beth Lura. It is pieced. The design source is At Home with Thimbleberries Quilts by Lynette Jensen, Meadow Lily pattern.
"This quilt was my first effort at quilting. With the help of my daughter and husband, I purchased the material I'd need from the local hardware store, which also had a really nice fabric department. My guild friends encouraged me to put this quilt in the Iowa State Fair that summer. It won a blue ribbon for "My First Quilt". I was both surprised and elated. That was the summer of 2002. I gave the quilt to my daughter who lives in Houston where she has displayed it in her home."
I think I initially snapped a picture of this quilt because the block reminded me of a similar block in the How Far Will You Go? QAL I participated in at The Elven Garden. But really inspirational is the quilter's statement, there are so many interesting aspects! It was her first quilt! It is gorgeous, and here it hangs in an international quilt festival! Also, I think I may need to go see that hardware store. You know hardware stores are getting almost as rare as quilt shops. I wonder if they combined if they would have better luck against the big box stores. It sounds like the perfect date night destination for me. Just sayin'!
Do you still have your first quilt?
Thanks for reading today,
Jen
Quilter in the Closet: My artistic journey as I learn, try, and am inspired by multiple techniques, including quilting, painting, drawing, and who knows what else!
This blog may contain affiliate links to products. As an affiliate, I earn a small amount from qualifying purchases; however, it does not affect the cost of the item to you, nor am I compensated if you do not purchase.
Sunday, March 30, 2014
Tuesday, March 25, 2014
Cutting it up - Building Blocks Tuesday
As of this morning, I didn't have any new blocks to share. So, I decided to postpone this post for a few hours to see if I could come up with one or two.
Instead of making blocks, I've been busy cutting for days! No really, DAYS.
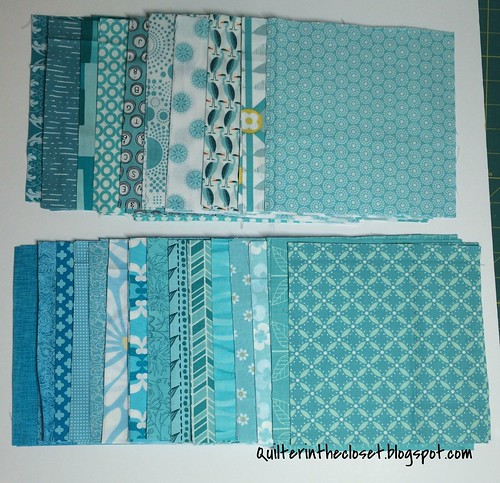
This is only about 1/3 of the stuff I've been cutting lately. I have two projects that needed similar colors cut, so I figured I should do it all at once. I despise cutting, so I try to do it all before I start a project just so I know it's done and I won't have to do any more in order to finish. Sometimes that backfires on me (a little).
For example, if I had only cut enough fabric to test 4 of these blocks, I would have definitely made some changes to the cutting requirements.
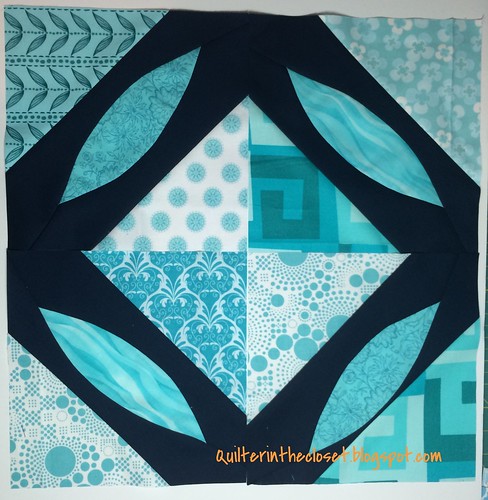
These are blocks from the "Illusion" quilt in Jacquie Gering & Katie Pedersen's book Quilting Modern: Techniques and Projects for Improvisational Quilts (amazon link) . It involves making improvisational curves for the center "pods" and then adding fabric on the sides to end up with a square block. Making those pods was not that easy. The pods are supposed to be somewhat centered in the solid fabric, and as you can see, the one shown bottom right above didn't quite end up that way though I followed the directions properly. Once I made that mistake, I learned how to fudge the others so I wouldn't have such a narrow strip on one side. Or, I could have simply cut one of my solid strips a little wider to accommodate for needing a little extra room on the second side of the pod.
I'm sure I will have more to say about this pattern when I am actually done with the top. 4 blocks done, something like 165 left to go. Given that large number, I am sure you will be seeing more of these on Building Blocks Tuesdays in the future.
What blocks have you been working on? I would love to see. Link up your fabulous blocks. You put a lot of hard work into them - show them off! This free linky will stay open until the first Monday of next month, but I will repost it every Tuesday until a new month starts.
Rules:
1) Please link up only to the page in your blog showing your wonderful blocks, not just the blog homepage. Flickr pictures are also OK.
2) Make sure to put your blog name as the description so people know where they are going or the name of your block!
3) Please grab my button and post it in your blog post or sidebar.
4) Visit other linky participants!
Thanks for reading!
Jen
Instead of making blocks, I've been busy cutting for days! No really, DAYS.
This is only about 1/3 of the stuff I've been cutting lately. I have two projects that needed similar colors cut, so I figured I should do it all at once. I despise cutting, so I try to do it all before I start a project just so I know it's done and I won't have to do any more in order to finish. Sometimes that backfires on me (a little).
For example, if I had only cut enough fabric to test 4 of these blocks, I would have definitely made some changes to the cutting requirements.
These are blocks from the "Illusion" quilt in Jacquie Gering & Katie Pedersen's book Quilting Modern: Techniques and Projects for Improvisational Quilts (amazon link)
I'm sure I will have more to say about this pattern when I am actually done with the top. 4 blocks done, something like 165 left to go. Given that large number, I am sure you will be seeing more of these on Building Blocks Tuesdays in the future.
What blocks have you been working on? I would love to see. Link up your fabulous blocks. You put a lot of hard work into them - show them off! This free linky will stay open until the first Monday of next month, but I will repost it every Tuesday until a new month starts.
Rules:
1) Please link up only to the page in your blog showing your wonderful blocks, not just the blog homepage. Flickr pictures are also OK.
2) Make sure to put your blog name as the description so people know where they are going or the name of your block!
3) Please grab my button and post it in your blog post or sidebar.
4) Visit other linky participants!
Thanks for reading!
Jen
Sunday, March 23, 2014
Inspirational Sunday (25) - via the 2013 International Quilt Festival in Long Beach
For several weeks, I've been sharing nature inspired quilts, but today's quilts are more about man-made things.
First, "Tutti Frutti Village" by Susan Bleiweiss of Upton, Massachusetts. It won Honorable Mention in the Art-Whimsical category. She fused, raw-edge appliqued with machine stitching, and machine quilted this original design.
She says, "This quilt was inspired by a digital sketch I did on my iPad using a very simple sketching application. I used only my hand-dyed sandwashed cotton (yes, even the black is hand-dyed!)."
I guess that answers my question about her technique with the black outline of each shape. This quilt is just so bright and cheerful. Susan's "The Hummingbird" quilt that I shared last week is equally colorful.
This next one is called, "Fear of Flying" by Judy Coates Perez of Sacramento, California. It is wholecloth painted and machine quilted. Her design source was, "A scary flight home".
She says, "On a flight home to Chicago, after filming QATV in Cleveland on March 7th last year, I happened to sit next to an aeronautical engineer. Very high winds were causing extreme turbulence, which has always terrified me. I will always be grateful to have witnessed the incredibly calm demeanor of this man, who knew everything about planes. That made me realize I could let go of that all-encompassing fear. Every flight since then has literally been a breeze."
Sounds like this mysterious man should offer this as a service to others who have a fear of flying.
"Mabel - 1952 REO" by Susan Cane of Canaan, Connecticut won 2nd Place in the Art-Pictorial category. She machine appliqued, machine quilted and painted this original design, inspired by a workshop with Katie Pasquini Masopust.
She says, "This quilt was created from a photograph, taken by my husband, of the first antique truck we purchased together."
I recently spent some time in Canaan, CT when I visited my grandmother in January. Rural Connecticut probably still has some of these trucks around. Perhaps next time I visit I can snap my own picture.
This next quilt just amazes me! It is called, "Around the Block" by Karen Eckmeier of Kent, Connecticut. It won Honorable Mention in the Art-Whimsical category. It uses fabric collage under tulle, topstitching, and is machine quilted. The design source is Log Cabin Barn Raising.
She says, "As quilters, we have "been around the block" when it comes to making quilts! I thought it would be fun to substitute the central square of the Log Cabin design with a village so that it would be like walking around the block of several different towns."
The little details in this quilt make it so interesting. I looked at this quilt for a long time and was delighted each time I noticed something new.
Isn't that border just amazing?
I think next week, we will return to some more traditional quilts.
Thanks for reading today,
Jen
Friday, March 21, 2014
How I Made My Monet - an "How I Do It" Tutorial
Thank you to everyone who left a nice comment on my post for Monet inspired quilt. I have just nicknamed it "My Monet". I am no good at naming quilts.
I snapped pictures throughout the process of making it, just in case one of you want to make your own "My Monet." So let's get started.....
Step One
We need to make our canvas. In the process we are also going to create a horizon line for our picture.
First you will need to cut pieces for your sky and water. The fabric for the water should be darker in color than the sky.
I wanted my quilt to be small enough to hang on a wall, so my pieces are 7 x 20.5 inches for the sky and 9.5 x 20.5 inches for the water. In art and photography there is this "rule of thirds" that people talk about, referring to dividing your subject matter into thirds instead of in half to make it more pleasing to the eye. So, your sky should be roughly a third of the overall height of your quilt.
Sew these pieces together with a 1/4 inch seam. This is the only seam you will sew in this whole project! Press this seam open.
Step Two
Gather a bunch of scraps in varying shades of purple and red-violet, dark gray, light gray, white and orange. Apply your favorite fusible to the back. You will notice that I just used scraps of fusible as well. I always seem to have random shapes of fusible laying around.
Now, I did NOT use all this fabric. When I started the project, I wasn't sure how much I would need. I was just using scraps, so it didn't really bother me that I had some left over from this project. I would guess that I actually only used about half of what is shown above with the exception of the dark and light grays. You will need enough of these scraps to make the size of Parliament bldg (dark gray) and some background bldgs (lighter gray), so you will want a nice medium size scrap of those colors.
**I did not use the yellow shown above, but you can if you want.
Step Three
Grab your dark gray scrap. Mine was roughly 9 x 7. Draw your Parliament bldg on the fusible ** Remember that you will need to draw it in a mirror image since you will be flipping it when you fuse it. So the right side of your drawing will become the left side of the bldg when you flip it. **
Cut out your building. Save your scraps!
If you are from the UK or have visited the Parliament bldg, fell free to be more detailed in the roof line. I do not have first hand knowledge of the bldg myself, and this piece is just a silhouette so I improvised.
Step Four
Using your lighter gray scraps, draw a distant skyline and cut it out. Save your scraps!
This skyline is meant to be across the river in the distance, so you don't have to be very detailed. Imagine a foggy evening; you aren't going to see anything in great detail.
Now we need to fuse them to our background. Because the Parliament building is in the foreground, place it below the horizon line. ** The bottom of the building needs to be below the horizon line, but make sure that no part of the roof line is below the horizon line (we don't need to see any water behind it).**
The skyline in the distance is part of the background, so place it directly on the horizon line (your seam).
I also chose this moment to cut out a sun from my orange scrap for the sun and place it in the sky. It is just nice at this point to know where your light source is, because coming up next is the shadows.
Step Five
Take your dark gray scraps and cut them into skinny strips of varying lengths. You will want some that are as long as your Parliament building, and some that are rather short.
Also cut your scraps of lighter gray into strips, but keep them separate.
Step Six
Use those gray strips to create a shadow in the water of the Parliament bldg and skyline in the distance.
Fuse them in place. I found it extremely helpful to use a Teflon pressing sheet from now on with these skinny strips.
The pressing sheet will help keep your iron free of any fusible residue.
Pressing sheets are easy to use, you just lay them over your piece and press.
You will need shadows for your skyline in the distance too. I kept my lighter gray strips for the shadows of the distant skyline.
The darker scraps should probably be closer to the horizon line.
Step Seven
Now we need to start layering the other colors, so take all your darker purple and violet scraps and make skinny strips in varying lengths.
I liked a bunch of my strips to be long.
Starting with your DARKEST color of purple, place them in the water in a way that is pleasing to you and fuse them in place.
Keep layering the dark colored strips in the water and put a few in the sky too.
Step Eight
Now switch to your lightest color. Take your scraps and cut them into strips. This time you will want more short strips than long.
Starting the the lightest color purple, place them around the sun (not too close), and fuse into place.
You will also want to add a few of the light color strips in the water as reflections.
Keep layering the lighter and medium color purple strips in the sky and a few in the water.
Next, add short white strips close to the sun, and tiny orange pieces closest to the sun. Add some to the water too, and don't forget the reflection of the sun in the water. Fuse in place.
Step Nine
Back and baste your quilt. I used spray basting for this small sized quilt. Now get out your threads and get ready to quilt!
Because the buildings are roughly in the center of the quilt, I started my quilting there. I used dark gray thread and made vertical straightline/matchstick quilting lines. I then did the same to the background skyline, using a lighter gray thread.
I heavily quilted the water and sky horizontally in wavy organic lines using different colors of purple thread.
Here are some close ups of the quilting of the final project.
I've seen many quilts in the quilt shows that add a piece of tulle before quilting this type of quilt, but I haven't tried this technique yet. I did want to mention it though as it is supposed to keep the fused pieces flat and in place during the quilting process. The tulle is also a bit slick and I've heard your quilting foot will glide over it more easily.
If anyone has used that technique, I would love to know more details!
So that's How "I" Did It!
I hope you enjoyed this tutorial. If you make your own Monet, I would love to see it!
Thanks for reading,
Jen
Thursday, March 20, 2014
My Monet quilt - Pantone Quilt Challenge entry
Behold! My last minute (and only) entry for the 2014 Pantone Quilt Challenge.
I've been planning this one for weeks, but was just able to get to it this week.
This wall quilt measures 19 inches by 15 inches and is inspired by Monet's Houses of Parliament series of paintings. I used fusible to create the scene, then quilted the daylights out of it!
Now before you think I am the bee's knees for coming up with this idea. I must admit that for a couple of weeks there, I was surrounded by purple Houses of Parliament. It was one of the more recent projects that I taught to my daughters' classes at school through the Hands on Art program. When Anne at Play-Crafts announced the Pantone color challenge the same week I was painting and teaching this purplicious project, I knew it was fate that I would attempt to make one in quilt form.
How did I do? If you like what you see, head on over to Play-Crafts to see all the other awesome entries.
If you are interested in a more detailed step by step how I made this quilt, I took photos along the way and here is the tutorial so you can make your own.
Thanks for reading today,
Jen
Linking up with:
Tuesday, March 18, 2014
I'm in! - Hands 2 Help charity quilt drive
I just wanted to write a quick note to let you know that the Hands 2 Help charity quilt drive is going on right now!
You can read all about it HERE at Confessions of a Fabric Addict. If you are interested in making a quilt this year for one of the 3 charities listed, you can sign up HERE. There is a little giveaway going on if you sign up before Saturday, March 22nd! And don't worry, you have until the end of May to make your quilt and send it off.
I've participated in Hands 2 Help for the past two years and it feels great to make something for someone in need.
In the past, I have sent my quilts to Happy Chemo, but there are 3 different charities to choose from this year.
Won't you join me?
Thanks for reading,
Jen
You can read all about it HERE at Confessions of a Fabric Addict. If you are interested in making a quilt this year for one of the 3 charities listed, you can sign up HERE. There is a little giveaway going on if you sign up before Saturday, March 22nd! And don't worry, you have until the end of May to make your quilt and send it off.
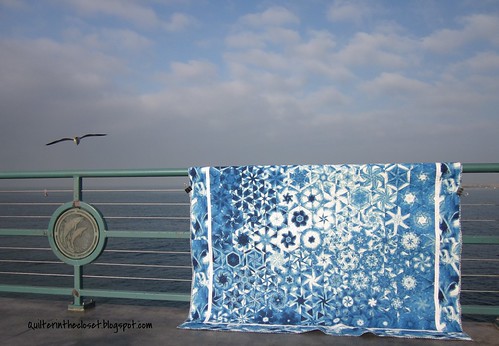 |
| donated to Happy Chemo via the Hands 2 Help charity drive in 2013 |
I've participated in Hands 2 Help for the past two years and it feels great to make something for someone in need.
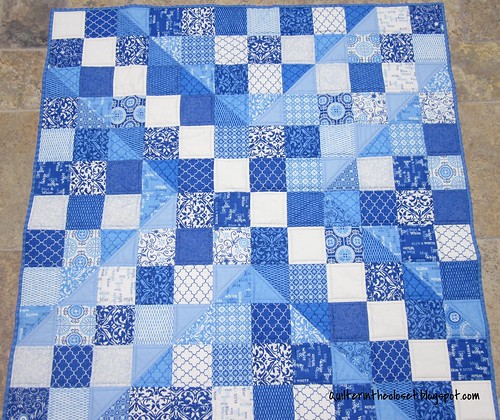 |
| donated to Happy Chemo via the Hands 2 Help charity drive in 2013 |
Won't you join me?
Thanks for reading,
Jen
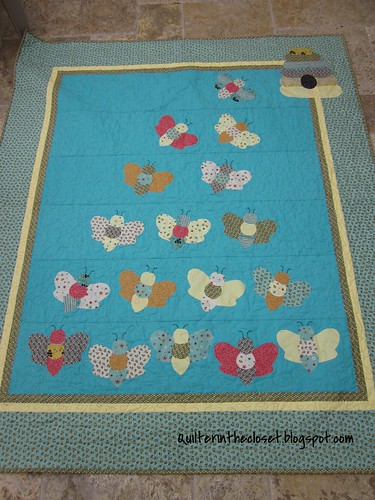 |
| Bee Happy quilt donated to Happy Chemo via Hands 2 Help 2012 |
Subscribe to:
Comments (Atom)
