 |
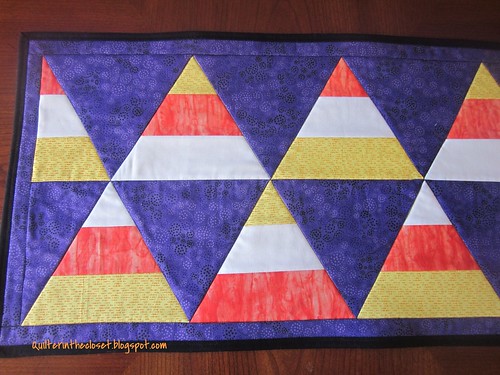
| Candy corn table runner is 54 inches long by 13.5 inches wide |
Here's what you will need:
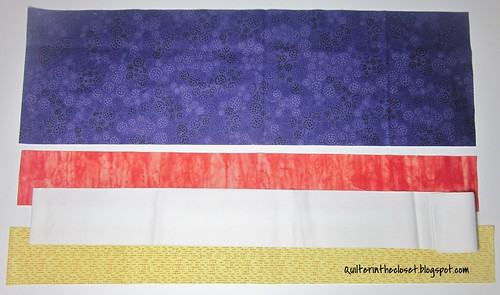
- 2.5 inch x WOF strips - 2 each of white, yellow, and orange
- 6.5 inch x WOF strips - 2 of purple (or whichever background color you like)
- 60 degree ruler
- 16.5 x 57 inch piece of batting
- 16.5 x 57 inch piece of backing fabric
- approximately 148 inches of binding fabric (2.5 inch for double fold)
- rotary cutter, sewing machine, thread, etc.
- optional border - Three 1.25 inch x WOF strips of purple
The following directions are for right handed rotary cutting. My finished table runner was 54 inches long by 13.5 inches wide before binding.
Step One - Make your strip sets
Taking three of your 2.5 inch x WOF strips, sew them together length wise. The candy corn I spied at the store was yellow on top, orange in the middle and white on the bottom, but it really doesn't matter. Repeat for you other 3 strips. Mix up the order if you like. Your strip sets should measure 6.5 inches wide x WOF.
Step Two - cut 30 degree triangles:
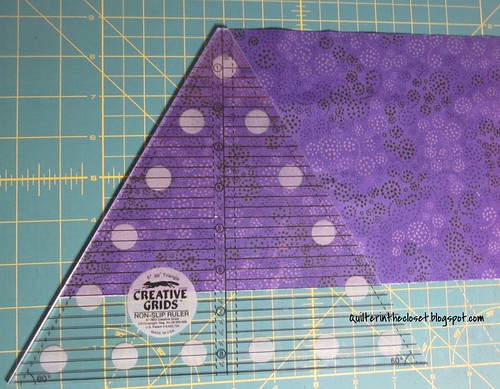
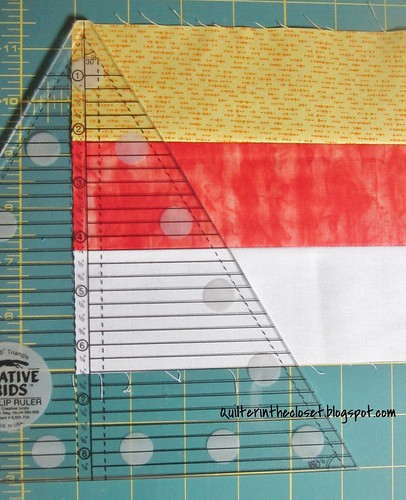
Take one of your purple 6.5 inch strips, folded selvage to selvage, and cut off selvages making sure the edge is square. Line up your 60 degree ruler with the dotted line left of the center of your ruler. Also line up the flat tip of the ruler along the top edge of your fabric strip and the bottom edge of your strip should follow the 6.5 inch line across the ruler. Cut along the angle. You should now have two 30 degree triangles.
Why the dotted line to the left? Think of it this way, you need 1/2 a 60 degree triangle, but you also need 1/4 inch seam allowance too. So choose the dotted line that will add that seam allowance.
Why do you need a 30 degree triangle? Well, if you want your sides to be straight, you will either need to add 30 degree triangles on the sides or you will be slicing a little less than half of your 60 degree triangles off into the scrap pile at the end. I just figure since your strips start with that nice square edge that is perfect for getting some 30 degree triangles, and you have to make a similar cut to start the 60 degree triangles anyway. It's a win/win.
Why do you need a 30 degree triangle? Well, if you want your sides to be straight, you will either need to add 30 degree triangles on the sides or you will be slicing a little less than half of your 60 degree triangles off into the scrap pile at the end. I just figure since your strips start with that nice square edge that is perfect for getting some 30 degree triangles, and you have to make a similar cut to start the 60 degree triangles anyway. It's a win/win.
Step Three - cut 60 degree triangles
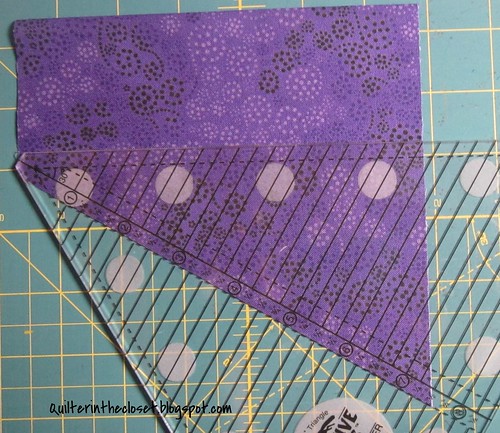
Now that you have one angled cut, line up you ruler facing away from you with the 6.5 inch line across the top of your strip, and the blunt end of the triangle on the bottom of your strip. Cut the new angle. Because your strip is folded, you are cutting two 60 degree triangles at a time.
Now rotate your ruler around to face you, lining up the 6.5 inch lines and blunt tips, and cut again. Continue rotating your ruler around until you are near the end of your strip.
At this point, you can either open the fold and cut one more 60 degree triangle, or line up the dotted line to the left of center again on the ANGLED cut. The blunt tip of the ruler should be in line with the top edge of your strip. Cut along the angled portion of the ruler, noting that it is actually cutting a perpendicular cut, making a 30 degree triangle.
Step Four - repeating cutting with your strip sets.
Now take your strip sets (yellow, orange and white). You can fold them in half lengthwise, lining up the seams, and make your cuts, but I find that my cutting gets a little messy at some point.
Start with your 30 degree triangle at the end, then continue with your 60 degree triangles until you reach the end of your strip. If you have room at the end, it never hurts to get one more 30 degree triangle out of the other end.
Repeat for your second strip set.
Step Five - Play around with possible layouts
Step Five - Play around with possible layouts
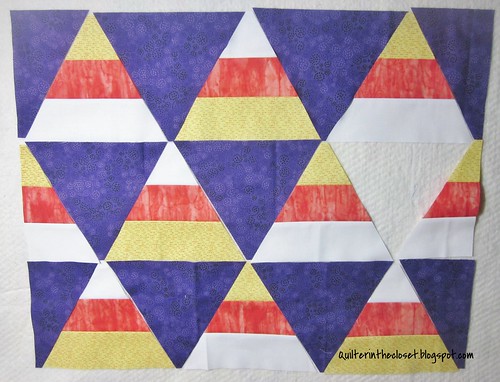
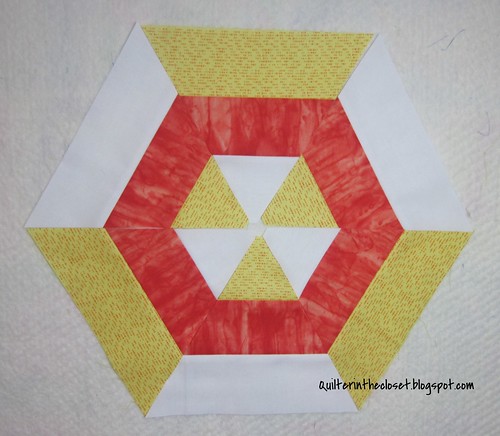
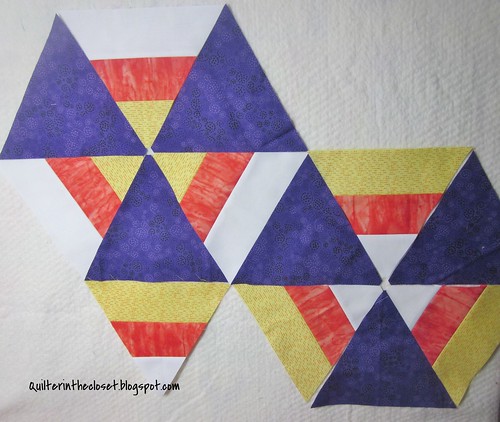
These triangles you have cut can make all kinds of fun designs. For the table runner, I chose the 1000 Pyramid design, but if you would rather have a wall hanging, try some hexagons.
Here's a picture of how half of the hexagon would be pieced together (see all those blunt tips together). You would then add a background triangle to either side. Notice how it is forming a straight row? For those of you doing the One Block Wonder Quilt Along, this is essentially how we will be making hexagons.
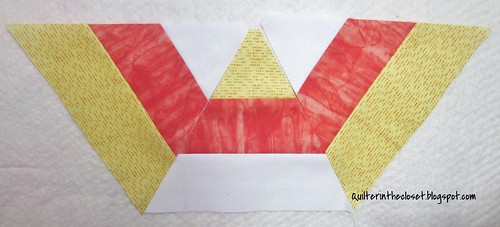
You can even mix up the hexagons, though I thought this reminded me a little too much of a radiation warning sign.
These are just some of the things you do with the triangles you cut. You can also use the ruler to make diamonds, and combine them with triangles to make lovely stars. Sarah Fielke's "Big Techniques from Small Scraps" Craftsy Class has a whole segment on this ruler.
Step Six - start piecing in rows
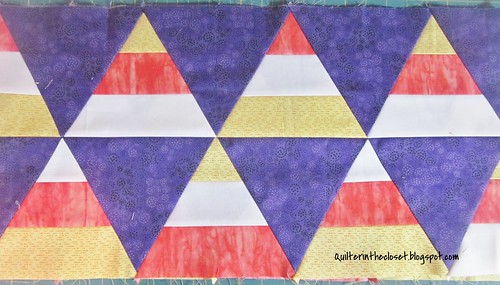
After you have chosen your final layout, start piecing the triangles together, lining up the edges. You will want to start and finish each row with a 30 degree triangle. This gives us nice straight edges along the sides of your quilt. For the table runner, I pieced fourteen 60 degree triangles and two 30 degree triangles in each row, alternating between my candy corn and the purple background triangles. For my second row, I started with the opposite (candy corn or purple) than my 1st row started with.
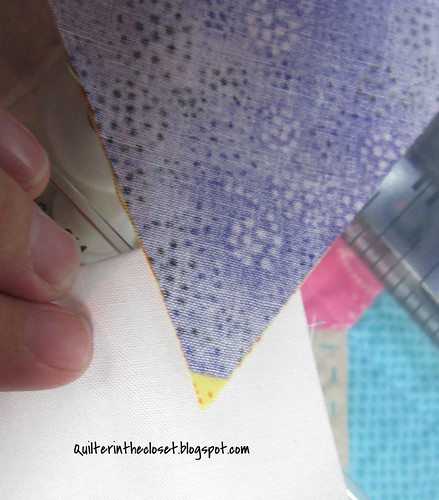
Piecing tips: The blunt tip on the end of the ruler will show you where your seam allowance should start.
Just remember as you add more triangles to your row, one edge will always line up straight across.
I didn't feel the need to press as I went. I just sort of finger pressed toward the dark background triangles since they were darker. Once my row was together, I pressed the seams to reinforce that direction.
Once you have your rows completed, sew them together.
Step Seven - finishing
If you desire, add a border. Mine is only 3/4 inch wide. Then baste together with the batting and backing, quilt as desired and bind.
I chose to just stitch in the ditch for my table runner. This decision had more to do with time than anything else. I thought a fun loop-de-loop with a bat motif mixed in here or there might be fun. My personal preference would be to keep the candy corn unobstructed with a design, but those purple background triangles are screaming out for something fun. Maybe I'll go back later and add something in those spots.
This pattern could also be adapted to make Christmas trees, especially if you added a sashing between rows with some squares to be the trunks of the trees. Just a thought!
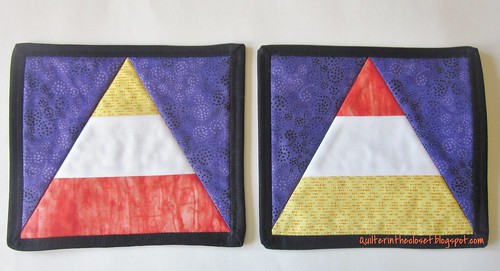
I did have several triangles left over, and made these little candy corn mug rugs. They are really closer to over-sized coasters, but they are cute. Anybody want one? Just leave me a comment telling me what is your favorite Halloween treat. I will draw two winners this Friday, September 6th and they will each get one little coaster/mug rug. This giveaway is open internationally.
This giveaway is now closed.
Thanks for reading today,
Jen



Lovely block, and great instructions!
ReplyDeleteThanks for taking the time to put the tutorial together! Love the runner!
ReplyDeleteI have never tasted candy corn I suspect that this might be the closest I will ever get to it :)
ReplyDeleteI've just googled candy corn and learned it's fat free, lol! Your runner looks great and those mug rugs are very cute :)
ReplyDeleteI always have to buy a bag of Candy Corn for old time sake but I end up eating most of it!!! My favorite treat at Halloween is Necco Wafers. They aren't too sweet. It was my favorite since childhood. The table runner is so festive. I bet it was fun to make with the ruler. I am using the ruler now for a quilt!
ReplyDeleteWow, I just got a similar ruler and have been trying to figure out how to use it
ReplyDeleteThanks for the cute candy corn and 60 degree triangle tutorial. I was just looking for something "candy corn" -- to do a quilted project so it was nice to find your project!
ReplyDelete