 |
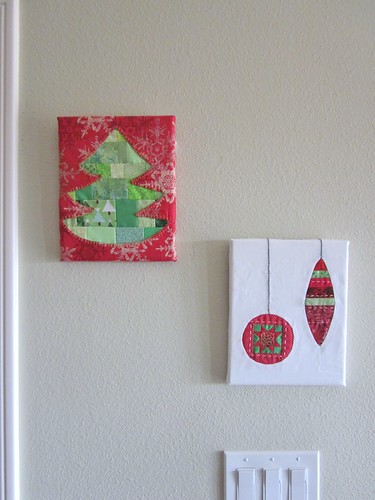
| Tree and Ornament Wall Art |
What you will need:
- 2 canvases (I used 8 x 10)
- 2 pieces of paper the same size as your canvas
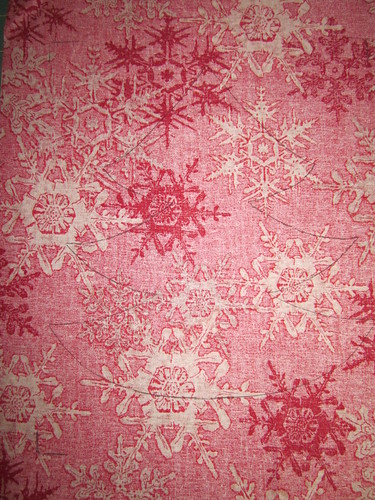
- 2 pieces of background fabric at least 2 inches bigger than the dimensions of your canvas (so mine was 10 x 12), (make sure 2 inches is enough to allow for the thickness of your canvas, mine was pretty thin)
- Various scraps of red and green fabrics
- Lite Steam a Seam 2 Fusible Tape - I used the 1/2 inch variety.
- Thread
- Scissors
- Pearl cotton or embroidery floss (optional)
- Stapler
Rather than give you templates, I will show you how simply I made mine. This way you can adapt your project to whatever size canvas you like (or perhaps another project entirely).
For the Tree:

Fold your paper in half. Draw half a tree, cut out. See, I told you it was simple! Double check to make sure your tree fits nicely on your canvas.
For the ornaments:
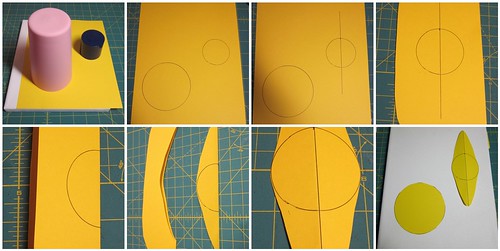
Grab a few round objects and trace. For the round ornament, I used a cup. For the oblong ornament, I traced around a cap, drew a line through the center the length I wanted my final ornament to be, folded on the line, then cut my shape. Again, place your paper templates on the canvas to make sure you like how they fit.
Step Two: Preparing your background fabric.
Take your templates and trace their shapes on the wrong side of your background fabric, in the position you want them. I wanted my tree to be centered. Remember for the ornaments, this would be the mirror image.
TIP: I also marked the edges of my canvas on the background fabric, just to give me an idea of where they were so I could more easily center my objects.
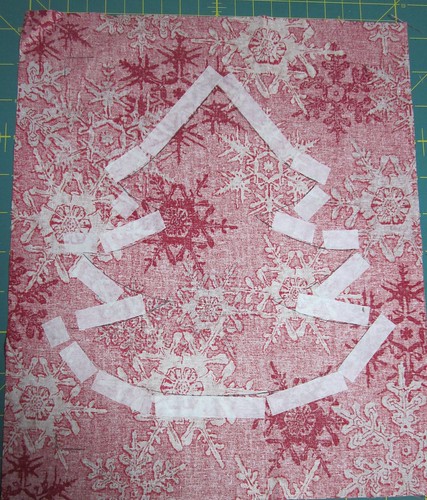
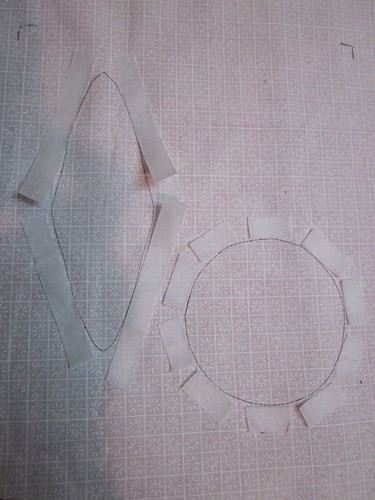
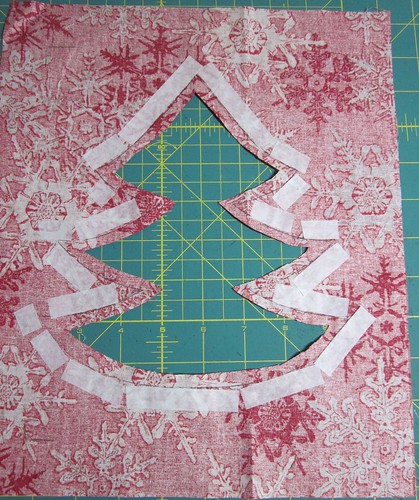
Next take your fusible tape and place as close to the line you marked as possible. You can leave some gaps here and there (curves are tricky, after all). Then remove one side (the bottom side) of the paper and iron in place.
Now take your scissors and cut approximately 1/4 inch from the line on the inside of your shapes.
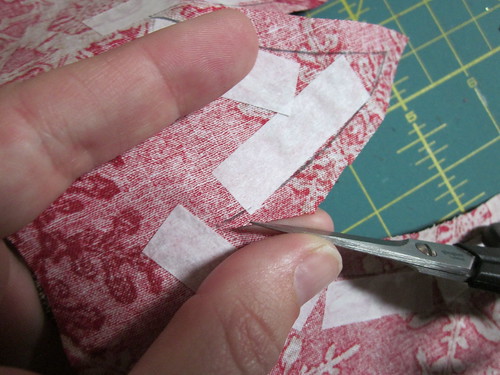
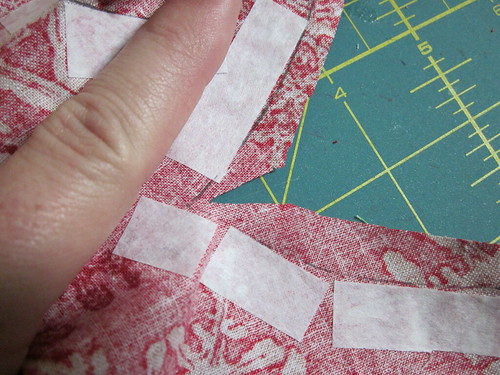
You will also want to carefully snip inside any corners, almost to your drawn line (about 1/8 inch away), and along any concave curves (the circle ornament and the bottom of the tree in my case).
Now finger press all those seams.
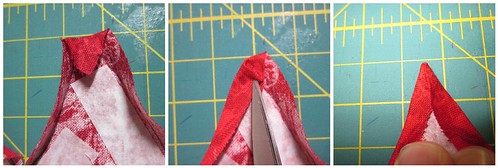
Now is a good time to prepare the points too. Finger press them by first folding in the point, then folding each "side around it, until it is sharp. It is OK that this doesn't stay put. You are just trying to give the fabric an idea of where it will be going soon.
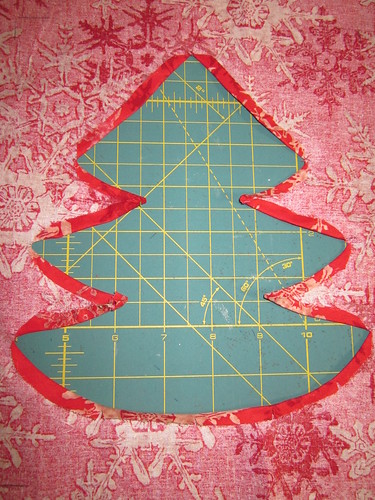

Now, remove the 2nd piece of paper of your tape and CAREFULLY fuse your new seam allowance to the remaining side of the tape. ****If you used the 1/2 inch tape, as I did, there will be some extra fusible goo. This will be handy for the next step, but if you press your iron against it now it is going to make a mess! So be careful, use the tip of your iron and work from the inside of your shapes. IF you are lucky enough to have one of those Clover mini irons, this is an excellent use for it!
If you were rather generous with your seam allowance, or if you used 1/4 inch tape. Now is a good time to add a little extra tape around the edges of your shapes. You don't have to go crazy with it, but a little extra might be nice.
Put your background fabrics aside for a moment.
Step Three - Preparing the "insides" of your tree and ornaments
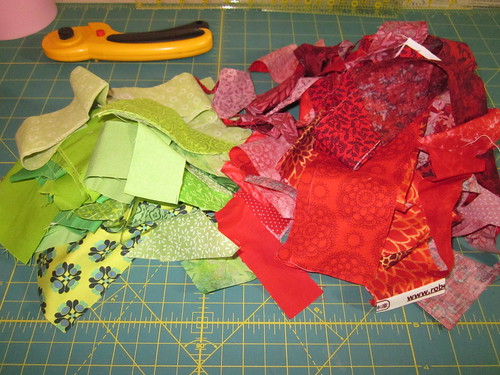 |
| You will notice, I am really thin on the green scraps! |
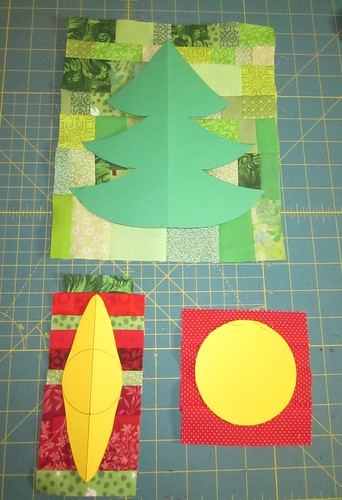 |
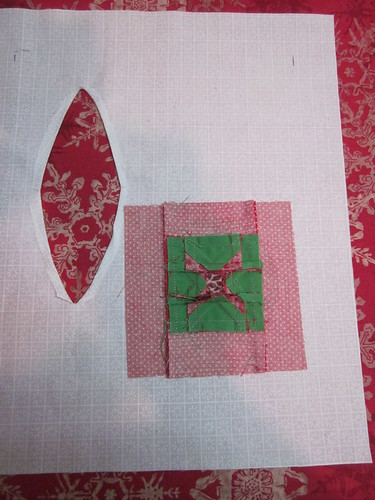
For my tree I took squares of the same width, strung them together, then added them to strips of squares that were different in width. For my oblong ornament, I just did strips. For my round ornament, I did go a little crazy and make a mini star block (but I'm not sure I'll ever be that crazy again).
Now here is where that extra fusible tape will come in handy!
Step Four: Joining the insides with the background
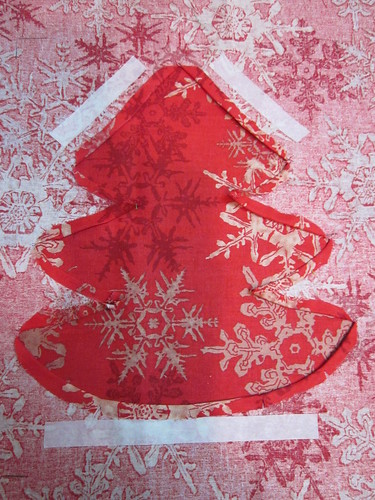
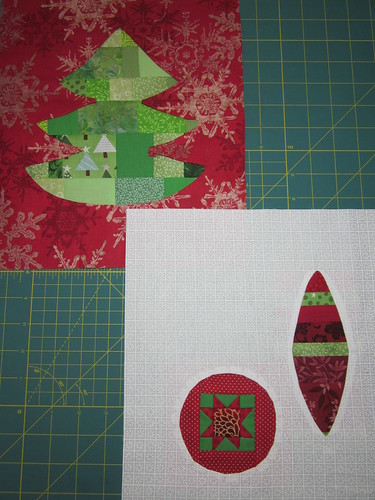
Take your "insides" and place them on your background. ****The right side of you "insides" will be against the wrong side of your background piece.**** Make sure it is centered in your hole of the background, remove any paper from any additional tape you added, then iron from the backside, fusing all the fabric together. Do this for all your pieces.
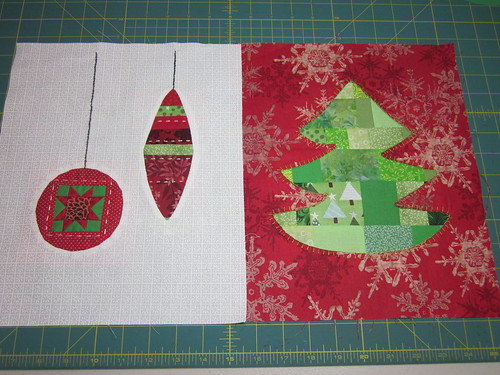
When you are finished. They should look something like the picture above from the front. The fusible tape will hold everything together so you can stitch them together.
Step Five - Stitching them together
Next, you need to stitch the fabrics together. You could machine applique them if you choose. I decided to do mine by hand. I used a blind stitch for the ornaments with regular white hand quilting thread, and I used a BIG blanket stitch for the tree using size 8 pearl cotton in a green (in the hope it will look like pine needles).
I also added some running stitches to the ornaments, and backstitched a "thread" which my ornaments hang from. I considered adding some red running stitches to my tree, but I decided I actually like it just the way it was.
You could get pretty fancy adding beads and other embellishments at this point!
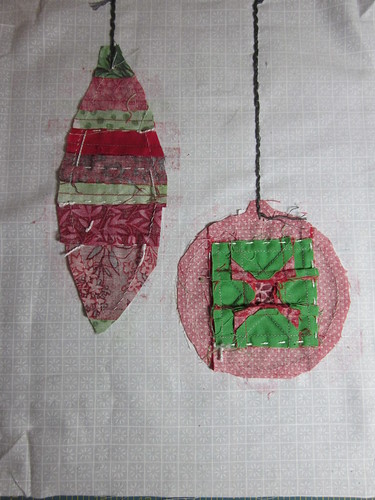 |
| Now you can really see the quality (or lack of) in my stitching! |
Make sure you press everything well before moving on to the next step.
Step Six - Adding your work to the canvas
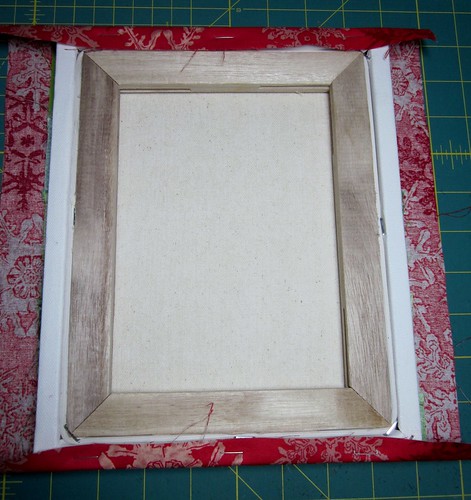
This part is extremely easy! You just staple it! I suppose you could also glue it down, but I had it in my mind that I might want to re-use these canvases for other holiday creations. Staples are easily removed and would allow me to do that!
Laying my fabric wrong side up, I centered my canvas on top (also wrong side up), then stapled along the edges.

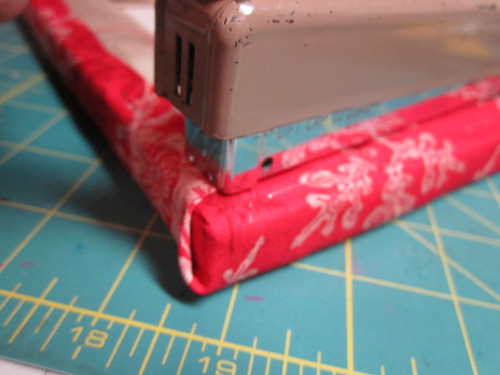
At the corners, I folded one side in as much as possible, then folded the other side up and over - much like the edges of binding - then stapled them in place.
Step Seven - Finally, hang your art on the wall!
If wall art isn't your thing, the same steps could be used to make cute reversible applique pillows! Add a bobble, make it square, quilt around it, and it would make an adorable holiday pillow.
I hope you enjoyed this tutorial! I hope you join me for Building Blocks Tuesday tomorrow.
Thanks for reading,
Jen


Jen they look fantastic! I love your lazy girls method - I haven't tried reverse appliqué yet but that looks simple enough that even I might get it right!
ReplyDeleteThose are so cute! And great tutorial - I need to try this!
ReplyDeleteVery fun! Nice tutorial! And I've tried tiny piecing before--I agree with you--will be a while before I do it again!
ReplyDeleteThat's brilliant Jen, a big merci from France.
ReplyDeleteFiona x
So pretty! Great tutorial!
ReplyDeleteThese look great Jen, really easy to follow tutorial too!
ReplyDeleteI love these! Great tutorial - thanks!
ReplyDelete