
Tension
You can't have a post about FMQ without mentioning tension. It can really be nerve-racking trying to get tension right. Persevere! Use your practice sandwich to get an initial tension level, but if you are already working on your quilt, check the underside of your quilt frequently AND any time you change a bobbin, re-thread your machine, change a needle, etc.
Here are some pictures to show you what my tension process looks like.
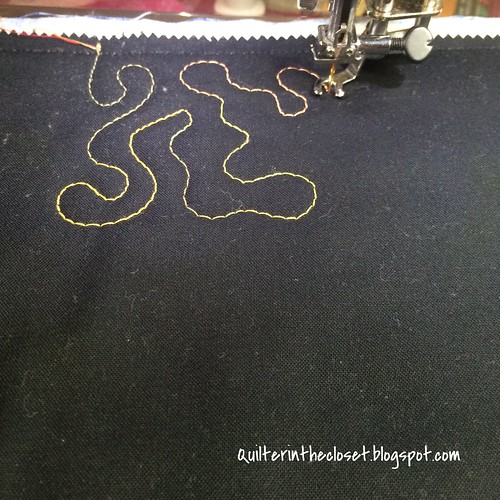
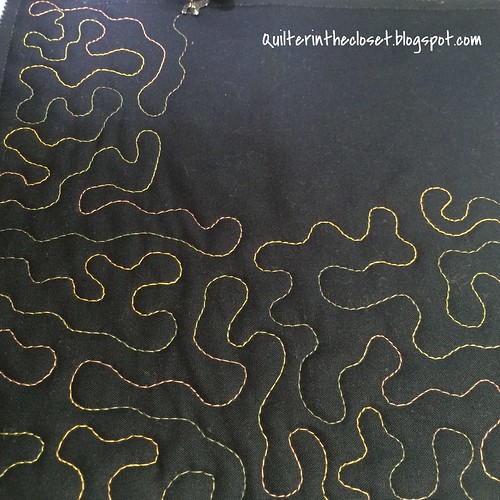
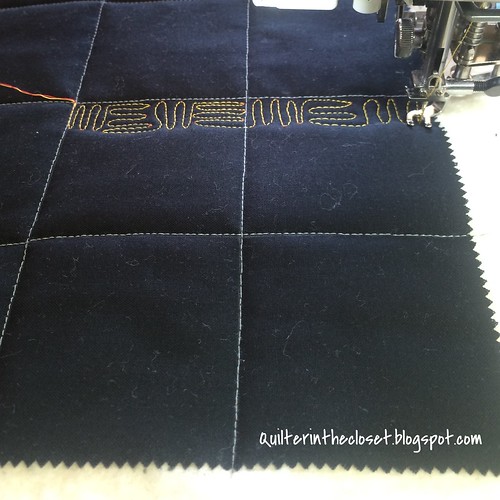
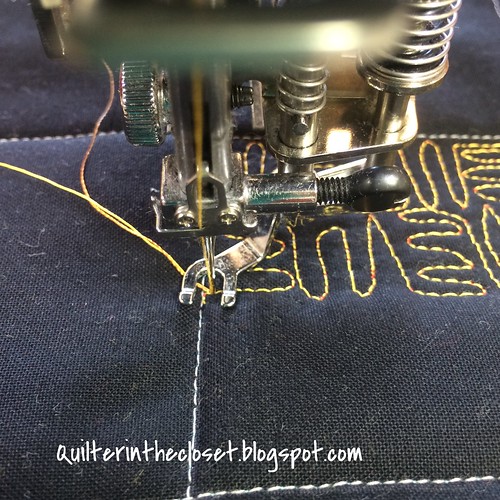
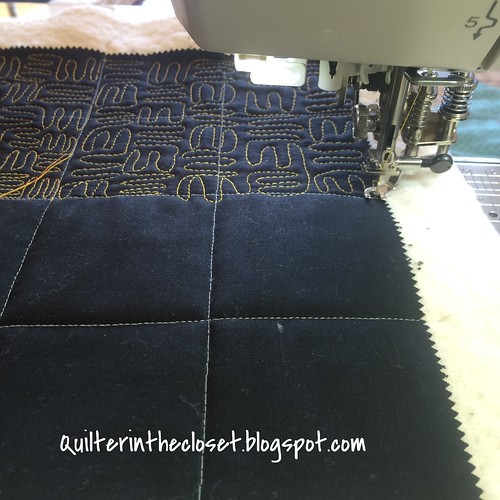
In this case, I started stitching a medium size stipple from the center of one of my sides of the practice sandwich. Just get going a little ways; two stitches isn't enough to tell you if your tension is right.
From the top, everything appears to be going well, but you have to check underneath as well. This is where most of my troubles appear.
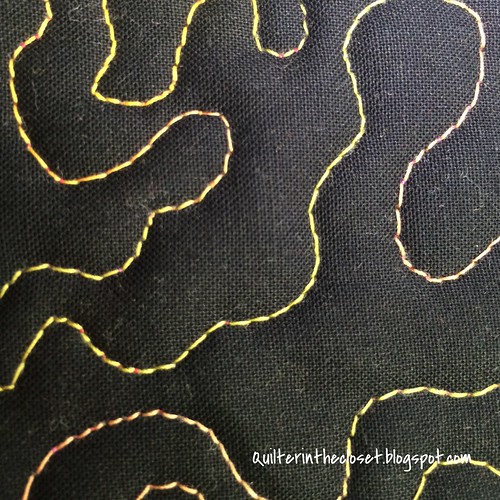
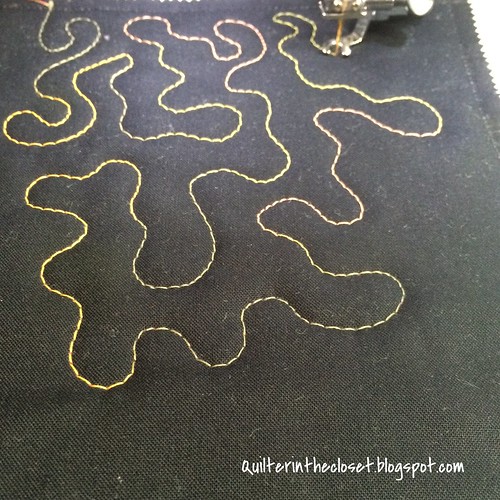
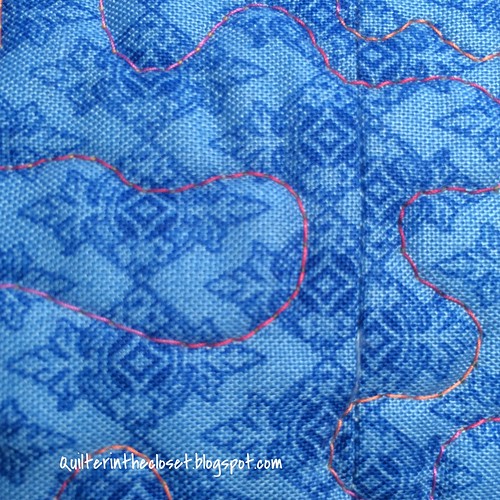
On this sandwich I am using a yellow thread on top and a red thread underneath. From below, you can see little dots of my yellow top thread showing on the bottom side. This means my tension is too loose. Loose/tight, it is easy to get these mixed up. I try to remember that I need my top tension tight enough to draw up my bottom thread approximately in the middle of my quilt sandwich. If it is too loose, my bobbin thread will not penetrate the sandwich. If my top tension is too tight, it will bring my bobbin thread too far through the sandwich and it will show on surface of the quilt.
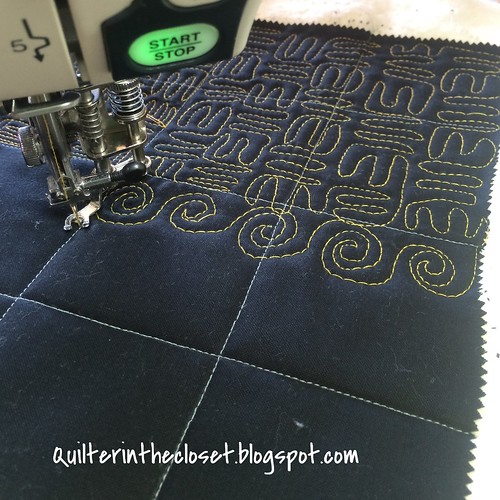
Ah, here is my problem today:
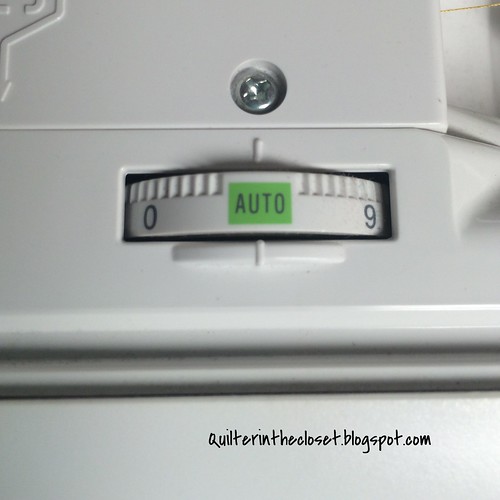
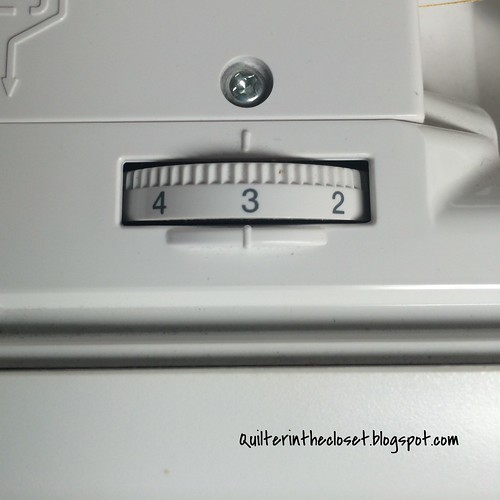
The auto tension on my machine is pretty nice for piecing, but it is NEVER right for FMQ. I have to manually adjust the tension. Let's try a tension of 4.
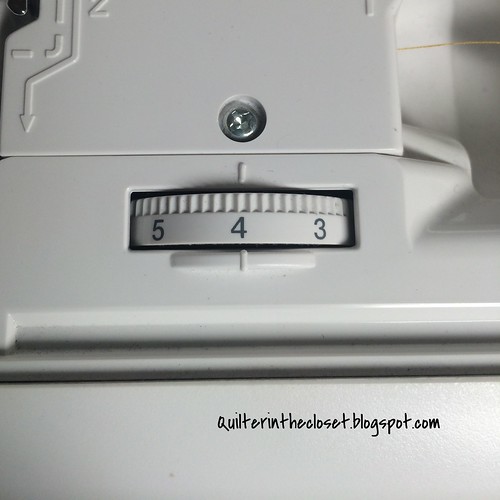
If you are trying to figure your tension out for the first time, I recommend starting in the middle of your tension range and go from there.
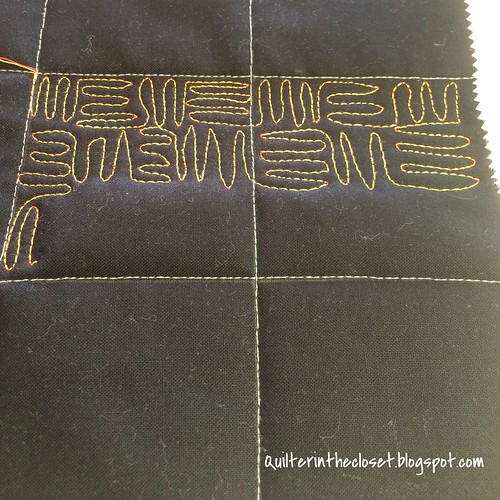
Now stitch a bit more.
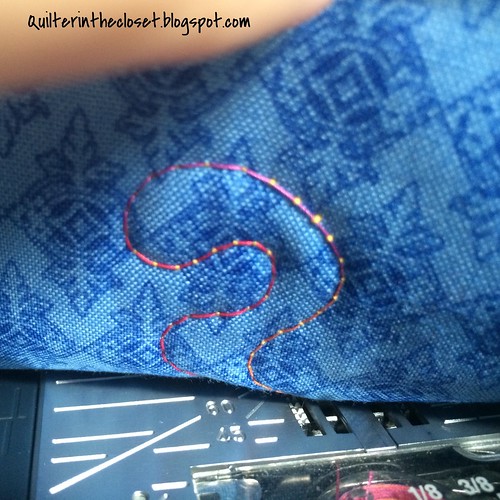
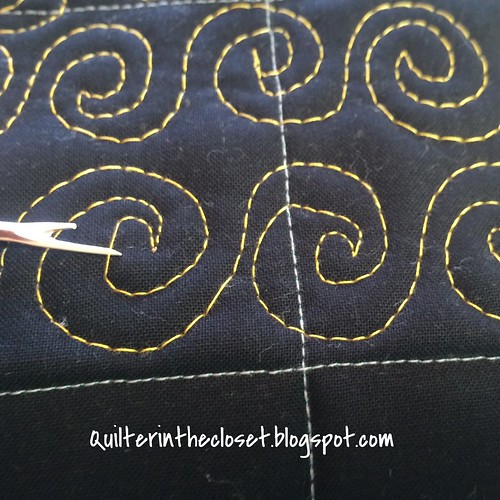
This time I can see a tiny bit of my red thread from the bobbin showing on the quilt top, indicating that my tension is too tight. I still need to check the bottom to make sure there isn't anything strange going on down there too.
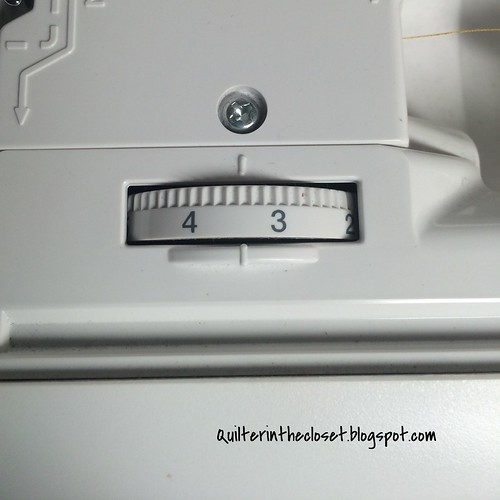
The bottom looks alright. So, since the bobbin is showing on top, I am going to adjust my tension to 3.
Stitch a little more.
Now the top looks alright again, but I have to recheck the bottom.
Oops, a little yellow is showing, so my tension is too loose now. Let's try between 3 and 4.
Top looks good. How about the bottom?
Bottom looks good too. Hooray! Now we know what tension level to use for my quilt.
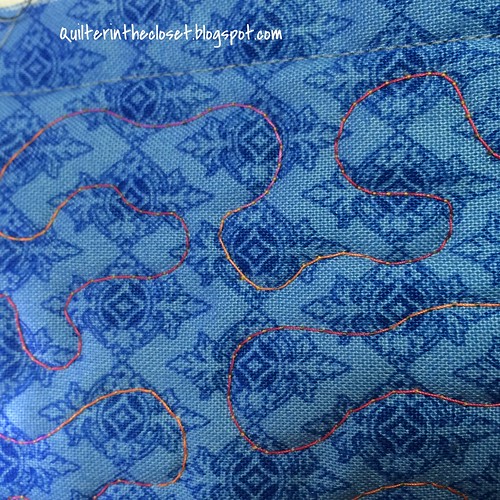
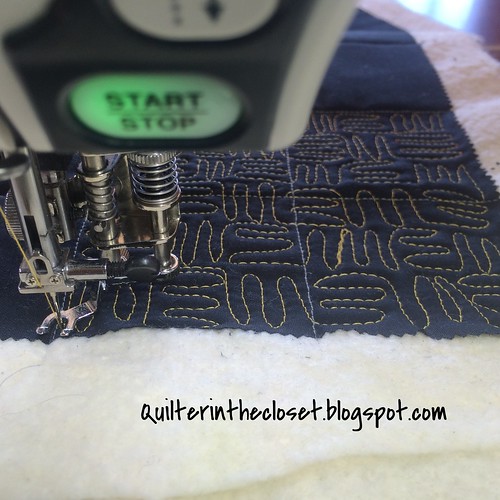
One of the biggest tips I can give someone new to FMQ is to use the same color thread in your top and bobbin. It won't solve every tension issue (eyelashing for example), but it will give you a slightly wider range of acceptable tension levels. For example, (usually) my machine likes to quilt on or around 3.5 for most quilts I make. If I have a different color thread on the bottom (maybe I wanted to blend with my backing), I will need to adjust my tension to find that sweet spot, almost exactly, otherwise you will see little dots of the wrong color either on the top or bottom of my quilt. Whereas, if I use the same color thread, I could have my tension set anywhere from 2.5 to 5, and you wouldn't see the difference! That's huge! Especially for someone just starting out. I have some pictures below that will highlight this point.
Getting Started - bringing up your threads
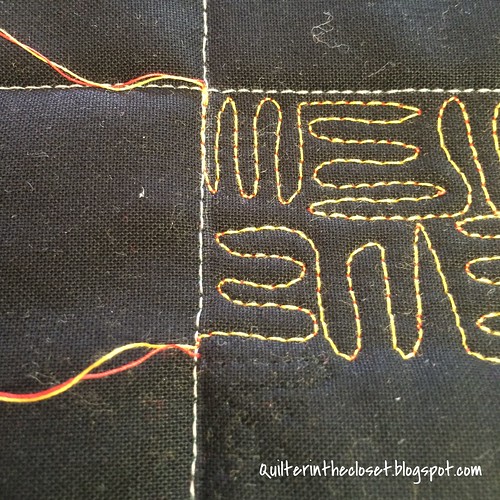
I start by bringing up my threads, preferably in a seam line so I can hide my start stitches. Why bring up the threads? Bringing up your bobbin thread to the top will help alleviate those terrible bird nests that can occur if your bobbin thread is just hanging around below your quilt.
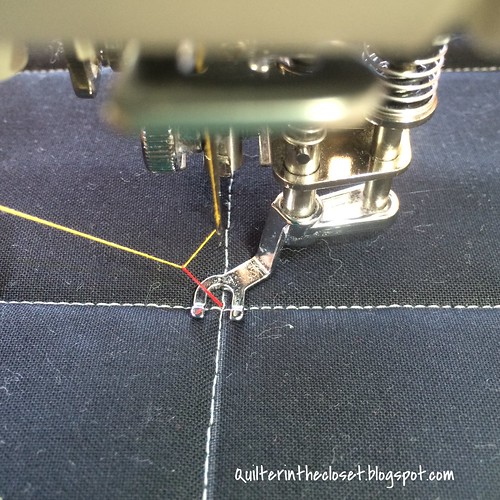
I put my needle down in the seam and hold on to the top thread.

I then use my hand wheel to put the needle up, still holding on to the top thread. When the needle comes up, the top thread will have caught the bottom thread. Just gently pull on the top thread and the rest of the bottom thread will come up.
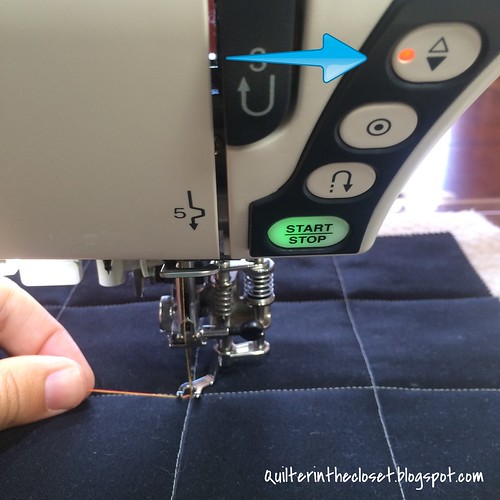
Once you have the bottom thread completely pulled up to the top, just hold both threads over to the left side (because we are going to start stitching down or to the right) so they will stay out of the way. I like to stitch with my needle down function engaged so that every time I stop stitching, my needle will stop down.
Why is that a big deal? Well, if my needle is down, it holds my quilt in place. That way, when I lift my hands off the quilt, it won't shift. When I was first learning to FMQ, the machine I was using did not have a needle down function. I finally learned to use the hand wheel to lower the needle in place before I would move my left hand off the quilt. But that routine didn't start until after a lot of frustrating moments when my quilt would slide and shift.
Quilting by Quadrants
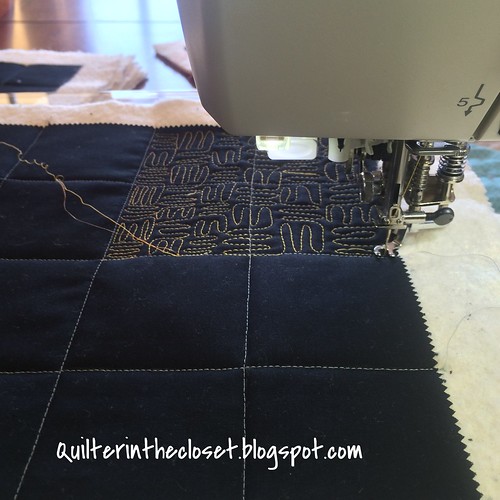
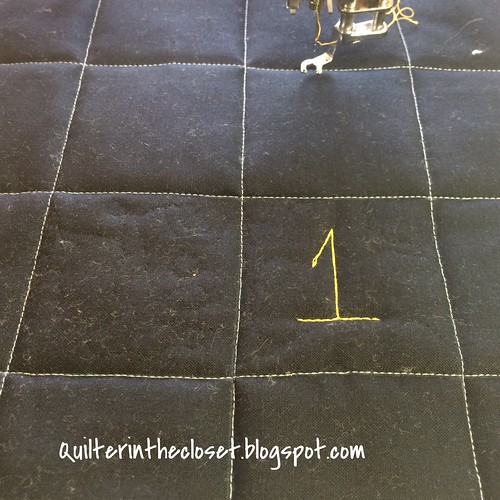
My favorite way to quilt is to quilt by quadrants. I mentally break up my quilt into four even sections, or quadrants, and I always work on the lower right hand quadrant, starting from the center and working my way to the edge, then down. Let me show you what I mean.
I bring up my threads, then I stitch toward the right of my quilt. I don't just make a bee line for the edge. I kind of go up and down and back and forth about 10 to 12 inches at a time. Now clearly, this is a practice sandwich, not a king sized quilt. So, to give you the idea, my stitching is about an inch square and it represents that 10 - 12 inch corridor I mentioned.

I would go back and forth this way until I finish stitching my first quadrant, but I ran out of bobbin thread (or maybe my thread broke, or worse, my needle (point being you had to stop for some reason before you were finished)). It happened to be a lucky thing, because I can take a quick moment to show you how I handle a situation like this. It will also give me a chance to show you what using a matching bobbin will do for tension issues (don't pretend you didn't notice all those little red dots showing on my top).
OK, so in this case I ran out of bobbin, so that thread is rather short to bury. Luckily, I haven't gotten too far away from my seam. I would use my seam ripper to gently pull out the stitches (NOT RIP THEM). The seam ripper is a good tool for this job because it can get under those stitches, but I want to be careful to pull out the stitches, not rip them, because I want my threads long enough to tie and bury. I would go back far enough to a place where I either crossed a seam line, or a place where my stitches happened to be really close together.
In this case, I crossed the seam line, so I pull out my stitches to this point, tie and bury my threads. I will probably go back and bury my threads from my initial start too, since I already have my needle out.
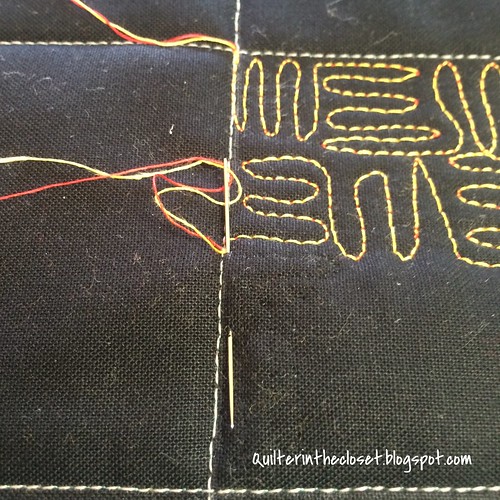
Now I am going to find a place a couple of stitches from the end of my previous stitching (in the seam is best), drop my needle and bring up my bobbin thread. and start stitching from there. I will tie and bury those threads when I stop next time.
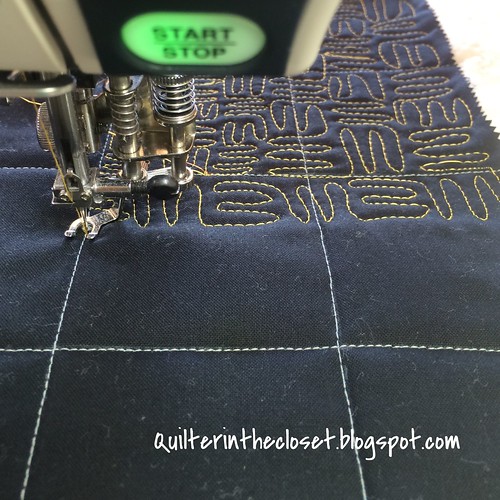
Now I can finish my quadrant.
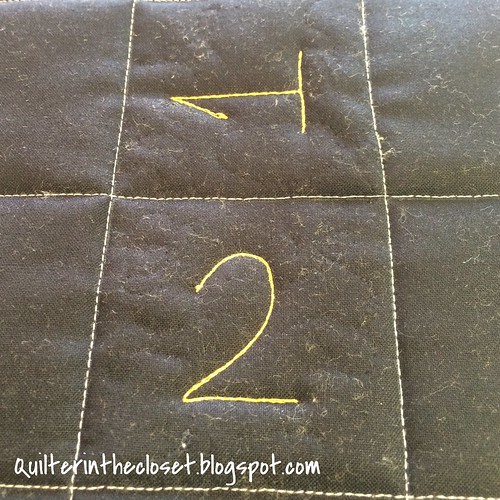
Then I rotate my entire quilt, and start stitching my second quadrant by heading back toward my center line.
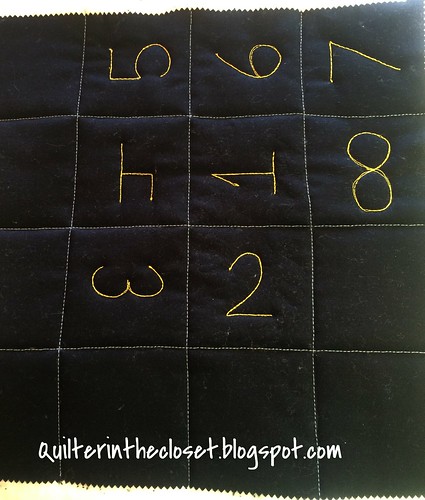
When I am done with my second quadrant, I rotate my quilt and start stitching my third quadrant. You get the idea.
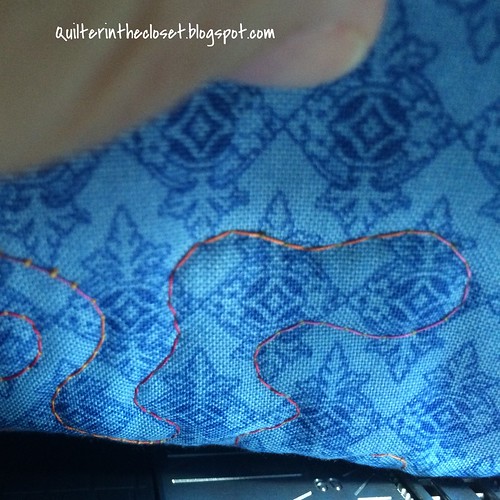
This next picture is a good one to highlight the tension tip I gave you about using the same or a similar color thread in the bobbin. When I first started this sandwich, I was using up a red bobbin. You could see little red dots on the surface of my quilt, indicating that the tension was too tight. It was set a 5. I left it there, even after my bobbin ran out and I switched to a mostly yellow variegated thread. Remember I said that if you matched your top and bobbin thread, you would have a wider range of tension you could use? My machine prefers a tension around 3.5, but here I am stitching at a 5 and because I matched my threads, you really can't tell that the tension isn't perfect.
One more final tip about the bobbin. I have found that once I towards the end of a bobbin, my machine will skip a stitch or two, here and there. I think it has to do with the tension of the bobbin thread when it is first wound onto the bobbin, but I can't be sure.
Catching these big stitches in time can be tricky. If I notice a big skipped stitch, and I see the bobbin is almost empty, I pull out my stitches to before the skipped stitch, tie and bury those threads, and restart my stitching using a new bobbin. I can always use up those almost empty bobbins later on a practice sandwich.
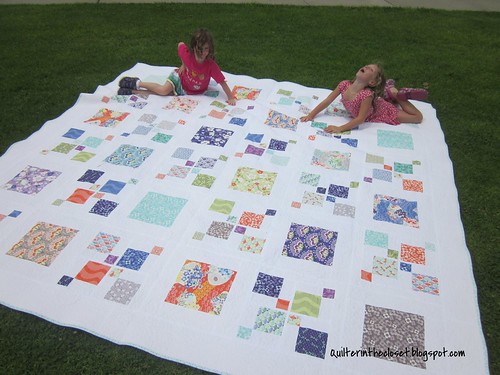
Quilting by quadrants is great if you are quilting an all over design. I quilted this huge king-sized Impromptu quilt by quadrant. That way I only had to work on 9 blocks at a time, and the majority of my quilt was on the table behind and to the left of my machine.
Quilting by Blocks
If my plan was to quilt each block differently, then I would probably start with the blocks near the center and work my way out. It is similar to quilting by quadrant, but modified to focus on individual blocks.
I would start by quilting the block to the right and below the center of my quilt.
Then I would rotate my quilt and quilt the 2nd block (now also to the right and below the center of my quilt).
I would continue rotating and quilting by block until all the center blocks are done. Then, I would continue on to the blocks along the edge of the quilt.
Not too tough!
I plan on quilting my Swoon and my Lucky Star quilts this way (if I ever get around to them).
Stitching in the Ditch
I glossed over this topic on the guest post for Jess, but I really am a believer in Stitching in the Ditch (or SID) before you start FMQ. It really stabilizes the quilt. I think of it as cementing my seams in place so that my blocks look like they are supposed to after the quilting process.
What am I talking about? I'm sure you have heard it here and elsewhere that the quilting process "shifts" the layers of your quilt around a bit. That is why basting really well is so important. Aside from not wanting puckers, you also don't want your blocks to be skewed. You put a lot of hard work into getting those points "pointy" and those seam lines straight, you don't want the quilting process to make everything look wavy. SID makes sure that all those seams stay exactly where they are supposed to be, and as straight as you can stitch!
Yes, it is an extra step that is going to take some time, but it is well worth it. Give it a try and see if you can see a difference.
Here's a quick recap of Part Two:
- Use you practice sandwich to get an initial tension setting
- Check the bottom of your quilt often for tension troubles
- Use the same color thread in your bobbin
- Quilt from the center of your quilt, out
- Stitch in the Ditch to cement things in place before the FMQ process
I'm sure that I will think of some more FMQ tips in the future. If there is anything specific you would like me to address, please let me know.
How do you do it? Link up your tutorials here (on this or any other quilting subject).

Rules:
1) NO QUILT POLICE ALLOWED! - if you are making a tutorial, keep it friendly, as if you were teaching your best friend. If you are visiting a tutorial, please remember that the authors are simply sharing what they have found to work for them.
2) Please link up tutorials from 2014 only. Feel free to point out any previous tutorial in your new post, but let's try to keep the links current.
3) Visit other linky participants to see how they do it.
4) Did I mention no quilt police allowed?
Thanks for joining me today!
Jen
Another fab lesson Jen, that must have taken ages! Thank you so much!
ReplyDeleteExcellent tutorial!!
ReplyDeleteYou do a really thorough and excellent job of explaining and demonstrating what you do without getting overly technical or boring. These are great posts; I imagine you would be an excellent workshop leader and instructor as well.
ReplyDeleteJust wanted to let you know that this tutorial has been SO helpful! I have it bookmarked and every time (not often but it does happen) I have tension issues I come back and read that section again. Your words and pictures are WAY easier to understand than the owner's manual :) I have a Janome 8900 and find the tension settings you give work great on it too :)
ReplyDeleteThis has been an awesome tutorial for FMQ! You did a great job of showing how to deal with tension. I teach free motion classes and I always tell my students to start by stitching in the ditch and then move on to FMQ.
ReplyDeleteJulie @ The Crafty Quilter