
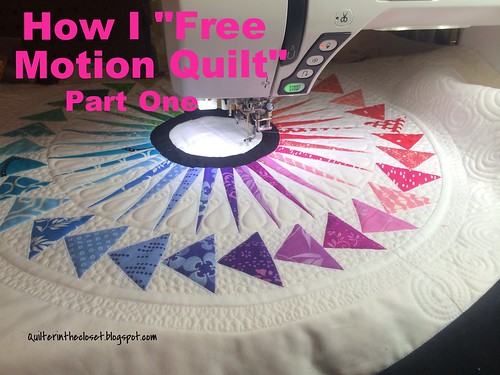
I was honored to write a guest post about FMQ on Jess's blog, The Elven Garden, a couple of weeks ago during vacation. When I sat down to write the post, it quickly got out of hand with some tutorial-like photos. I ended up simplifying the post for Jess, but then I was left with enough pictures and tips to make another whole post, even two!
Part One will focus on the stuff before I start stitching. Part Two will go through a few tips concerning the stitching process.
First Things First - my set up
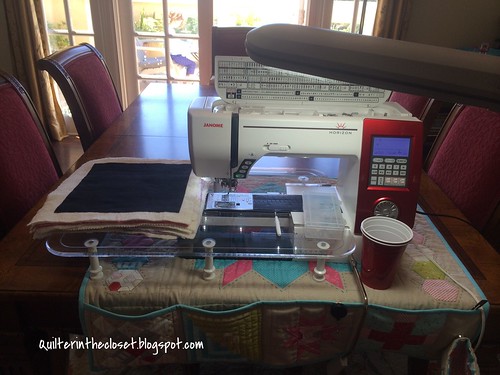 |
| Quilter in the Closet - my FMQ set up |
Lighting is very important. The Janome has a great light underneath in the throat space, but more is better! I also use an Ott-lite, placed a little closer to me and pointing toward the quilting area.
Depending on the size of the quilt, I usually wind at least 6 bobbins and put them in my little bobbin case.
 |
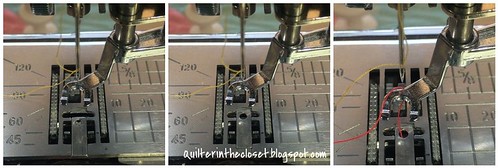
| Quilter in the Closet - things I keep close by for FMQ |
I can't live without my seam ripper nearby. I try to avoid ripping out stitches, but sometimes you have to. I am also lazy, and use my seam ripper to clip threads after I bury them.
There are a few other things I do before I get started. I put in a fresh needle, and attach my open toe quilting foot. My machine also has a needle plate cover that converts to a single hole. I think it was Leah Day who first turned me on to this feature, and it does seem to stitch better.
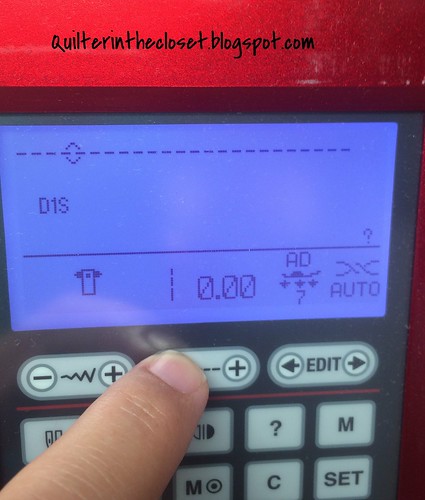
I also reduce my stitch length to 0.00, but I keep my feed dogs UP. I believe that the machine was engineered to use the feed dogs and that it stitches better and more consistently with them engaged. With my stitch length set at zero, my quilt is not going to move in any direction without me moving it.
Before I start any quilting, I warm myself up using a practice sandwich.
Practice Sandwiches - practice makes improvement
You may remember that when I was learning FMQ, I chose to make place mat sized sandwiches for the 2012 FMQ challenge at Insights from Sew Cal Gal (some of the lessons are still available HERE). Place mats were the perfect size, because I needed something large enough to hold on to and give me time to learn a design, but small enough to be easy to manage under the machine (back then I was using one with a much smaller throat space) and not so big that I felt I was wasting fabric if everything went totally wrong. Plus, place mats are practical and unless your cooking is truly terrible, no one will be studying your place mat in detail. We still use the ones I created during the challenge.
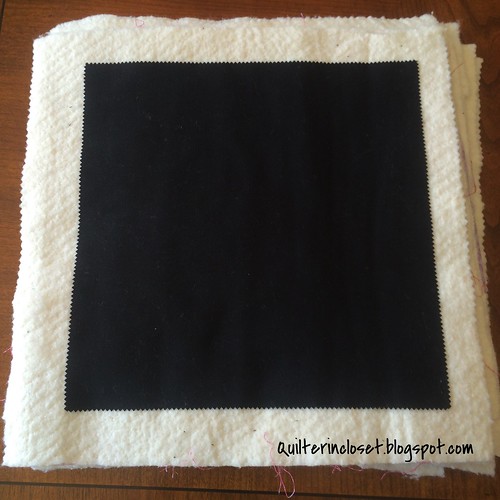
I now use smaller practice sandwiches. My standard is a 10 x 10 black layer cake square, 2 layers of batting (because that is what I like to use in my quilts), and some scrap fabric on the back (a great use of questionable quality fabric that you got in a swap). It is nice to make your sandwiches out of the same type of materials as your quilt. I'm not saying you have to use the same exact fabric, but if you plan on using a wool batting, make a sandwich with wool batting. I like to use two thicknesses of cotton batting, so my sandwiches have two pieces of cotton batting.
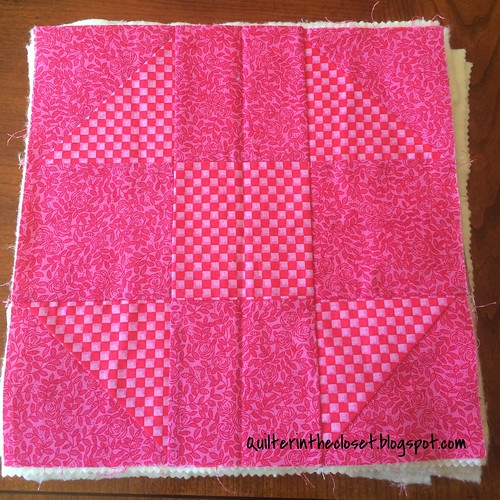
If you have orphan blocks, they are fabulous for making practice sandwiches.
Before I start stitching on any quilt, I pull out a practice sandwich and the thread I want to use on my quilt and start quilting. If the design I am going to use is small, I will stitch it on my practice sandwich. If it is large or complex, I might just stitch my favorite swirls to remind my muscles what to do, get my tension right, and figure out if today is a good day for quilting (some days I'm just plain too tired or distracted). If all is going well at the end of my practice sandwich, I will move on to my quilt.
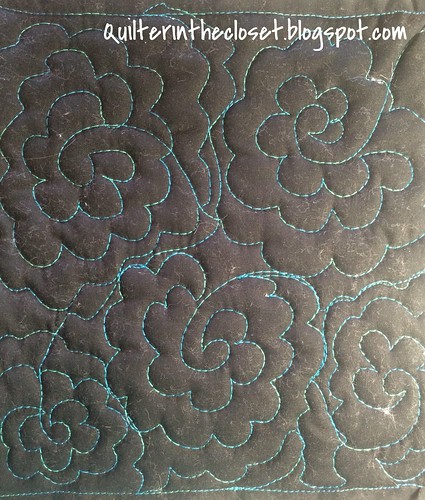
Practice sandwiches also give you an opportunity (off quilt) to try out new designs or threads. I did this one just before quilting this flower design on a commission quilt. It gave me a chance to remind myself of the design and remember some of the trouble spots where the design runs into itself.
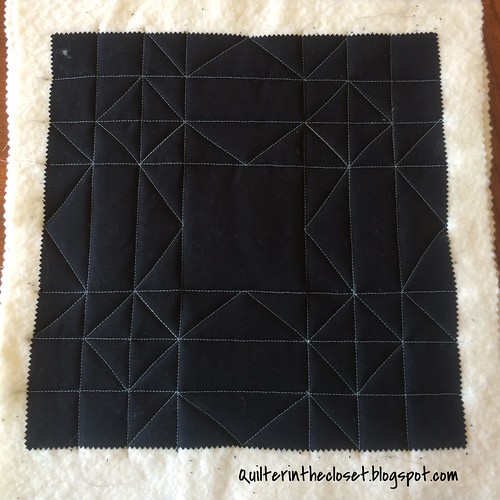
Sometimes I also stitch the outlines of a block from my quilt, so I can practice out some designs. For example, I've already stitched out the outlines of the Swoon block here, so I can try out some designs before I move on to my actual quilt.
Practice sandwiches also give you an opportunity to regulate your speed. Speed is something that will be different for everyone. Personally, I like to really pedal to the metal; however, it is not the speed that works best for me. If I quilt too fast, I tend to jerk the quilt around a bit, making large stitches in a sea of smaller stitches. If I quilt too slowly, all my stitches are super tiny. I found out through practice that somewhere between medium and high yields my best results.
Practicing on Real Quilts
I feel it is important to note that at some point you have to "just do it" and try your hands on a real quilt. Practice sandwiches are great, but there is nothing that will build your muscle memory like completing an entire quilt.
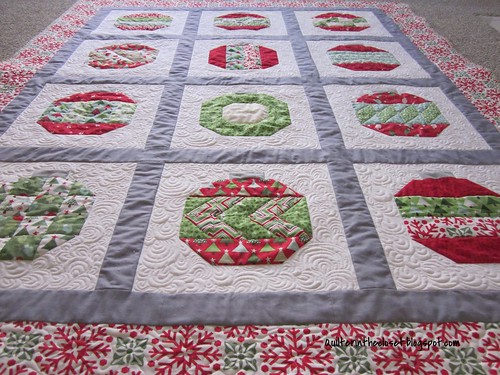
I really got good at the paisley design by filling in the background of all these ornaments.
When you first get started, you might notice a difference from the spot you start to the spot you finish. Don't stress though, it is still perfectly normal and acceptable. I think you really have to be quilting consistently for a long time to resolve this completely. I can even notice a difference if I take a break in the middle of my quilt and then continue my stitching. I think this is pretty normal, and I know that no one other than me (and perhaps a quilting judge) could detect those spots. Starting with a practice sandwich does help work out some of the early kinks before you start on a quilt.
I also recommend looking for ways you can practice multiple quilting designs on a single quilt.
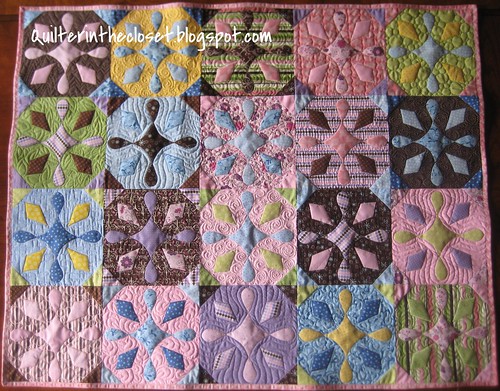
This is one of my earlier quilts. I tried out several different quilting designs in the background of these applique blocks. I tried outline quilting, paisley, spirals, pebbles, leaves, and even some geometric meander in this quilt.
Those blocks were all pretty small, but here is an example that gave me plenty of room to practice 5 different quilting designs: my Totally Groovy quilt.
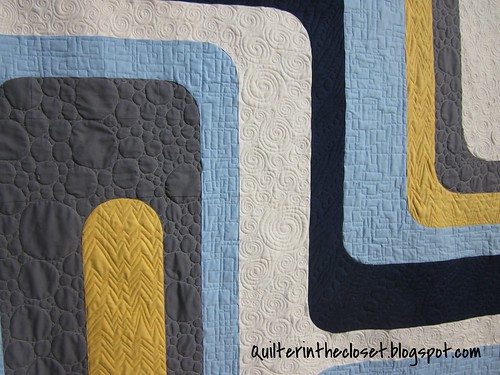
I chose a different design for each color. By the end of the quilting process, I was pretty good at all of them.
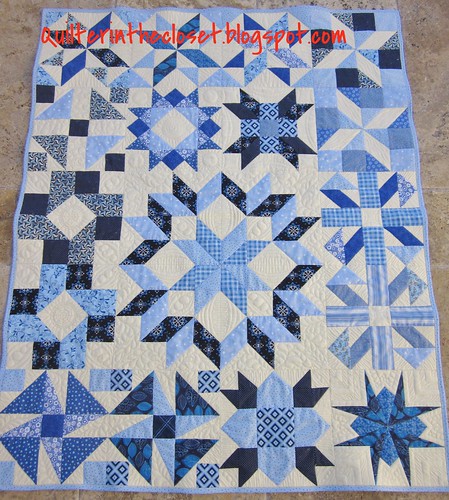
Sampler quilts also give you a lot of space to try out different things on one quilt. On this quilt from the How Far Will You Go QAL, I just messed around and had a good time!
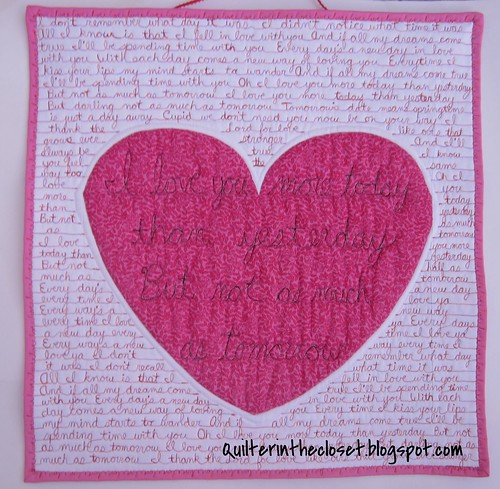
Practicing on quilts also gives you a chance to try out some new things. For example, on this mini, I tried out FMQ my handwriting. I felt confident just going for this one without using a practice sandwich, since I was pretty sure I knew my own handwriting. It turned out pretty neat.
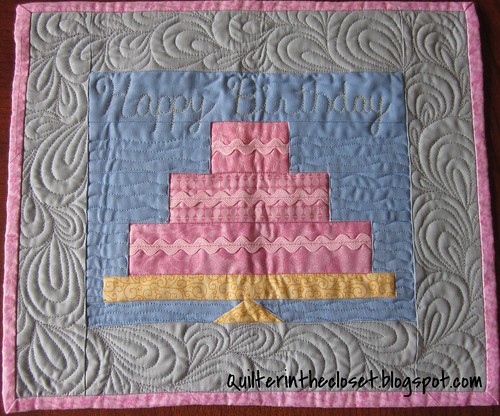
Don't think that everything you practice on has to be big. Mug rugs are perfect practice items too.
Anything you practice on, will lead to improvement.
Threads and Needles
I mostly use Aurifil or Superior Threads for my quilting now. The path to those choices wasn't smooth. I was trying to finish a quilt up for charity using a simple meandering design and my gorgeous variegated Superior Thread that matched the quilt perfectly, kept breaking. I am not exaggerating when I say I could only stitch about 6 to 8 inches before the thread would break. I was at my wits end! I went through the troubleshooting list:
- Rethread your top thread
- Rethread the bobbin
- Recheck your tension
- Change your needle
- Try a bigger needle
- Try a smaller needle
- Clean out your machine (surprisingly this is really important)
- Go back to a practice sandwich
- Try a different thread (totally defeating the purpose in this case)
- Take a break, turn off your machine/walk away for a little while
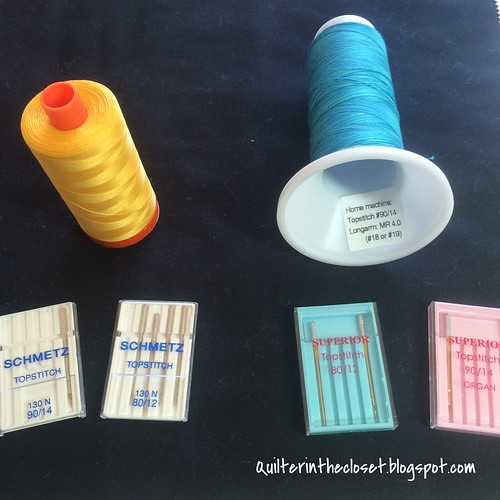
I had a similar problem with Aurifil threads. I had started using those Superior needles for all my quilting, and when I tried out Aurifil, it kept breaking. Again, I was at my wits end. Everyone raved about this thread, and I had bought a LOT of it. It pieced nicely, but maybe the stress of FMQ was too much?? On a whim, I switched back to the Schmetz needles I had. No more breakage. Go figure! It was only through trial and error that I figured that all out. -- on a side note, the Gutermann thread I started my quilting journey with years ago, never broke, regardless of the needle used.
I read recently that ball-point needles should be used for quilting. I haven't had the chance to try them out yet, but plan to. They might just be what works for you.
Have a Game Plan for your Quilt
All I mean by this is, think about what design you are going to do, and where you need to start your stitching. In general, it is recommended that you start in the center of your quilt and work your way out. The reason? As you quilt along, the layers of your quilt sandwich will shift a bit, even with the best basting. If you start on the borders of your quilt and work your way in, you will likely have a lot of excess "something" in the center of your quilt. If the "something" is the fabric of your quilt top, then you will have pleats on the front of your quilt. If the "something" is excess backing fabric, then the pleats will be on the back of your quilt. If the "something" is batting, then you are going to have a big lump in the center of your quilt.
Also, if possible, your game plan should allow for the least amount of quilt in your throat space. You don't want to start on the left side of your quilt and have the entire thing bunched up in your throat space; it's not impossible, just uncomfortable.
Here's a quick recap of the tips from Part One:
- Wind a bunch of bobbins
- Have adequate lighting
- Start with a fresh needle
- Warm up with a practice sandwich (the same thickness as your quilt)
- Practice on real quilts too
- Have a game plan for your quilt
I hope you check out Part Two.
How do you do it? Link up your tutorials here (on this or any other quilting subject).

Rules:
1) NO QUILT POLICE ALLOWED! - if you are making a tutorial, keep it friendly, as if you were teaching your best friend. If you are visiting a tutorial, please remember that the authors are simply sharing what they have found to work for them.
2) Please link up tutorials from 2014 only. Feel free to point out any previous tutorial in your new post, but let's try to keep the links current.
3) Visit other linky participants to see how they do it.
4) Did I mention no quilt police allowed?
Thanks for joining me today!
Jen
Jen you are a star! And as the very proud (smug) owner of that first quilt I can assure everyone that you are very qualified to tell the world how to FMQ !
ReplyDelete/Jen - just found your blog while looking for something about how to quilt the paisley design. I am so glad I did! It's wonderful! And as a side note, any tips on quilting a paisley design would be most appreciated - I am a newbie as well, but have been able to do other patterns - this one is just eluding me! I keep getting myself in odd places... Anyway - this is great and I always appreciate sites that give some good basic info based on trial and error - like thread/needle challenge you had. good stuff!
ReplyDelete