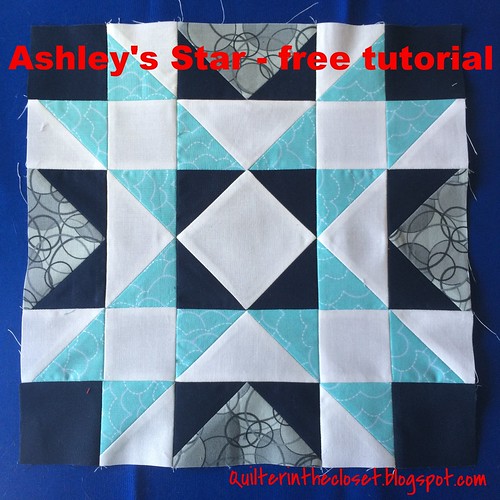
Ashley's Star Tutorial
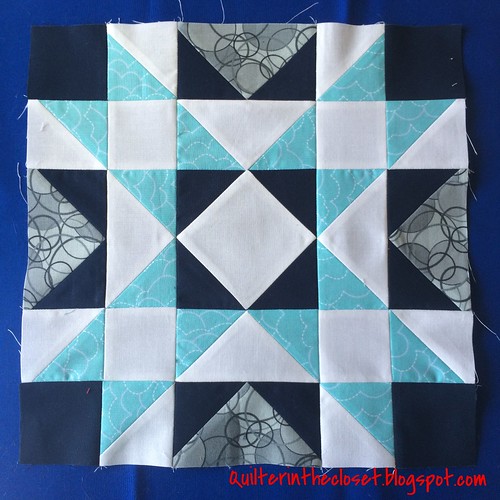
I came up with this block for the Flying Geese bee that I am participating in next year. I also have my We Bee With It bee mates making them this month. So lucky Me will have about half my quilt completed by other people. Love it!
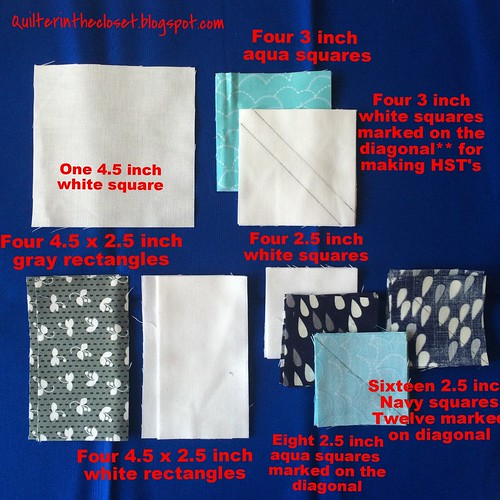
For the Ashley's Star, you will need:
- in White/Cream/or Low volume
- One 4.5 inch square for the center
- Four 4.5 x 2.5 inch rectangles for Flying Geese
- Four 3 inch squares for HST's
- Four 2.5 inch squares
- in Navy
- Sixteen 2.5 inch squares, Twelve marked on the diagonal
- in Aqua/Mint
- Eight 2.5 inch squares marked on diagonal
- Four 3 inch squares for HST's
- in Gray
- Four 4.5 x 2.5 inch rectangles for Flying Geese
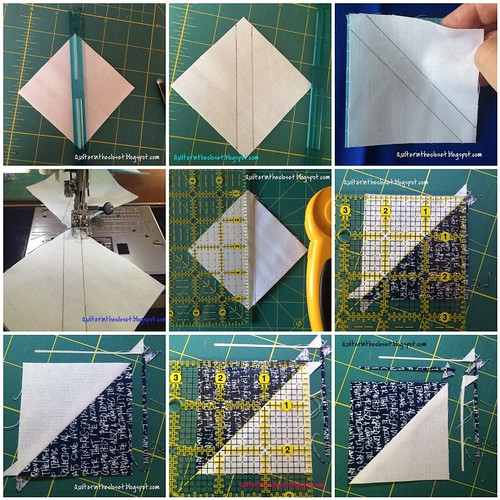
Step One: Make the HST's using the Four 3 inch white squares and the Four 3 inch aqua squares
- choose one white square and one aqua square
- place Right sides together
- draw a pencil line across the diagonal on the wrong side of one square (please note in my pics, I like to draw lines 1/4 inch from diagonal as my sew lines)
- sew 1/4 inch from both sides of the line
- cut on pencil line and open to reveal HST
- press seams open**
- Trim HST to 2.5 inches square
- repeat for remaining white and aqua 3 inch squares. You should have 8 total white and aqua HST's when complete.
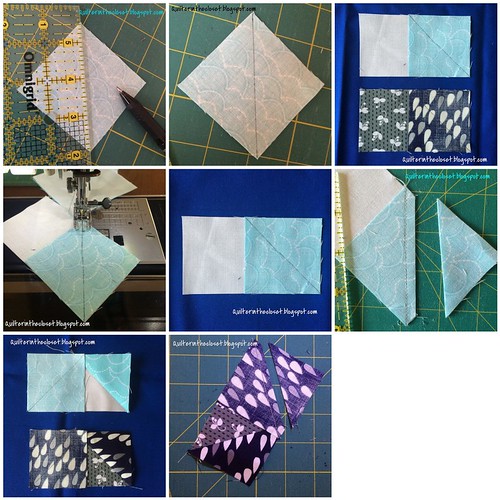
Step Two: Make Flying Geese
- Pair one white 4.5 x 2.5 inch rectangle and one 2.5 inch aqua square (marked on diagonal), place square in the corner of the rectangle, aligning edges
- Sew along marked line
- Trim 1/4 inch from sewn line
- open and press seams open
- Align another 2.5 inch aqua square in the other corner as shown in the photo
- sew along marked line
- trim 1/4 inch from sewn line
- open and press seams open
- repeat for remaining white rectangles and aqua squares
- repeat process with Gray rectangles and Eight navy 2.5 inch squares
- You will have 4 white and aqua flying geese and 4 gray and navy flying geese total.
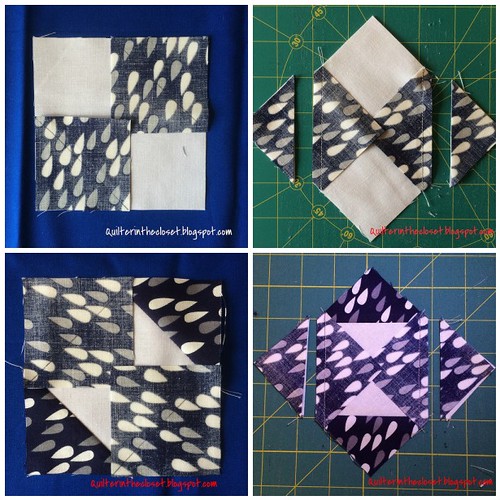
Step Three: Making the center using One 4.5 inch white square and Four 2.5 inch navy squares
- Align 2 navy squares with diagonals as shown in photo, in opposing corners of white square
- sew along diagonal lines
- trim 1/4 inch from sewn lines
- open, press seams open
- align 2 more navy squares on the other two opposing corners of the white square as shown
- sew along diagonal lines
- trim 1/4 inch from sewn lines
- open and press seams open
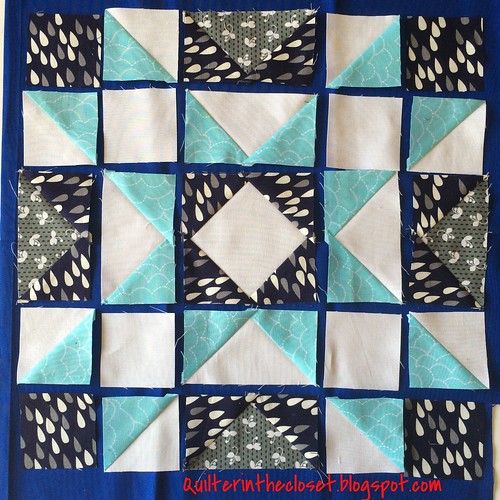
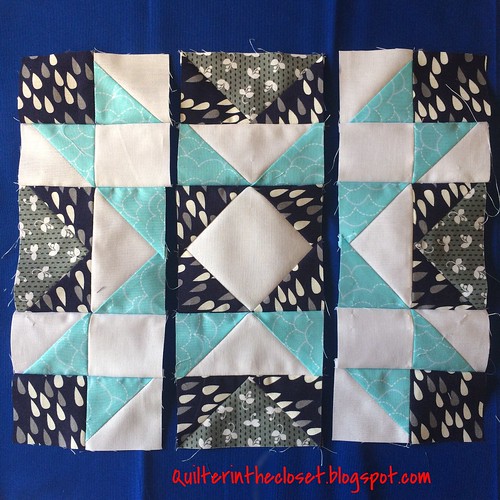
Step Four: Assembling the block using HST's, flying geese, center unit and remaining Four 2.5 inch navy squares and Four 2.5 inch white squares
- lay out block as shown
- sew units together
- press seams open
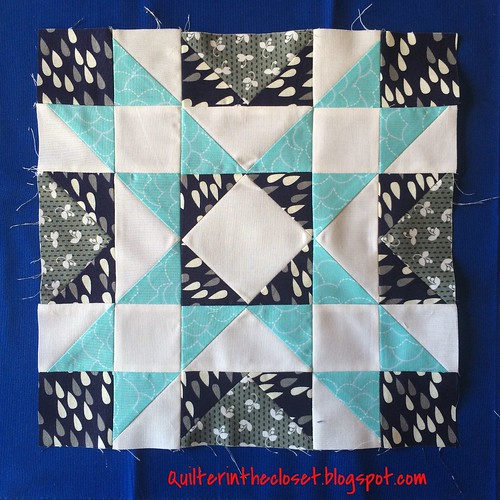
You are finished! Your block should measure 12.5 inches
Here is another block for example.
I hope you stop by next week when I share the alternate block I came up with to go with Ashley's Star.
What blocks have you working on this week? I would love to see. Link up your fabulous blocks. You put a lot of hard work into them - show them off! This free linky will stay open until the first Monday of next month, but I will repost it every Tuesday until a new month starts.
Rules:
1) Please link up only to the page in your blog showing your wonderful blocks, not just the blog homepage. Flickr pictures are also OK.
2) Make sure to put your blog name as the description so people know where they are going or the name of your block!
3) Please grab my button and post it in your blog post or sidebar.
4) Visit other linky participants!
Thanks for reading!
Jen


Jen, what is the finished size of your block? I'm trying to do the math but I figured I'd ask the expert. :)
ReplyDeletelove it and therefore pinnnnned it :)
ReplyDeletevery detailed tutorial which I will save the link to so I can come back and have a go, thank you
ReplyDeleteFab block - far too many HSTs for me to make, but lovely to look at!!!! Isn't one of your girls Ashley? is it for her?
ReplyDeleteI am looking forward to doing the Tuesday Blocks. I just love the tutorials. So easy to follow!
ReplyDeleteThank you,Jen.
Sparkly Day ! don't you just love it everybody !!
ReplyDelete