What you will need:

- Eight 7 inch squares of Medium Gray (I will be sending you these in the mail!)
- Four 7 inch squares of Color One (stash bust from your favorite colors)
- One 6.5 inch square of Color One (stash bust from your favorite colors)
- Four 7 inch squares of Color Two (stash bust from your favorite colors)
- One 6.5 inch square of Color Two (stash bust from your favorite colors)
Assembly:
Set your 6.5 inch squares of Color One and Two aside. You won't be doing anything with them but I need them for the final layout.
Take the four 7 inch squares of Color One and the four 7 inch squares of Color Two and cut them on the diagonal into two triangles.
Take the four 7 inch squares of Color One and the four 7 inch squares of Color Two and cut them on the diagonal into two triangles.
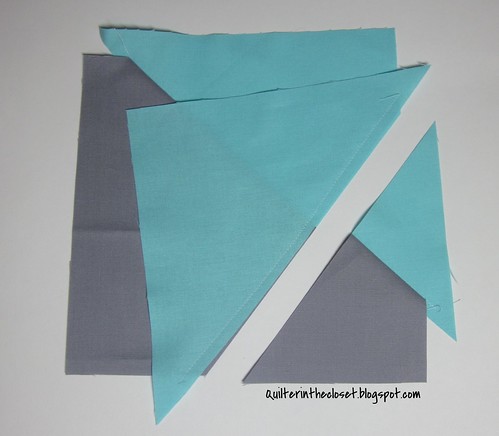
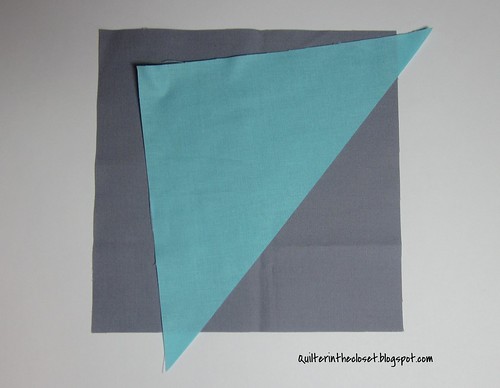
We are essentially going to make wonky star points by taking a 7 inch gray square and stitching a triangle of Color One to the right side of the square.
I like to make sure my fabric will cover the square when flipped over after pressing before I sew it.
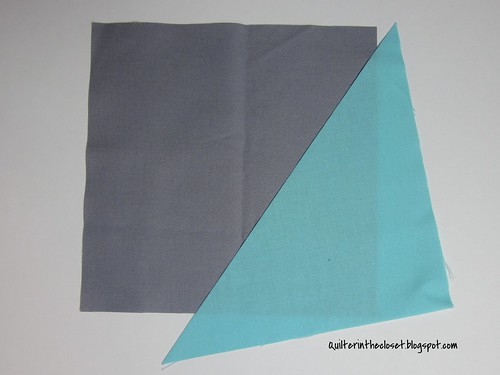
Once you have your triangle sewn in place. Double check to be sure when you press it, that it will cover the gray square (Ask me how I know this is important). Then trim the extra gray fabric from the seam. You can either toss these trimmings into your own scrap pile or send them back to me, your choice.
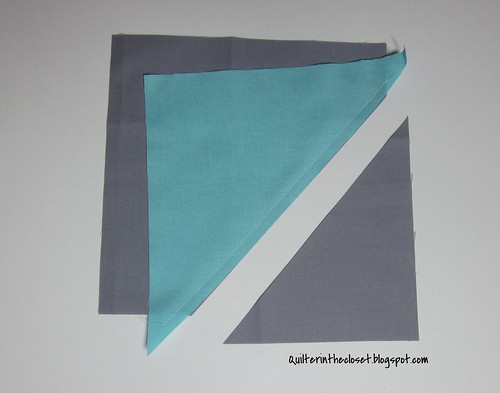
Press the seam toward the gray regardless of whether you have chosen a dark color for your solid. Repeat for the other 3 gray squares for Color One and 4 gray squares to be paired with Color 2, varying the angles of the triangle to make them all individual. Your pieces should look, roughly, like this.
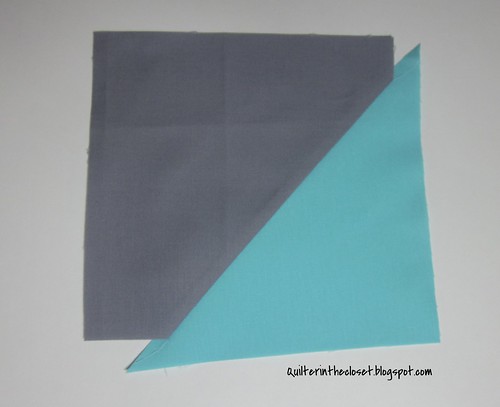
Now sew another colored triangle to the left side of the gray square.
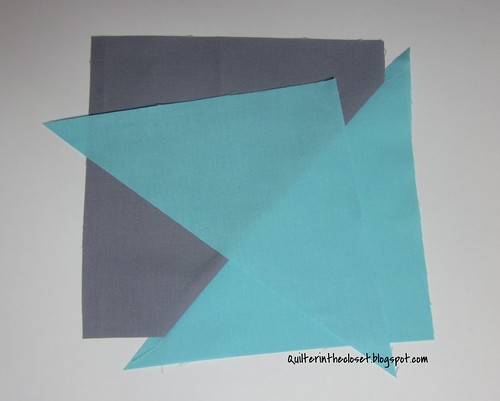
Again, I like to just be sure that when flipped it will cover the gray square.
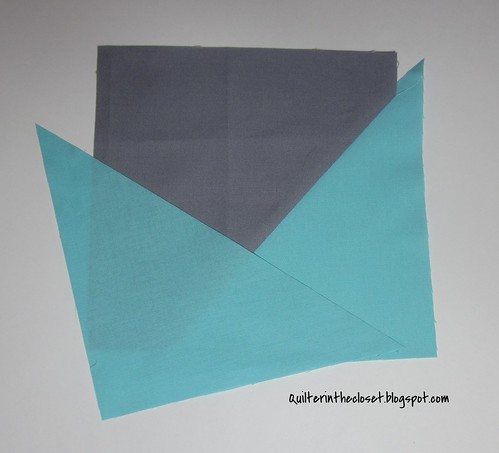
Once sewn on, trim the excess fabric from the seam allowance and press toward the gray. Again, either keep these trimmings or send them to me (I like to make improv blocks from these). Repeat for the other gray squares and colors.
It should look, roughly, like this, once pressed.
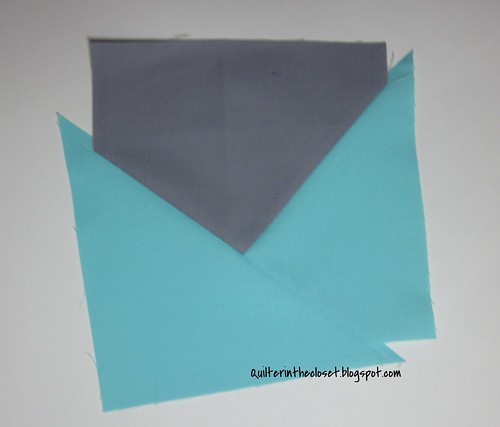
Now trim your pieces to 6.5 inches square. I purposely started everyone with 7 inch gray squares so that you would have some to trim away. It may seem a little wasteful, but the first time I made these blocks I had a few corners come up short using the original instructions, and had to start over. That was a pain!

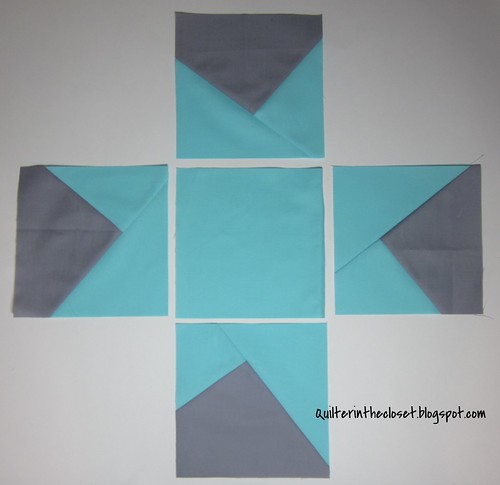
For each Color you should have one center square and four squares of star "points". That is it. Put them in a bag as is, and mail them to me. I will assemble the rest.
In case you are curious, the stars will fit together something like this in the finished quilt.
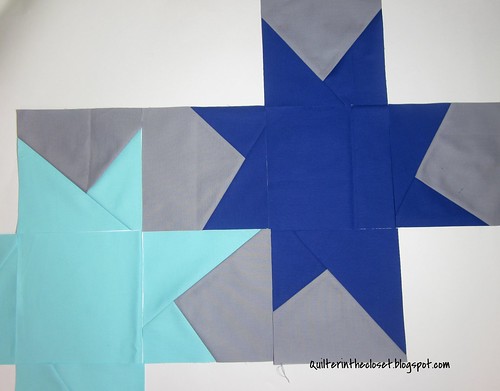
Hopefully, I will have lots of different colors! And I'm really looking forward to quilting the daylights out of those nice big stars.
Thank you in advance for everyone in my hive! I hope I am not asking too much for everyone to do two colors. It takes a lot of stars to make the quilt, and with your help, I'll have about 1/3 done!
Thanks again,
Jen

Press the seam toward the gray regardless of whether you have chosen a dark color for your solid. Repeat for the other 3 gray squares for Color One and 4 gray squares to be paired with Color 2, varying the angles of the triangle to make them all individual. Your pieces should look, roughly, like this.

Now sew another colored triangle to the left side of the gray square.

Again, I like to just be sure that when flipped it will cover the gray square.

Once sewn on, trim the excess fabric from the seam allowance and press toward the gray. Again, either keep these trimmings or send them to me (I like to make improv blocks from these). Repeat for the other gray squares and colors.

It should look, roughly, like this, once pressed.

Now trim your pieces to 6.5 inches square. I purposely started everyone with 7 inch gray squares so that you would have some to trim away. It may seem a little wasteful, but the first time I made these blocks I had a few corners come up short using the original instructions, and had to start over. That was a pain!

For each Color you should have one center square and four squares of star "points". That is it. Put them in a bag as is, and mail them to me. I will assemble the rest.

In case you are curious, the stars will fit together something like this in the finished quilt.

Hopefully, I will have lots of different colors! And I'm really looking forward to quilting the daylights out of those nice big stars.
Thank you in advance for everyone in my hive! I hope I am not asking too much for everyone to do two colors. It takes a lot of stars to make the quilt, and with your help, I'll have about 1/3 done!
Thanks again,
Jen


love this look
ReplyDeleteLooking forward to seeing all your blocks arriving.
ReplyDeleteHow lovely that you like my design so much :-) - your description is much better than mine!!!!! It's going to look fab xxx
ReplyDelete